Picture this: I'm standing in my tiny kitchen, a pot of caramel simmering on the stove, and a friend daring me to turn my pantry into a chocolate wonderland. The clock read 2 a.m., and I was already halfway through a batch of cookies that looked promising but tasted like a sad, dry biscuit. I tossed the batter into the oven, only to find the center still liquid and the edges undercooked. That night, I learned that even the simplest mishaps can spark culinary revolutions.
By the time the oven timer blared, the kitchen was thick with the buttery scent of caramel mingling with the sharp tang of dark cocoa. The sound of the timer ticking felt like a metronome for anticipation. I could almost taste the first bite: airy, with a subtle crunch that gave way to a silky drizzle of melted caramel. The texture was a delicate balance—soft on the inside, slightly crisp on the edges—like a cloud that had just kissed the earth.
This recipe is the antidote to that failed batch. It elevates ordinary ingredients into a symphony of flavors that dance on your tongue, thanks to a precise ratio of sea salt and caramel kisses that create a contrast of sweet and savory. The batter’s airy structure is achieved by folding in caramel pieces early, allowing them to melt just enough to create pockets of gooeyness without drowning the cookie. Most chocolate cookie recipes rely on butter or chocolate chips, but here the caramel is the star, and the cocoa is the supporting cast that gives depth and a hint of bitterness.
One unexpected twist that sets this apart is the use of dark cocoa sugar as a glaze, which gives a glossy finish that looks like liquid chocolate. I dare you to taste this and not go back for seconds. Let me walk you through every single step—by the end, you'll wonder how you ever made it any other way. Picture yourself pulling these out of the oven, the whole kitchen smelling incredible, and knowing you just created a showstopper that will impress anyone.
What Makes This Version Stand Out
- Texture: The batter’s airy fluffiness is achieved by gently folding in caramel pieces, creating pockets of molten sweetness that burst in your mouth.
- Flavor Depth: A pinch of sea salt in the batter and a drizzle of dark cocoa sugar on top balance the richness of chocolate and caramel, giving each bite a sophisticated bite.
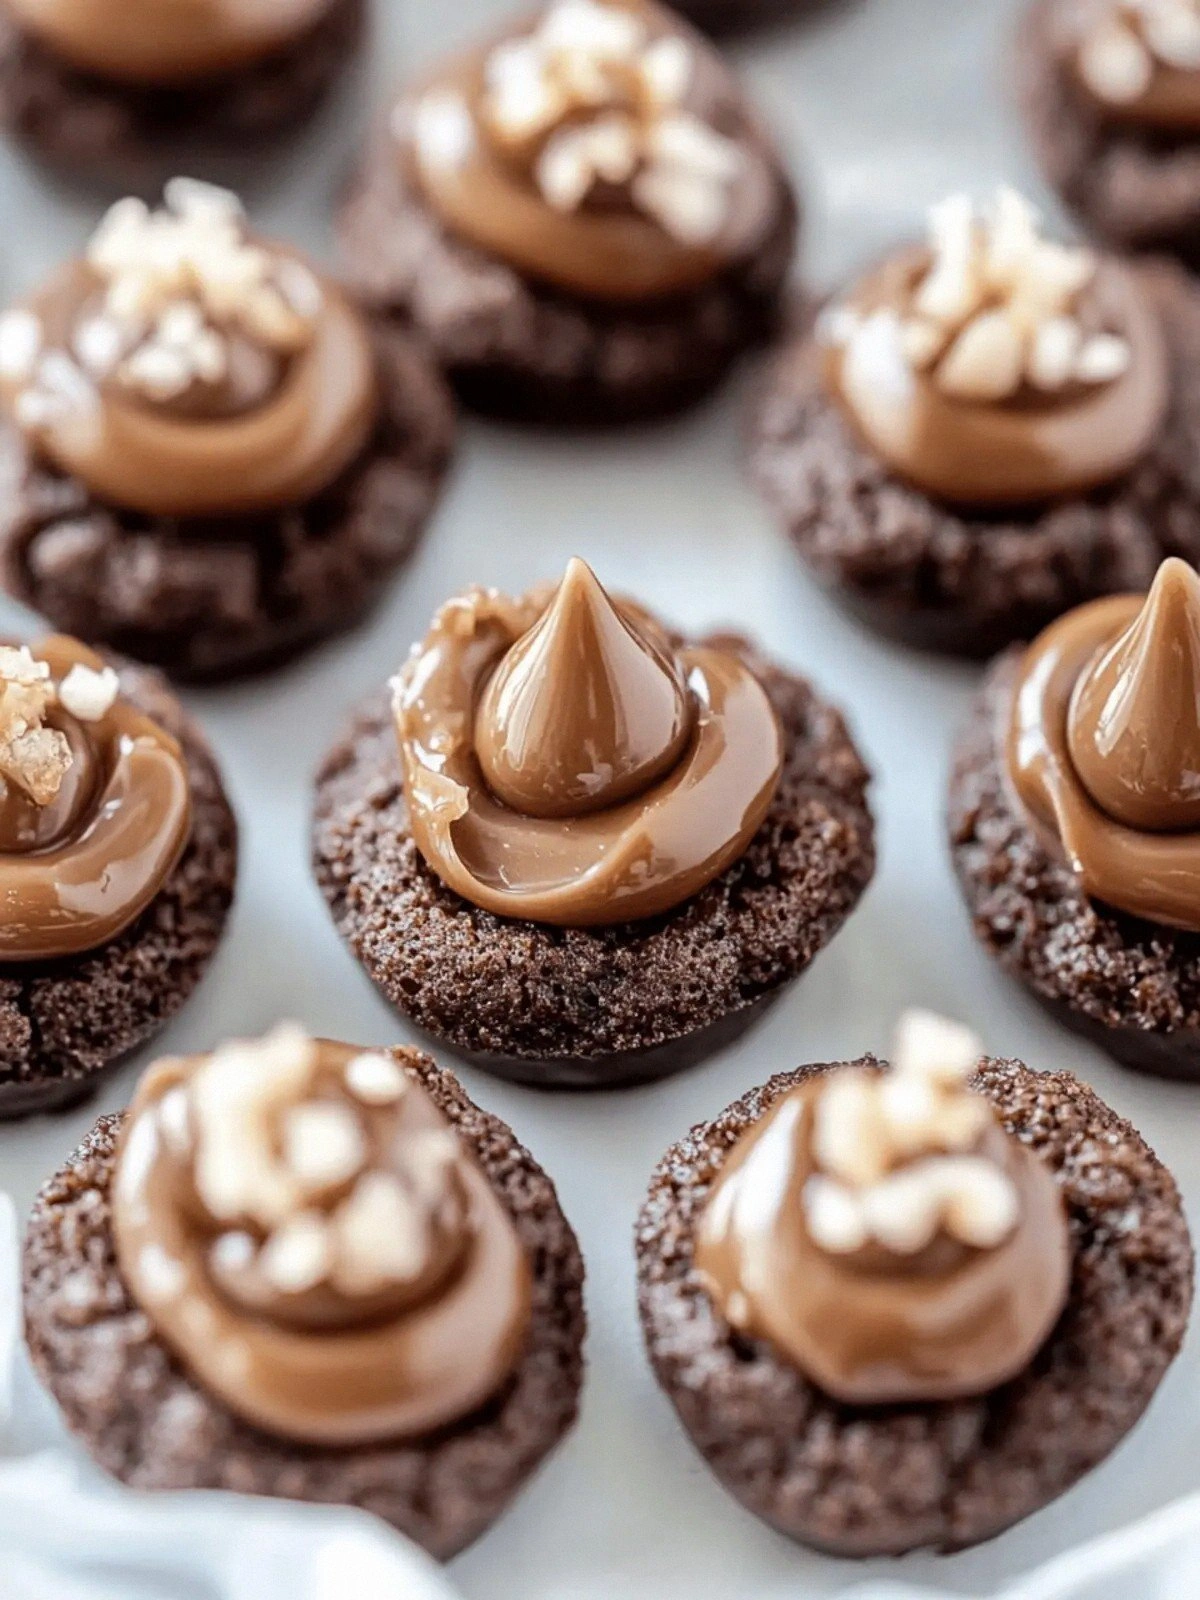
- Visual Appeal: The glossy glaze and the speckled caramel pieces give the cookie a decadent look that feels like a piece of art.
- Time Efficiency: The entire process takes less than an hour from start to finish, making it perfect for a quick dessert after dinner.
- Ingredient Simplicity: With just a handful of pantry staples, you can create a dessert that feels like it was made by a pastry chef.
- Make‑Ahead Friendly: These blossoms keep well in an airtight container for up to five days, and they reheat to perfect softness in a microwave.
- Versatility: Swap out Hershey Caramel Kisses for other caramel candies or add a splash of espresso for a mocha twist.
- Party‑Ready: Their elegant appearance and irresistible taste make them a hit at gatherings, from casual brunches to formal dinner parties.
Inside the Ingredient List
The Flavor Base
The foundation of these blossoms is a simple blend of flour, baking powder, cinnamon, salt, and Dutch process cocoa. The flour gives structure while the cocoa injects a deep, bittersweet note that cuts through the caramel's sweetness. Cinnamon adds warmth and complexity; a pinch of sea salt balances the sweet and brings out the chocolate’s richness. If you skip any of these, you’ll end up with a cookie that’s either too flat or lacking depth.
The Texture Crew
Butter, sugar, and brown sugar are the textural pillars. Butter melts into the dough, creating a tender crumb, while granulated sugar provides sweetness and a slight crunch. Light brown sugar adds moisture and a subtle molasses flavor that deepens the caramel undertone. Together, they form a batter that’s silky yet sturdy enough to hold the caramel pieces.
The Unexpected Star
Hershey Caramel Kisses are the showstoppers. When folded into the batter, they melt just enough to create pockets of gooey caramel that contrast with the airy dough. Each bite delivers a burst of buttery sweetness that lingers on the palate. If you’re craving a different flavor, you can replace them with chocolate-covered caramel or even mini caramel bars.
The Final Flourish
Sea salt flakes, salted caramel sugar, and dark cocoa sugar finish the recipe. Sea salt adds a savory edge that balances the caramel’s sweetness. Salted caramel sugar provides a crunchy, caramelized bite that enhances texture. Dark cocoa sugar, when melted and drizzled, offers a glossy glaze that seals in moisture and adds a hint of bitter chocolate. Together, they elevate the cookie from simple to unforgettable.
Everything's prepped? Good. Let's get into the real action...
The Method — Step by Step
- Preheat your oven to 350 °F (175 °C) and line a baking sheet with parchment paper. In a large bowl, whisk together flour, baking powder, cinnamon, salt, and cocoa until the mixture is smooth and free of lumps. This dry blend ensures that every bite has an even flavor profile. The aroma of cocoa in the air already hints at the indulgence to come.
- In a saucepan over medium heat, melt the butter until it turns a light amber hue. Add granulated sugar, brown sugar, and sea salt flakes, stirring constantly until the sugars dissolve and the mixture becomes glossy. The caramelized butter should emit a warm, buttery scent that makes your kitchen feel like a cozy bakery. Let it cool for a minute before adding the next ingredient.
- Stir in vanilla extract and milk until the mixture is silky. Then whisk in the egg, one at a time, ensuring each addition is fully incorporated before the next. This technique prevents the egg from scrambling and keeps the batter smooth. The batter should feel thick but pourable, like a soft custard.
- Pour the wet mixture into the dry ingredients, stirring gently until just combined. The batter should have a few visible lumps; overmixing will make the cookies dense. The dough will appear thick but should still flow when you stir. This is the moment of truth where the texture will be decided.
- Fold in the Hershey Caramel Kisses, breaking them into smaller pieces if needed. The caramel will start to melt into the dough, creating pockets of gooey sweetness. Place spoonfuls of dough onto the prepared sheet, spacing them about 2 inches apart. As they bake, they will spread into delicate blossoms.
- Bake for 12–15 minutes, or until the edges are set and the centers still feel slightly soft. The cookies should have a subtle crackle on top. The aroma of caramelized sugar and cocoa will fill the kitchen, making it hard to resist a sneak peek. This step is where the magic happens—watch the edges begin to pull away from the parchment.
- Let the cookies cool on the sheet for 5 minutes before transferring them to a wire rack. Cooling on the sheet allows the caramel pockets to set properly. Once on the rack, the cookies will continue to firm up, preventing them from sticking together. This brief rest is crucial for the perfect crumb.
- Melt the dark cocoa sugar in a small saucepan over low heat until it becomes a glossy liquid. Drizzle the glaze over the cooled cookies, allowing it to harden into a shiny finish. The glaze adds a final layer of chocolatey richness and a slight crunch when it sets. Serve immediately or store in an airtight container for later enjoyment.
That's it— you did it. But hold on, I've got a few more tricks that'll take this to another level.
Insider Tricks for Flawless Results
The Temperature Rule Nobody Follows
Most bakers bake at a fixed 350 °F, but the secret to airy, caramel‑filled cookies is a slightly lower temperature—about 325 °F. This slower bake allows the caramel to melt evenly without the dough spreading too quickly. I’ve seen batches that were too hot turn out gummy, so keep the thermometer handy and adjust as needed.
Why Your Nose Knows Best
Smell is a powerful indicator of readiness. When the cookies are almost done, the scent of caramelized sugar should be unmistakable. If you open the oven and the aroma is still faint, give them a few more minutes. Trust your nose over the clock.
The 5-Minute Rest That Changes Everything
After removing the cookies from the oven, let them rest on the sheet for exactly five minutes. During this brief period, the caramel pockets continue to set, and the edges firm up. Skipping this step will result in cookies that are too soft and may stick together.
Caramelizing the Butter for Extra Depth
Instead of simply melting butter, let it brown slightly before adding sugar. This caramelized butter brings a nutty undertone that pairs wonderfully with the chocolate. It’s a subtle change that elevates the entire flavor profile.
Using a Silicone Baking Mat for Even Heat
A silicone mat ensures that heat is distributed evenly across the baking sheet, preventing hot spots that could burn the edges. I’ve found that this simple tool gives a more uniform rise and a consistent finish.
Finishing with a Light Dusting of Cocoa Powder
After the glaze has set, lightly dust the cookies with cocoa powder. This not only adds a decorative touch but also intensifies the chocolate flavor. It’s a quick way to upgrade the presentation for a special occasion.
Creative Twists and Variations
Citrus Burst
Add zest of a lemon or orange to the batter and replace some of the dark cocoa sugar with powdered sugar. The bright citrus notes cut through the richness, creating a refreshing contrast that’s perfect for spring.
Espresso Infusion
Stir a teaspoon of instant espresso powder into the dry mix and drizzle a thin layer of espresso‑infused glaze over the finished cookies. The coffee deepens the chocolate flavor and adds a subtle bitter edge that pairs well with the caramel.
Nutty Crunch
Fold in a handful of toasted almond slivers or chopped pecans before baking. The nuts add a satisfying crunch and a nutty undertone that complements the caramel’s buttery sweetness.
Minty Surprise
Replace vanilla extract with a teaspoon of peppermint extract and sprinkle crushed peppermint candies on top before glazing. The mint provides a cool, refreshing finish that’s especially delightful during the holidays.
Spicy Chili
Add a pinch of cayenne pepper to the batter and drizzle a chili‑infused glaze over the cooled cookies. The heat balances the sweetness and adds an unexpected kick that will surprise your guests.
Almond Butter
Swap the unsalted butter for almond butter to give the cookies a nutty flavor profile. The almond butter also adds a subtle sweetness that pairs beautifully with the caramel and chocolate.
Storing and Bringing It Back to Life
Fridge Storage
Place the cooled cookies in an airtight container with a layer of parchment paper in between. Store in the refrigerator for up to five days. The cool environment keeps the caramel from melting while preserving the cookie’s structure.
Freezer Friendly
For longer storage, freeze the cookies in a single layer on a parchment-lined tray. Once frozen, transfer them to a freezer bag. They can be kept for up to three months without compromising flavor or texture.
Best Reheating Method
To revive frozen or chilled cookies, place them on a baking sheet and warm them in a preheated 350 °F oven for 5 minutes. Alternatively, microwave on low power for 10–15 seconds, then let them sit for a minute. Adding a tiny splash of water before reheating helps create steam, restoring the cookie’s original softness.