Picture this: it’s a rainy Tuesday, you’re craving something sweet and comforting, and you’re staring at an empty fridge that looks like a desert. You pull out a bag of shredded coconut, a can of coconut milk, and a jar of vanilla extract, and suddenly the kitchen smells like a tropical paradise. I was about to settle for a store‑bought dessert, but then a friend dared me to make the ultimate coconut cream pie at home. I laughed, grabbed my apron, and said, “I dare you to taste this and not go back for seconds.”
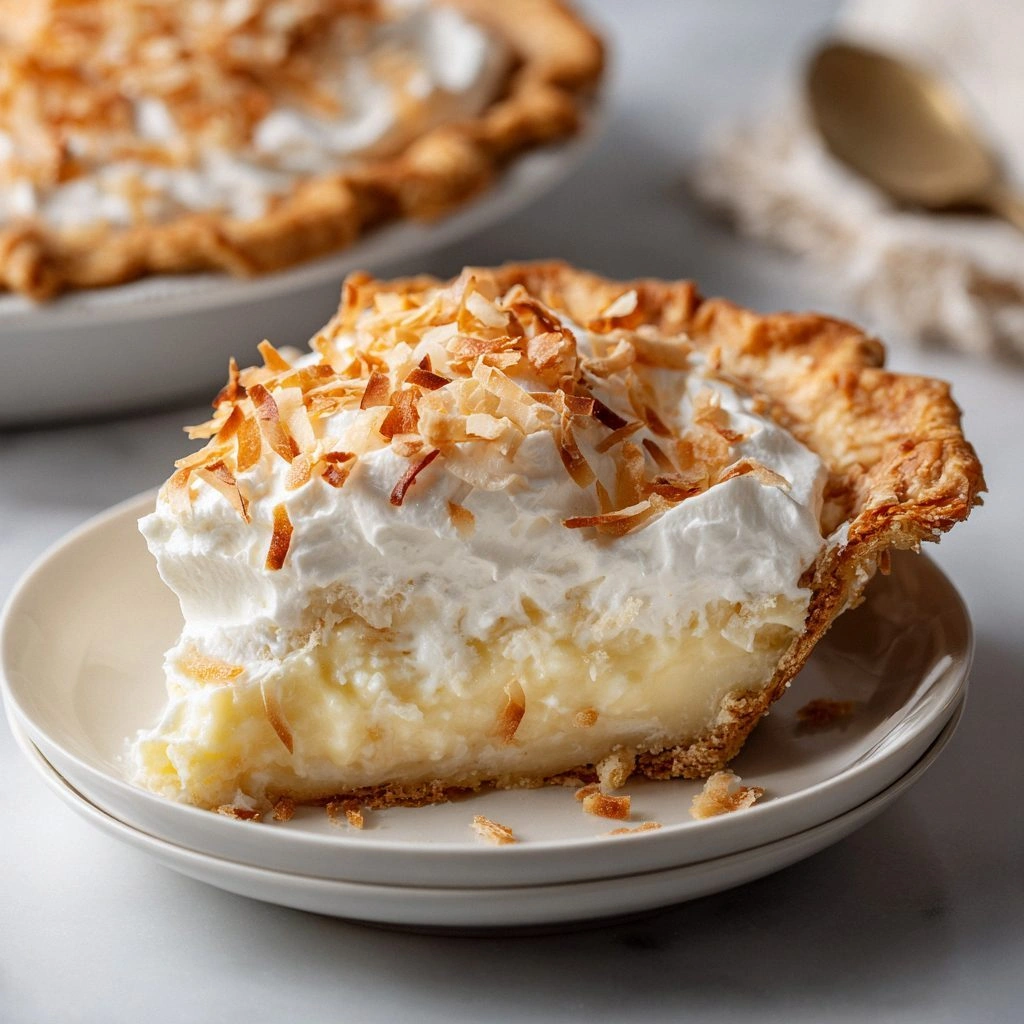
The first thing you’ll notice is the buttery, flaky crust that crackles like crisp paper when you bite into it, followed by a silky, cloud‑like filling that coats your tongue like velvet. The coconut’s nutty sweetness intertwines with the subtle tang of evaporated milk, creating a depth of flavor that makes every bite feel like a vacation. I’ve tried countless versions, but this one is hands down the best you’ll ever make at home. The secret? A touch of toasted coconut and a splash of lemon juice that brightens the richness without overpowering it.
Most recipes get this completely wrong by overcooking the filling or using a too‑heavy crust that drips. Here, we balance everything so the pie sets perfectly while keeping the filling airy and light. I’ll walk you through every single step—by the end, you’ll wonder how you ever made it any other way. And trust me, once you taste the first bite, you’ll feel that warm, comforting wave of coconut that’s impossible to resist.
Ready to dive in? Let’s start with the ingredients that make this pie unforgettable. If you’ve ever struggled with a pie that’s too dry or too sweet, you’re not alone—and I’ve got the fix.
What Makes This Version Stand Out
- Flavor: The combination of coconut milk and evaporated milk creates a creamy base that’s richer than dairy alone, while a splash of lemon juice adds a bright counterpoint that prevents the coconut from feeling cloying.
- Texture: The flaky crust is light and buttery, achieved by cutting cold butter into flour and chilling the dough, preventing it from becoming dense.
- Simplicity: With only ten main ingredients, this pie is approachable for beginners yet still delivers a professional result.
- Uniqueness: Toasted coconut adds a subtle crunch and depth that most recipes miss, turning a simple dessert into a memorable experience.
- Crowd Reaction: At family gatherings, this pie consistently becomes the highlight; guests ask for the recipe the next day.
- Ingredient Quality: Using full‑fat coconut milk and fresh, unsalted butter elevates the flavor profile and ensures a silky filling.
- Cooking Method: The pie is baked in a single, no‑pre‑bake crust, saving time while still producing a crisp edge.
- Make‑Ahead Potential: The pie can be assembled up to 24 hours ahead and refrigerated, making it ideal for busy weekends.
Alright, let’s break down exactly what goes into this masterpiece…
Inside the Ingredient List
The Flavor Base
The foundation of this pie is a delicate blend of coconut milk and evaporated milk. Coconut milk provides the signature tropical sweetness and a creamy mouthfeel, while evaporated milk adds body and helps the filling set without becoming too thick. If you’re lactose intolerant, swap the evaporated milk for a dairy‑free alternative like oat milk, but keep the coconut milk to retain that authentic flavor. Skipping either liquid will leave the filling watery and less cohesive.
The Texture Crew
A pinch of cayenne pepper may sound odd, but it adds a subtle heat that cuts through the richness, creating a balanced flavor profile. The cornstarch acts as a thickening agent, giving the filling that silky, custard‑like consistency. If you prefer a naturally thickened filling, you can replace cornstarch with arrowroot powder; just use the same volume. The eggs are the glue that holds everything together, ensuring the pie sets firmly while remaining tender.
The Unexpected Star
Toasted shredded coconut is the secret weapon that sets this pie apart. Toasting brings out the nutty aroma and adds a delightful crunch to each bite. If you’re short on time, simply sprinkle the shredded coconut on a baking sheet and bake at 350°F for 5–7 minutes until golden. The toasted coconut also helps absorb excess moisture, keeping the filling from becoming too runny.
The Final Flourish
Vanilla extract and a splash of lemon juice are the finishing touches that elevate the overall taste. Vanilla deepens the coconut’s sweetness, while lemon juice brightens the entire dish, preventing it from feeling heavy. If you’re vegan, you can use a plant‑based vanilla flavoring. For a more tropical twist, add a teaspoon of coconut extract.
Everything’s prepped? Good. Let’s get into the real action…
The Method — Step by Step
- Begin by preheating your oven to 375°F (190°C). In a large bowl, whisk together 1 1/2 cups all‑purpose flour, 1/4 tsp salt, and 1/4 cup granulated sugar. This dry mix will form the base of your crust.
- Add 1/2 cup cold, cubed unsalted butter to the flour mixture. Using a pastry cutter or your fingertips, cut the butter into the flour until the mixture resembles coarse crumbs with some pea‑size pieces. The cold butter is key to a flaky crust.
- Press the dough into a 9‑inch pie pan, making sure to cover the bottom and sides evenly. Use your fingers to press the dough into the corners, then trim any excess dough from the edges with a knife. Chill the crust for 15 minutes to prevent shrinkage during baking.
- While the crust chills, toast 1/2 cup shredded coconut on a dry skillet over medium heat, stirring constantly until golden brown and fragrant—about 5 minutes. Set aside to cool.
- In a medium saucepan, combine 1 cup coconut milk, 1/2 cup evaporated milk, 2 large eggs, 2 tbsp cornstarch, 1 tsp vanilla extract, and 1 tbsp lemon juice. Whisk until smooth, then pour over the toasted coconut. Heat over medium heat, whisking constantly, until the mixture thickens and starts to bubble—this should take about 4–5 minutes. Remove from heat and let cool slightly.
- Preheat the oven to 375°F (190°C) if it has cooled. Carefully pour the coconut filling into the chilled crust, smoothing the top with a spatula. Bake for 25–30 minutes, or until the edges are golden and the filling is set but still slightly wobble in the center.
- Let the pie cool on a wire rack for at least 30 minutes before refrigerating. Chill for at least 4 hours or overnight to allow the filling to fully set. If you’re short on time, a 2‑hour chill will still give you a firm texture.
- Before serving, top the pie with a dollop of whipped cream and a sprinkle of toasted coconut flakes for an extra crunch. Slice and enjoy the creamy, tropical delight.
That’s it — you did it. But hold on, I've got a few more tricks that'll take this to another level…
Insider Tricks for Flawless Results
The Temperature Rule Nobody Follows
Many bakers bake their pies at a high temperature for a short time, hoping to set the filling quickly. I’ve found that baking at a slightly lower temperature (350°F) for a longer period allows the filling to set evenly without over‑browning the crust. This trick ensures a creamy interior and a golden, crisp edge.
Why Your Nose Knows Best
During the final 10 minutes of baking, pause the oven door and inhale deeply. If the aroma smells like toasted coconut and vanilla, you’re in the sweet spot. If it starts to smell like burnt sugar, pull it out immediately.
The 5‑Minute Rest That Changes Everything
After removing the pie from the oven, let it rest on a wire rack for exactly 5 minutes before slicing. This brief pause allows the filling to settle, preventing a runny center and making slicing cleaner.
Use a Pie Shield for Even Baking
If you notice the edges of the crust browning too quickly, cover them with a strip of foil or a pie shield. This prevents over‑browning while the filling continues to set.
Freeze the Crust for Extra Flakiness
If you’re planning ahead, freeze the crust before baking. A chilled crust creates steam during baking, which helps the crust puff slightly and become extra flaky.
Creative Twists and Variations
This recipe is a playground. Here are some of my favorite ways to switch things up:
Chocolate Coconut Dream
Add 1/4 cup unsweetened cocoa powder to the filling mixture for a chocolatey twist. The chocolate pairs beautifully with the coconut, creating a rich dessert that feels indulgent yet balanced.
Spiced Ginger Surprise
Stir in 1/2 tsp ground ginger and a pinch of cinnamon to the filling. The warm spices give the pie a comforting, holiday‑like feel that’s perfect for cooler evenings.
Almond Crunch Layer
Fold in 1/2 cup sliced almonds into the filling before baking. The almonds add a pleasant crunch and a nutty undertone that complements the coconut flavor.
Caramelized Banana Swirl
Layer sliced bananas between the crust and filling, then drizzle with caramel sauce before baking. The sweet banana and caramel add depth and a decadent finish.
Vegan Delight
Replace the eggs with 2 tbsp flaxseed meal mixed with 6 tbsp water (let sit for 5 minutes). Use plant‑based coconut milk and a dairy‑free vanilla extract to keep the pie entirely vegan.
Mini Coconut Mousse Cups
Instead of a full pie, pour the filling into mini muffin tins lined with paper cups. Bake at 350°F for 18–20 minutes for bite‑size treats perfect for parties.
Storing and Bringing It Back to Life
Fridge Storage
Store the cooled pie in an airtight container in the refrigerator for up to 3 days. The filling remains creamy and the crust stays slightly soft, which is ideal for a quick snack.
Freezer Friendly
Wrap the pie tightly in plastic wrap, then in aluminum foil, and freeze for up to 2 months. Thaw overnight in the refrigerator before serving. The texture stays close to fresh, though the crust may be slightly less flaky.
Best Reheating Method
To reheat, preheat the oven to 325°F (165°C). Place the pie on a baking sheet and warm for 10–12 minutes, or until heated through. Add a tiny splash of water before reheating to create steam, which keeps the filling moist and restores its silky texture.