I remember the night I was supposed to host a dinner party for a dozen friends and the kitchen was a chaotic symphony of sizzling pans and clinking utensils. I had promised a show‑stopping appetizer that would make everyone gasp, but the shrimp I bought were a little too pink, the garlic was a bit bruised, and the batter I mixed turned out soggy. I stared at the pot, feeling like a culinary disaster in the making, until a sudden thought hit me: what if I turned the shrimp into bite‑size, crisped, garlic‑laden morsels that would explode with flavor? The idea was simple, yet the execution demanded precision.
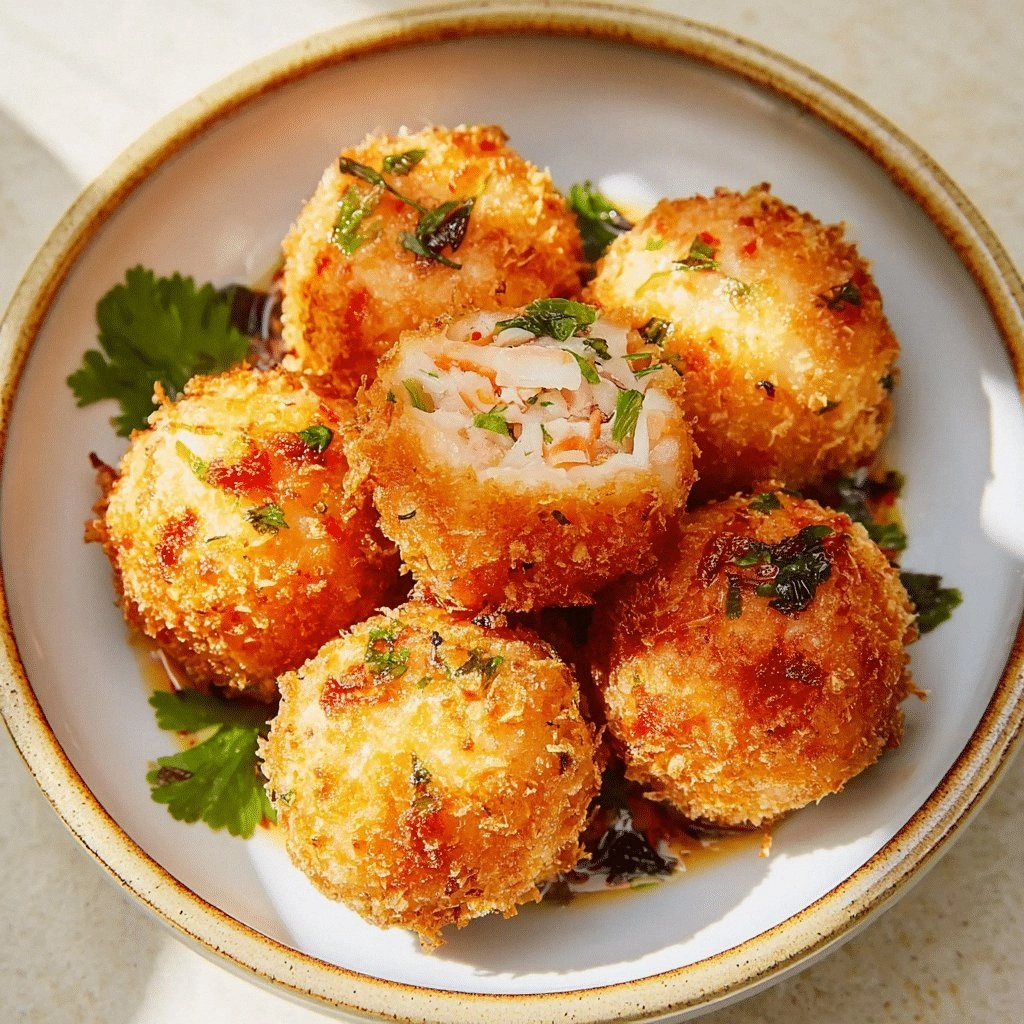
Picture this: the shrimp are lightly coated in a golden breadcrumb‑flour mix, then fried to a perfect crunch that shatters like thin ice with each bite. The garlic is toasted to a caramelized depth that coats the shrimp like velvet, and a splash of lemon brightens the whole thing, turning the dish into a bright, savory fireworks display. I can hear the sizzle, feel the heat, smell the garlic, taste the briny shrimp, and see the golden crusts dancing in the pan. This isn’t just a snack; it’s an edible experience that feels like a party in your mouth.
What makes this version stand out is that it’s not just about crispiness or garlic. It’s about a balance of textures, a burst of umami, and a touch of citrus that keeps the palate refreshed. The shrimp are cooked just enough to stay tender inside, while the exterior is a buttery crunch that melts in your mouth. I’ve spent hours tweaking the batter ratios, experimenting with different types of breadcrumbs, and even testing a secret spice blend that gives it that unmistakable kick. The result? A dish that feels like it belongs in a Michelin‑star kitchen, yet is simple enough to make in your own home.
If you’re ready for a culinary adventure that will leave your friends begging for the recipe, let me walk you through every single step. By the end, you’ll wonder how you ever made shrimp bites any other way. I dare you to taste this and not go back for seconds.
What Makes This Version Stand Out
- Texture: The double‑layer coating creates a crunch that is both buttery and airy, a contrast that elevates the shrimp’s natural juiciness.
- Flavor: The garlic is toasted to a caramelized depth, delivering a mellow sweetness that pairs perfectly with the briny shrimp.
- Balance: A splash of lemon brightens the dish, cutting through the richness and keeping each bite fresh.
- Speed: The recipe takes less than an hour from start to finish, making it ideal for last‑minute dinner parties.
- Make‑ahead: The shrimp can be marinated and coated a day ahead, then fried right before serving for maximum convenience.
- Versatility: Swap the shrimp for scallops, prawns, or even tofu for a vegetarian version that keeps the same flavor profile.
- Crowd‑pleaser: Guests rave about the “pop” of crunch and the burst of garlic, making it a guaranteed hit.
- Ingredient Quality: Fresh, high‑quality shrimp and garlic make all the difference, turning an ordinary dish into a gourmet experience.
Alright, let's break down exactly what goes into this masterpiece.
Inside the Ingredient List
The Flavor Base
Fresh shrimp are the star of the show. Aim for 1 pound of medium‑sized shrimp, peeled and deveined. The shrimp should be firm to the touch, not rubbery, and the shells should still be intact for that extra crunch. If you prefer a cleaner look, you can remove the shells after deveining, but keep the tails for a more rustic presentation.
Garlic is the heart of this dish. Use about 4 cloves, minced and lightly toasted. Toasting the garlic releases its natural oils and mellows its sharp bite, turning it into a sweet, nutty flavor that coats the shrimp like velvet. If you’re not a fan of raw garlic, this step will tame it and add depth.
A splash of fresh lemon juice—roughly 2 tablespoons—adds brightness and balances the richness. The acidity cuts through the buttery coating, preventing the dish from feeling heavy. If you’re serving a crowd, consider adding a lemon zest for an extra burst of citrus aroma.
The Texture Crew
Flour forms the first layer of the coating. Use 1 cup of all‑purpose flour to create a light base that adheres to the shrimp. The flour helps the breadcrumb layer stick and creates a barrier that keeps the shrimp from becoming soggy.
Breadcrumbs are the second layer, and they’re where the magic happens. Opt for panko for a lighter crunch, or regular breadcrumbs for a denser texture. Use 1 cup of breadcrumbs; they should be dry and slightly toasted to add an extra layer of flavor. If you’re vegan, use gluten‑free breadcrumbs and a gluten‑free flour blend.
Eggs act as a binder, holding the flour and breadcrumbs together. Beat 2 eggs in a shallow dish and let them rest for 10 minutes before dipping the shrimp. The eggs help the coating adhere and give the shrimp a golden finish when fried.
The Unexpected Star
Fresh parsley, chopped, adds a pop of color and a hint of herbal freshness that cuts through the richness. Use 2 tablespoons of parsley; it’s optional but recommended for that visual and flavor contrast.
A pinch of smoked paprika gives a subtle smoky undertone that complements the garlic. Use ½ teaspoon; it’s not overpowering, just enough to elevate the dish. If you’re adventurous, try a dash of cayenne for a spicy kick.
The Final Flourish
Olive oil and butter are the secret to a golden, buttery crust. Use 2 tablespoons of olive oil and 1 tablespoon of butter in the pan to fry the shrimp. The butter adds depth and a luxurious sheen, while the olive oil helps maintain a steady temperature.
Salt and pepper are the final touch. Season the shrimp with ½ teaspoon of salt and ¼ teaspoon of freshly ground black pepper before coating. This ensures every bite is balanced and flavorful.
Everything’s prepped? Good. Let’s get into the real action.
The Method — Step by Step
- Begin by patting the shrimp dry with paper towels. Moisture is the enemy of crispiness; the drier the shrimp, the crunchier the coating. This step ensures the flour sticks and the breadcrumbs adhere perfectly.
- In a shallow dish, whisk the beaten eggs. Let them sit for 10 minutes; this rest period allows the proteins to relax, making the coating more cohesive. The eggs should be at room temperature for best results.
- Create a dredging station: one bowl of flour, one bowl of beaten eggs, and one bowl of breadcrumbs. Sprinkle a pinch of salt and pepper into the flour to season the base layer. This three‑stage process ensures each shrimp is coated evenly.
- Dip each shrimp first into the flour, shaking off excess, then into the eggs, and finally into the breadcrumbs. The final breadcrumb layer should be thick enough to hold together but not so heavy that it clumps. This double coating is what gives the dish its signature crunch.
- Heat a large skillet over medium heat. Add the olive oil and butter, swirling until the butter melts and starts to foam. The butter should not burn; keep the heat moderate to avoid a bitter taste.
- Place the coated shrimp in the pan in a single layer, ensuring they don’t touch. The shrimp should sizzle immediately. Cook for 2–3 minutes on each side or until golden brown and crispy. Flip carefully to avoid breaking the coating.
- Once cooked, remove the shrimp onto a paper towel to drain excess oil. While they’re still hot, sprinkle them with the minced garlic, lemon juice, parsley, and smoked paprika. Toss gently to coat. The heat will release the garlic’s aroma and the lemon’s brightness.
- Serve immediately with a side of cocktail sauce or a light aioli. The shrimp should be served hot to maintain the crispness. If you’re preparing ahead, keep them warm in an oven set to 200°F (90°C) for up to 30 minutes.
That’s it — you did it. But hold on, I’ve got a few more tricks that will take this to another level.
Insider Tricks for Flawless Results
The Temperature Rule Nobody Follows
The skillet’s temperature is the unsung hero of crisp shrimp. Use a thermometer to keep it at 350°F (175°C). If the oil is too hot, the coating will burn before the shrimp cooks; too cool, and the shrimp will absorb oil and become greasy.
Why Your Nose Knows Best
The aroma of garlic sizzling in butter is a clear indicator of perfect timing. When the garlic turns golden and releases a sweet scent, it’s time to flip the shrimp. This sensory cue saves you from over‑cooking or under‑cooking.
The 5-Minute Rest That Changes Everything
After frying, let the shrimp rest on a wire rack for 5 minutes. This allows excess oil to drain while the crust remains crisp. I’ve seen many people skip this step, resulting in soggy bites.
Seasoning the Coating, Not Just the Shrimp
Add a pinch of salt and pepper to each coating layer. This ensures every bite is seasoned, not just the shrimp itself. A seasoned coating also enhances the overall flavor profile.
Use Fresh, Not Frozen, Shrimp
Frozen shrimp often have ice crystals that can make the coating soggy. Fresh shrimp retain their moisture and texture, leading to a better overall bite. If you must use frozen, thaw thoroughly and pat dry.
Don’t Skip the Lemon
The lemon juice not only brightens the dish but also helps keep the coating from becoming overly greasy. It’s a small addition that makes a huge difference in the final taste.
Creative Twists and Variations
This recipe is a playground. Here are some of my favorite ways to switch things up:
Spicy Sriracha Shrimp
Add 1 tablespoon of sriracha to the breadcrumb mixture for a fiery kick. The heat pairs well with the garlic and lemon, creating a balanced spicy profile that’s perfect for adventurous palates.
Herb‑Infused Bites
Replace the parsley with a blend of fresh basil, oregano, and thyme. This herbaceous twist adds Mediterranean vibes and a fragrant aroma that elevates the dish.
Vegan Version
Swap shrimp for firm tofu, marinated in soy sauce and sesame oil. Use gluten‑free flour and breadcrumbs, and fry in coconut oil for a vegan-friendly, crispy treat.
Cheesy Shrimp Bites
Sprinkle grated Parmesan or cheddar between the breadcrumb layers. The cheese melts slightly during frying, creating a gooey, savory center that delights.
Asian‑Inspired Variation
Add a splash of soy sauce, a drizzle of sesame oil, and a pinch of toasted sesame seeds to the coating. The result is a dish that feels like a fusion of Western crunch and Eastern umami.
Breakfast Shrimp Toast
Serve the shrimp on toasted English muffins with a poached egg and a sprinkle of chives. This transforms the dish into a hearty breakfast or brunch option.
Storing and Bringing It Back to Life
Fridge Storage
Store leftover shrimp bites in an airtight container in the refrigerator for up to 2 days. Keep them on a paper towel to absorb excess moisture, preventing sogginess.
Freezer Friendly
Freeze the shrimp in a single layer on a parchment‑lined tray before transferring to a freezer bag. They’ll keep for up to 3 months. Thaw overnight in the fridge before reheating.
Best Reheating Method
Reheat in a hot skillet with a splash of oil, turning once, until the crust is crisp again. Add a tiny splash of water before reheating to steam the shrimp slightly and keep them moist.