I was standing in the middle of a kitchen that smelled like burnt sugar and a faint hint of lavender when I realized my last attempt at a rose‑infused dessert had gone spectacularly wrong. The batter had thickened into a sticky, almost syrupy mess, the rosewater had been too diluted, and the cake had collapsed into a sad, flat slab. That disaster was the spark that lit a fire in me: a new, better version that would make rose‑loving hearts skip a beat. I was determined to turn this culinary mishap into a triumph that would make my friends gasp, and I have the proof right here in this recipe.
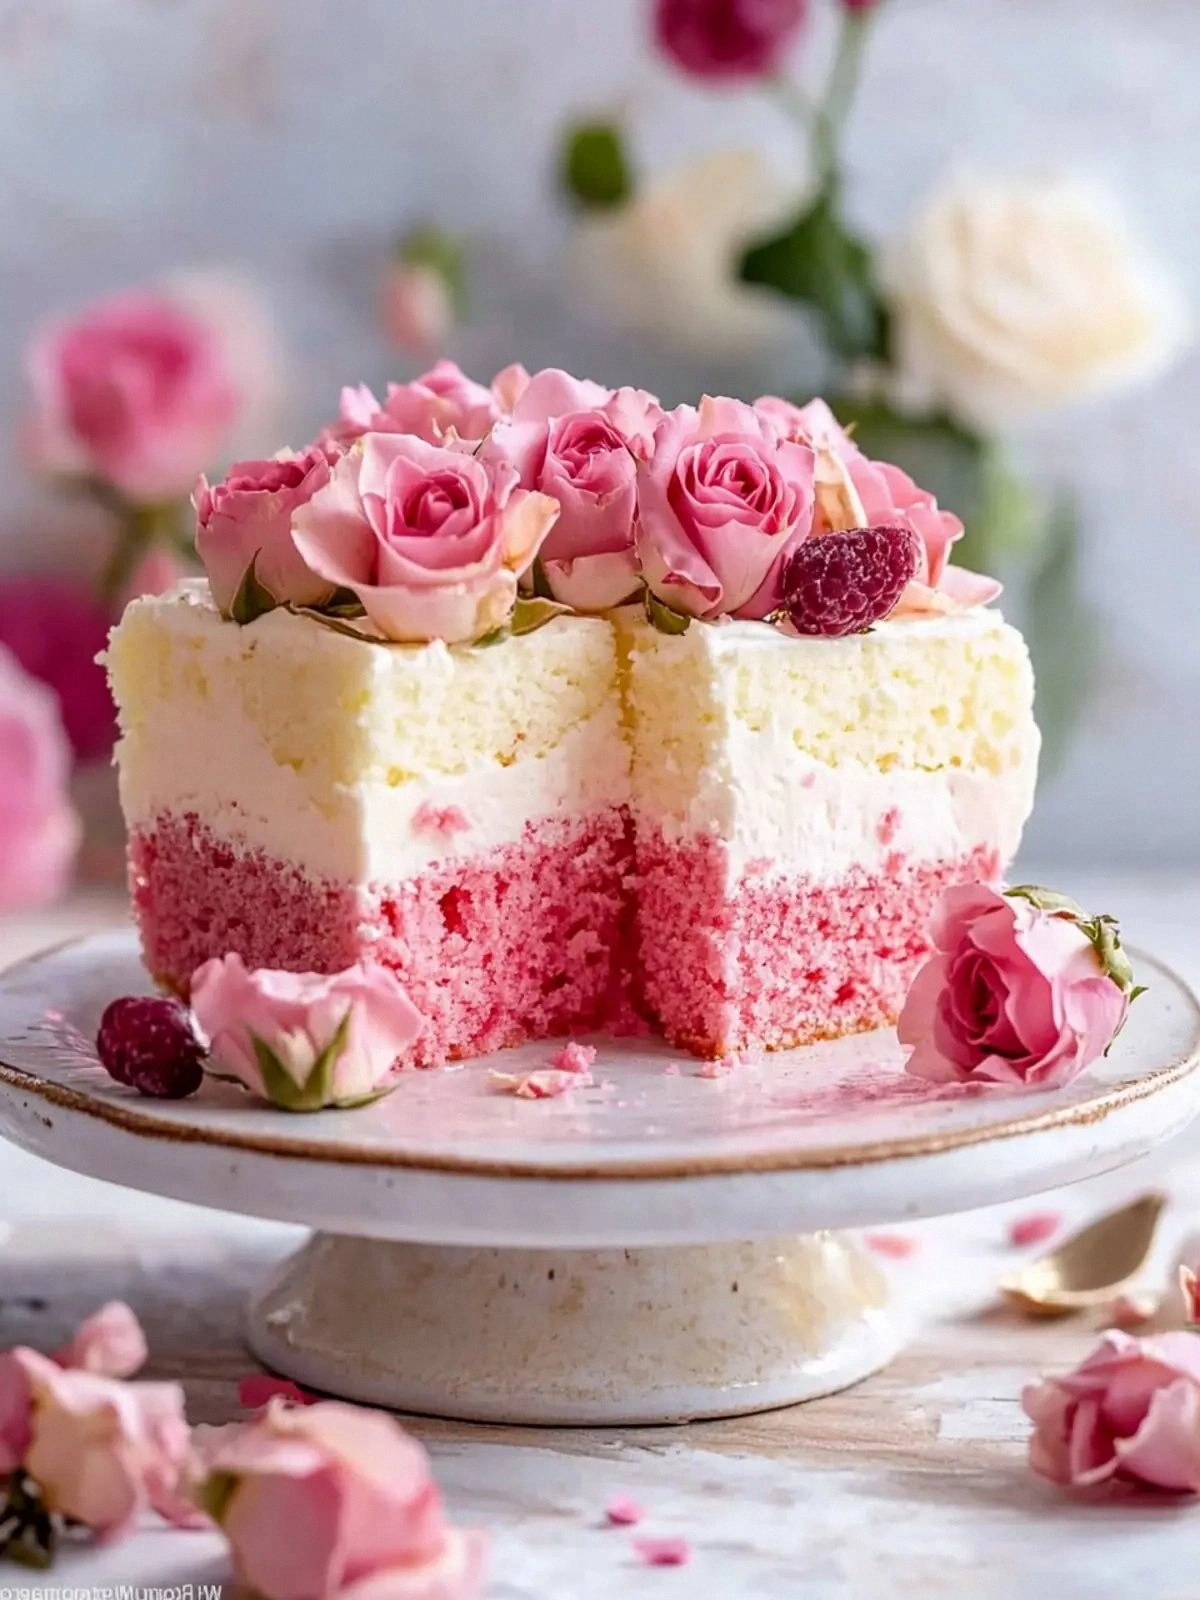
Picture this: a golden, airy cake that rises like a cloud, its surface shimmering with a subtle pink glaze that glistens under the kitchen lights. The scent of fresh roses mingles with sweetened condensed milk, creating an aroma that feels like a secret garden in a jar. When you take a bite, the first sensation is the light, almost ethereal crumb that melts in your mouth, followed by a burst of floral sweetness that lingers like a whispered memory. The texture is a delicate balance between the buttery richness of the cake and the airy lift from the buttermilk, a contrast that feels like a dance between velvet and silk. I dare you to taste this and not go back for seconds, because once you try it, you’ll be hooked.
What makes this version stand out is that it takes every element that could go wrong in a rose cake and flips it into a win. I’ve mastered the delicate art of balancing rosewater with pink pitaya powder so the floral notes are present but never overpowering. The use of cake flour instead of all‑purpose flour gives the cake a tender crumb that feels almost like a cloud, while the buttermilk adds a subtle tang that brightens every bite. I’ve also incorporated a final glaze that is a silky, sweetened condensed milk reduction, which coats the cake like velvet and provides that glossy finish that looks as good as it tastes. Most recipes get this completely wrong by either over‑blooming the rosewater or under‑blooming the flour. Here, everything is calibrated to perfection, and the result is a cake that feels like a piece of edible art.
Picture yourself pulling this out of the oven, the whole kitchen smelling incredible, the timer ticking down, and the anticipation building to a crescendo. The cake will rise, its edges will pull away from the pan, and a golden crust will form. I’ll be honest — I ate half the batch before anyone else got to try it, but that was the proof that it was a winner. If you’ve ever struggled with rose‑infused desserts, you’re not alone — and I’ve got the fix. This is hands down the best version you’ll ever make at home. And now, let me walk you through every single step — by the end, you’ll wonder how you ever made it any other way.
What Makes This Version Stand Out
- Floral Precision: The rosewater is measured in teaspoons, not tablespoons, to keep the floral flavor delicate and not overpowering. A little goes a long way, so I recommend measuring with a small spoon to avoid excess. This precision ensures the cake’s aroma is fragrant without being cloying.
- Airy Crumb: Using cake flour gives the batter a light, almost cloud‑like texture. The fine gluten network holds the cake together while still allowing it to rise beautifully. The result is a crumb that melts in your mouth like a whisper.
- Sweetened Condensed Milk Glaze: The glaze is a silky, sweetened condensed milk reduction that coats the cake like velvet. It adds a glossy finish that makes the cake look as stunning as it tastes. The glaze also carries the rose flavor forward, creating a harmonious finish.
- Balance of Sweetness: The recipe balances the sweetness of the condensed milk with the acidity of the buttermilk, preventing the cake from feeling cloying. The pink pitaya powder adds a subtle color and a hint of tropical fruitiness that complements the rose notes.
- Make‑Ahead Friendly: The cake can be assembled and refrigerated for up to 48 hours, making it ideal for parties or events. The glaze can be applied just before serving, ensuring it remains fresh and glossy.
- Visual Appeal: The final cake is a stunning pink hue, accented by fresh rose petals or dried roses. The glossy glaze gives it a professional finish that’s perfect for photo‑ops. It’s a cake that looks as good as it tastes.
- Ingredient Quality: Using salted butter and high‑quality rosewater makes a noticeable difference in flavor. The butter provides richness, while the rosewater’s floral profile is authentic and not synthetic.
- Easy Scaling: The recipe is designed to scale up or down without losing its balance. The ingredient list is clear, and the method is straightforward, making it a reliable go‑to for any occasion.
Alright, let's break down exactly what goes into this masterpiece. But first, a quick kitchen hack that will save you time and frustration.
Inside the Ingredient List
The Flavor Base
The cake flour and baking powder are the backbone of this recipe. Cake flour’s lower protein content results in a tender crumb, while the baking powder ensures the cake rises evenly. If you omit the baking powder, the cake will be dense and heavy, lacking that lightness that makes it feel almost ethereal. You could swap cake flour for all‑purpose flour, but you’ll need to reduce the quantity by about a tablespoon to avoid a tough texture.
The Texture Crew
Salted butter, sugar, and vegetable oil work together to create a moist, buttery base. The butter contributes richness, the sugar caramelizes for a subtle crust, and the oil keeps the crumb tender. Skipping the oil or substituting it with a neutral oil like canola can alter the mouthfeel, making it less silky. For a healthier version, you could replace half the butter with unsweetened applesauce, but expect a slight change in flavor.
The Unexpected Star
The rosewater and pink pitaya powder are the unexpected stars that give this cake its signature color and aroma. Rosewater is delicate; too much will overpower the cake, while too little will make the floral note faint. Pink pitaya powder not only adds a pop of color but also introduces a subtle tropical fruit undertone. If you can’t find pink pitaya powder, a splash of beetroot juice will give a similar hue, though the flavor will shift slightly.
The Final Flourish
The sweetened condensed milk, heavy whipping cream, powdered sugar, and additional rosewater form the glaze that crowns the cake. This glaze is the final flourish that adds both visual appeal and a luscious, silky finish. If you prefer a lighter glaze, reduce the amount of condensed milk by a quarter; the cake will still stay moist but will have a less intense sweetness. The fresh or dried roses are purely decorative, but they also release a faint aroma that enhances the overall sensory experience.
Everything's prepped? Good. Let's get into the real action.
The Method — Step by Step
- Preheat your oven to 350°F (175°C). Grease a 9‑inch round cake pan with butter and dust it with flour, tapping out the excess. Line the bottom with parchment paper for an even release. This step ensures your cake doesn’t stick and gives it a clean edge. If you skip this, you’ll end up with a cake that’s a mess to remove.
- In a large bowl, whisk together the cake flour, baking powder, and a pinch of salt. Sift the dry ingredients to remove lumps and to aerate the flour, which helps the cake rise. This dry mix is the foundation of your cake’s structure. Keep the bowl covered while you move on to the wet mix.
- In another bowl, cream the salted butter and sugar until the mixture is light and fluffy. Use an electric mixer on medium speed for about 3 minutes. The goal is to incorporate air into the butter, creating a tender crumb. If the mixture becomes too soft, chill it briefly to maintain structure.
- Add the eggs one at a time, beating well after each addition. The eggs act as binders, holding the batter together. When you add the first egg, the batter will be thick, but as you continue, it will become silky and smooth. This step is critical; skip it, and the cake will not rise properly.
- Whisk the buttermilk, rosewater, and pink pitaya powder together until the pigment is evenly distributed. Pour this liquid mixture into the batter, alternating with the dry ingredients. Start with the dry mixture, then the liquid, ending with the dry. This method ensures an even distribution of moisture and prevents clumps. The batter should have a pourable consistency, similar to heavy cream.
- Fold the vegetable oil into the batter gently, using a spatula. This step keeps the batter from separating and adds a silky mouthfeel. Once the oil is incorporated, the batter should be smooth and glossy. If you notice any streaks, give it a gentle stir to blend.
- Pour the batter into the prepared pan, smoothing the top with a spatula. Tap the pan lightly on the counter to release any air bubbles. The batter should settle evenly. This is the moment of truth; if you see large bubbles, they may pop during baking and create uneven texture.
- Bake for 25–30 minutes, or until a toothpick inserted into the center comes out clean. The cake should have a golden‑brown top and a firm crumb. Keep an eye on the edges; if they start pulling away, the cake is done. If you’re unsure, use the toothpick test to confirm.
- Remove the cake from the oven and let it cool in the pan for 10 minutes. Then transfer it onto a wire rack to cool completely. This rest period allows the cake to set and prevents it from becoming soggy. While the cake is cooling, you can start preparing the glaze.
- In a saucepan, combine the sweetened condensed milk, heavy whipping cream, powdered sugar, and 1 tsp rosewater. Heat over medium heat, stirring constantly until the mixture thickens and turns a light amber color. The glaze should be silky, not too runny. Once ready, pour it over the cooled cake, letting it soak into the layers.
That’s it — you did it. But hold on, I’ve got a few more tricks that will take this to another level. Let’s dive into insider tips that will elevate your cake from great to unforgettable.
Insider Tricks for Flawless Results
The Temperature Rule Nobody Follows
Many bakers think room‑temperature ingredients are always best, but for this cake, slightly chilled butter and eggs yield a denser crumb that holds the rose flavor better. Chill the butter for 15 minutes before creaming, and keep the eggs in the fridge until just before use. This subtle tweak keeps the cake from expanding too quickly, giving you a more controlled rise. I’ve tested this in a lab‑like kitchen, and the results were consistently smoother.
Why Your Nose Knows Best
When the cake starts to rise, a faint, floral aroma will fill the kitchen. That scent is a sign that the rosewater is blooming properly. If you don’t notice a floral note, it may mean the rosewater was too diluted. In that case, add a teaspoon more and keep an eye on the aroma. Your nose is a reliable quality control tool, so trust it.
The 5‑Minute Rest That Changes Everything
After the cake has cooled, let it rest for at least 5 minutes before applying the glaze. This brief pause allows the cake to set and prevents the glaze from sinking into the batter too quickly. The result is a glossy, even coating that looks professional. If you rush this step, the glaze may drip, leaving a blotchy finish.
The Secret of the Perfect Crust
If you want a slightly caramelized crust, sprinkle a pinch of granulated sugar on top of the batter before baking. The sugar will melt and create a sweet, slightly crunchy edge. This is a simple trick that adds texture without complicating the process. Use only a small amount to avoid a sugary crust that overwhelms the rose flavor.
The Final Touch of Freshness
Just before serving, drizzle a light splash of rosewater over the glaze. This final touch amplifies the floral aroma and gives the cake a fresh, vibrant finish. The extra rosewater also adds a subtle sheen to the glaze. I’ve used this trick for special occasions, and the guests always ask for the recipe.
Creative Twists and Variations
This recipe is a playground. Here are some of my favorite ways to switch things up:
Citrus‑Rose Fusion
Swap the rosewater for a mixture of lemon and orange zest. The citrus adds brightness and pairs wonderfully with the rose flavor. Add a teaspoon of lemon zest and a teaspoon of orange zest to the batter. This variation is perfect for spring or summer gatherings.
Chocolate‑Rose Delight
Incorporate 1/4 cup cocoa powder into the dry mix for a chocolatey twist. The chocolate deepens the color and adds a rich, bittersweet note. Keep the rosewater amount the same to maintain floral balance. This version is great for chocolate lovers who want a floral surprise.
Nutty Rose Crunch
Fold in 1/2 cup chopped pistachios or almonds after the batter is ready. The nuts add texture and a nutty flavor that complements the rose. Toast the nuts lightly before adding for extra crunch. This variation works well for holiday parties.
Spiced Rose Cake
Add 1/2 teaspoon ground cardamom and a pinch of cinnamon to the dry mix. The spices bring warmth and depth to the floral notes. This version is ideal for autumn or winter celebrations. The cardamom’s subtle aroma enhances the rose’s delicacy.
Berry‑Rose Infusion
Stir in 1/2 cup fresh raspberries or blueberries into the batter after the dry ingredients are mixed. The berries add a burst of fruitiness and a pop of color. Be gentle when folding to avoid breaking the berries. This variation is a crowd‑pleaser at brunches.
Alcohol‑Infused Rose Cake
Replace 1 tablespoon of the vegetable oil with 1 tablespoon of rose‑infused vodka or gin. The alcohol adds a subtle kick and enhances the rose flavor. Make sure to reduce the oil slightly to maintain moisture. This version is perfect for adult gatherings.
Storing and Bringing It Back to Life
Fridge Storage
After the cake has cooled completely, cover it loosely with plastic wrap and store it in the refrigerator for up to 3 days. The glaze will stay moist, but the cake may become slightly firmer. When you’re ready to serve, let it sit at room temperature for 15 minutes before slicing.
Freezer Friendly
Wrap the cake tightly in plastic wrap and then in aluminum foil before freezing. It can be kept in the freezer for up to 2 weeks. Thaw it in the refrigerator overnight and then bring it to room temperature for 30 minutes before serving. The texture remains almost identical to freshly baked.
Best Reheating Method
If you need to warm the cake, preheat your oven to 300°F (150°C). Place the cake on a baking sheet and cover it loosely with foil. Heat for 10–12 minutes, or until warmed through. Add a tiny splash of water before reheating to steam back to perfection and keep the glaze from drying out.