Picture this: I’m standing in my cramped kitchen, the air thick with the scent of burnt onions and a faint hint of desperation. My friends had dared me to create a burger that would outshine every takeout joint in town, and I had no choice but to rise to the challenge. I pulled out a pound of ground chuck, tossed in a generous pinch of salt, and let the anticipation simmer. That night, my stove became a battleground, and the sizzling sound was the soundtrack to culinary triumph. I was determined to turn a simple stovetop burger into a legend.
The moment the meat hit the hot skillet, the kitchen exploded in a chorus of crackles. The aroma was a deep, caramelized perfume that made my mouth water before I even tasted it. I could hear the sizzle like a drumbeat, feel the heat radiating from the pan, and see the golden crust forming on the patties. Each bite was a contrast of juicy center and crispy edges, a harmony of textures that danced on the tongue. The first bite felt like a warm hug that whispered, “You did this right.”
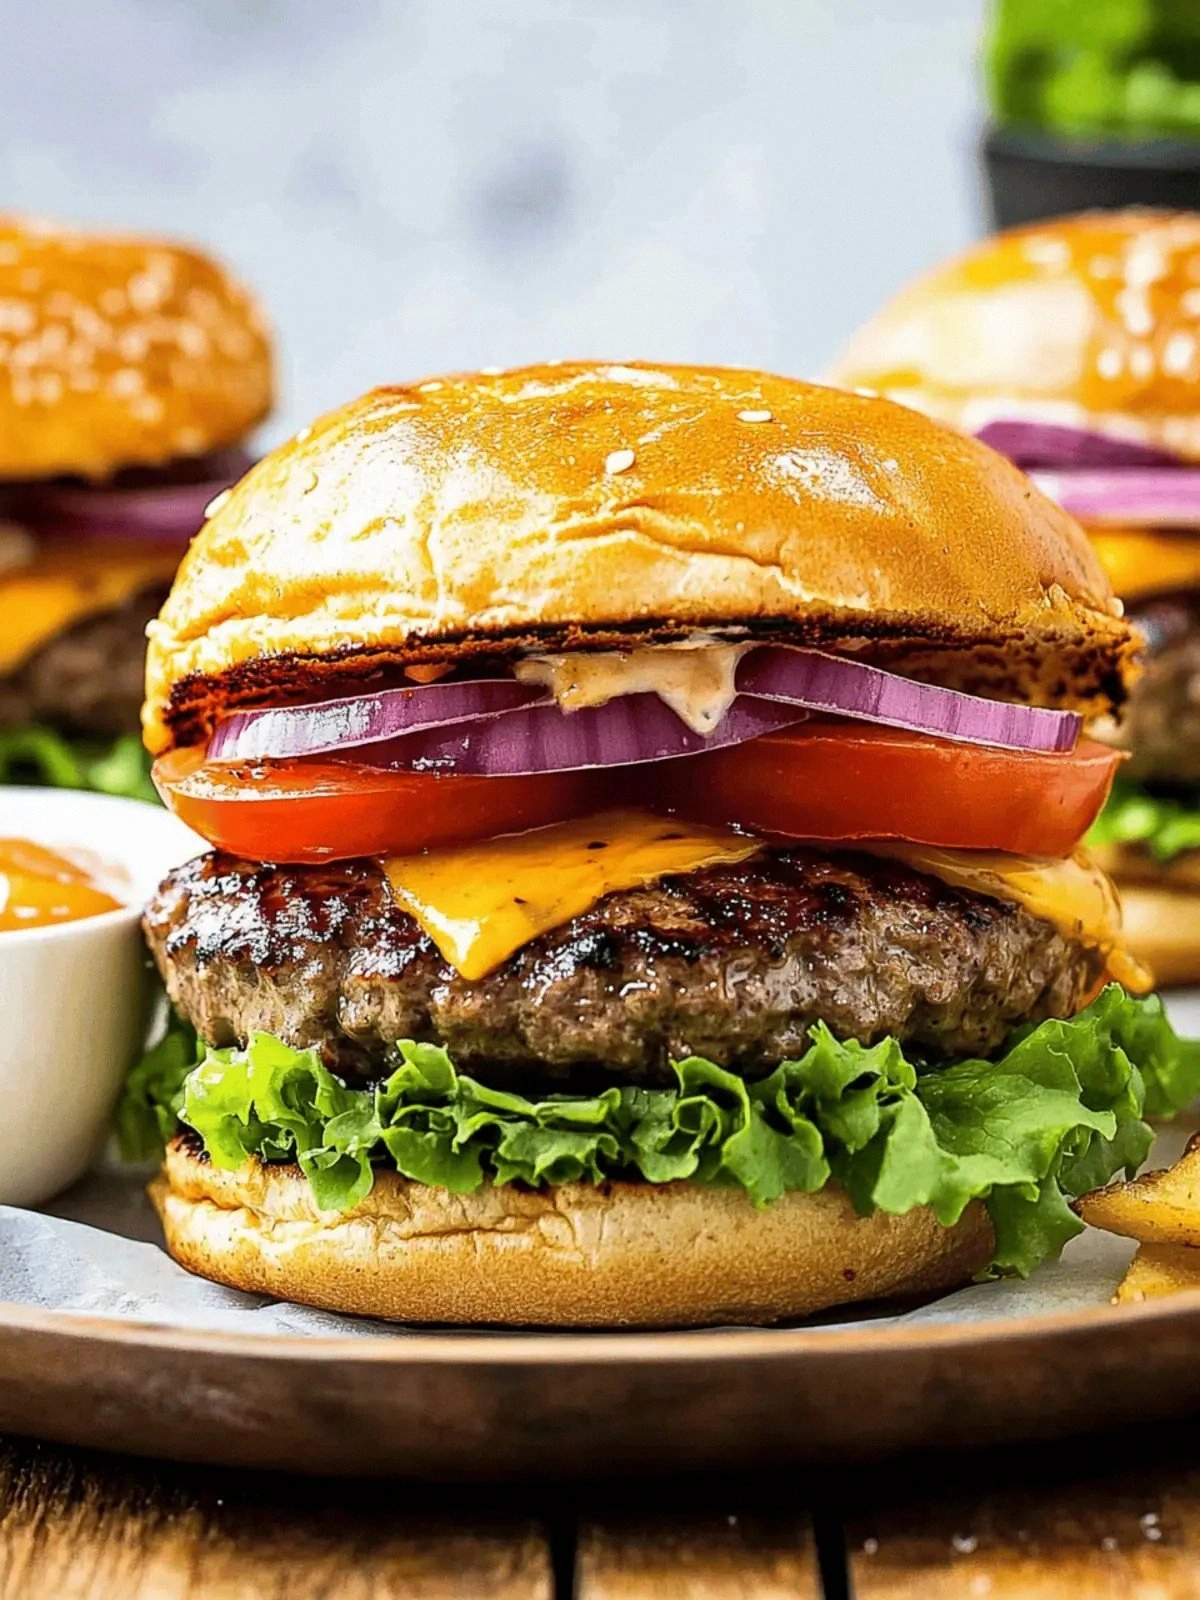
What makes this version stand out is not just the flawless sear or the gooey cheese—it’s the sheer confidence that comes with every bite. I’ve perfected a balance that makes the burger sing, and I’ve trimmed the recipe down to its most essential, yet most flavorful, components. No frills, no fuss, just pure, unapologetic deliciousness that will make you question every other burger you've ever tasted. I dare you to taste this and not go back for seconds.
Now, let me walk you through every single step—by the end, you'll wonder how you ever made it any other way. I’ll reveal the secret sauce of seasoning, the trick to achieving that perfect crust, and a few kitchen hacks that will save you time and frustration. Get ready, because this is hands down the best version you'll ever make at home.
What Makes This Version Stand Out
- Flavor: The seasoning is simple yet powerful, allowing the natural taste of the chuck to shine while adding a subtle depth from the salt and pepper. The result is a burger that feels authentic and hearty.
- Texture: A caramelized crust meets a juicy interior, creating a contrast that satisfies every bite. The cheese melts into a silky blanket that ties everything together.
- Speed: From prep to plate in under an hour, this recipe is a go-to for busy evenings or lazy weekends. No oven, no waiting—just a hot skillet and a few minutes.
- Versatility: Swap in your favorite cheese, try different buns, or experiment with toppings. The core method stays the same, but the flavor can be customized endlessly.
- Crowd‑Pleaser: Whether you’re feeding a family, hosting a game night, or just treating yourself, these burgers get rave reviews from friends and strangers alike.
- Ingredient Quality: Using a high‑fat ground chuck ensures maximum juiciness and flavor, while fresh toppings add a crisp counterpoint.
- Make‑ahead Potential: You can prep the patties ahead of time, refrigerate or freeze them, and pick them up on the stove whenever hunger strikes.
Inside the Ingredient List
The Flavor Base
Ground chuck is the heart of this burger, delivering a rich, meaty flavor that’s unmistakably beefy. The 1-pound portion ensures each patty is substantial enough to satisfy a craving. Skipping this would turn the burger into a mere patty, losing that essential depth. For a leaner option, replace with ground sirloin, but expect a drier bite.
The Texture Crew
Salt and pepper are the unsung heroes that elevate the meat’s natural taste. Kosher or sea salt offers a cleaner, more pronounced flavor, while freshly ground black pepper adds a subtle heat that wakes the palate. If you prefer a milder profile, use fine sea salt and a lighter pepper touch, but remember that seasoning is key to unlocking the meat’s potential.
The Unexpected Star
Cheese, whether American or Cheddar, brings a velvety melt that clings to the patty, creating a gooey, savory layer that feels indulgent. A thin slice is enough to coat the top, and it adds a creamy texture that contrasts with the crisp edges. If you’re a cheese lover, try adding a splash of smoked Gouda for an extra dimension.
The Final Flourish
Burger buns and fresh toppings transform the patty into a complete meal. The buns should be toasted to add crunch and prevent sogginess, while lettuce, tomato, red onion, and pickles provide freshness and bite. Condiments of choice—whether ketchup, mustard, or a homemade mayo—add a finishing touch that can turn a simple burger into a gourmet experience.
Everything's prepped? Good. Let's get into the real action...
The Method — Step by Step
- Heat a large cast‑iron skillet over medium‑high until it shimmers. Add a splash of oil and let it swirl. The pan should be hot enough that a pinch of water sizzles into tiny bubbles. This is the moment you know the base is ready. Let the heat settle for a minute before adding meat.
- Divide the ground chuck into four equal portions. Shape each into a patty about ¾ inch thick, making a slight indentation in the center. This indentation prevents the patties from puffing up and helps them cook evenly. Season each side generously with salt and pepper, letting the seasoning sink into the meat. Kitchen Hack: For even thickness, place a small paper towel between the patty and the skillet when flipping; this reduces sticking.
- Place the patties in the skillet, pressing gently to seal the edges. Don’t overcrowd the pan; if needed, cook in batches. The first side should brown in about 3–4 minutes, forming a caramelized crust. Flip once the underside releases easily and the juices begin to pool at the edges.
- After flipping, reduce the heat to medium. Add a tablespoon of butter and a splash of Worcestershire sauce to the pan. Swirl the butter so it coats the bottom and the patties. This adds richness and a subtle umami layer that lifts the flavor.
- Lay a slice of cheese over each patty and cover the skillet with a lid for 1–2 minutes. The cheese should melt into a glossy, gooey blanket. Watch Out: If you leave the lid on too long, the cheese can become rubbery. Remove the lid once the cheese is perfectly melted and the edges of the patty are firm.
- While the cheese melts, toast the buns in a separate pan or on a griddle until golden brown. A light butter coating on the cut side adds crunch and prevents the bun from absorbing too much moisture. The buns should feel firm yet pliable.
- Assemble each burger by placing the patty on the bottom bun, then layering lettuce, tomato, red onion, pickles, and your chosen condiments. The order can be tweaked to keep the bun from getting soggy. The final product should be a harmonious blend of textures and flavors.
- Serve immediately, allowing the steam to carry the aroma of sizzling meat and melted cheese into the room. Pair with a cold beer or a crisp soda for a satisfying meal. Enjoy the moment of pure culinary bliss. That's it — you did it. But hold on, I've got a few more tricks that will take this to another level...
Insider Tricks for Flawless Results
The Temperature Rule Nobody Follows
Keep the pan at medium‑high, not high. Over‑high heat burns the outside while leaving the inside raw. The trick is to let the skillet heat gradually, ensuring a golden crust without compromising the juicy center.
Why Your Nose Knows Best
The first sizzle is a cue that the pan is hot enough. If the sizzle is weak, the meat will stick. Use the aroma to gauge readiness and avoid a ruined crust.
The 5‑Minute Rest That Changes Everything
Let the burgers rest for 5 minutes after cooking. This allows juices to redistribute, preventing a dry bite. A friend once skipped this step and ended up with a patty that tasted like a dried‑out jerky.
The Cheese Layer Trick
Place cheese on the patty before flipping to avoid overcooking. The cheese melts evenly and stays on top, giving that signature gooey finish.
The Quick Fix for Over‑Seasoned Meat
If the seasoning is too strong, add a splash of milk or a tablespoon of water to the skillet to dilute. This keeps the flavor balanced and prevents bitterness.
The Bun Toasting Secret
Brush buns with melted butter and sprinkle a pinch of sea salt before toasting. This adds flavor and crispness that compliments the burger’s richness.
Creative Twists and Variations
This recipe is a playground. Here are some of my favorite ways to switch things up:
Smoky Chipotle Burger
Add chipotle powder to the seasoning mix and top with smoky chipotle mayo. The heat from the chipotle pairs beautifully with the buttery crust, giving the burger a subtle kick.
BBQ Bacon Burger
Layer crispy bacon and a drizzle of BBQ sauce between patty and bun. The smoky bacon adds crunch while the BBQ sauce brings a tangy sweetness that balances the savory meat.
Mushroom Swiss Delight
Sauté sliced mushrooms in garlic butter and place atop the patty before adding Swiss cheese. The earthy mushrooms complement the beef’s richness, creating a gourmet feel.
Mediterranean Lamb Burger
Replace ground chuck with ground lamb, add oregano and feta cheese. The lamb’s distinct flavor, combined with the Mediterranean herbs, transforms the burger into a new culinary adventure.
Veggie Burger Upgrade
Use a homemade chickpea patty, top with avocado and a squeeze of lime. The chickpeas keep the burger hearty, while the avocado adds creaminess and the lime brightens the overall taste.
Breakfast Burger
Add a fried egg on top of the cheese before serving. The runny yolk adds a rich, velvety texture that makes this a breakfast‑inspired delight.
Storing and Bringing It Back to Life
Fridge Storage
Store cooked burgers in an airtight container up to 3 days. Keep buns separate until ready to reheat. This prevents the buns from becoming soggy and keeps the meat juicy.
Freezer Friendly
Wrap each patty individually and freeze up to 2 months. Reheat in a skillet with a splash of water, then finish with a quick sear. This preserves the texture and flavor.
Best Reheating Method
Use a skillet over medium heat, add a dash of water, cover to steam, then finish with a quick sear. Add a tiny splash of water before reheating to keep moisture and prevent drying out.