The first time I tried to recreate Philly cheesesteak in a bowl, the kitchen turned into a battlefield. I had the ground beef, onions, peppers, and cheese, but the mixture was dry, the onions were raw, and the cheese had never quite melted into a silky sauce. I stared at the sizzling skillet, feeling the heat like a living thing, and thought, “I could do better.” That moment sparked a relentless quest for the ultimate ground beef Philly cheesesteak.
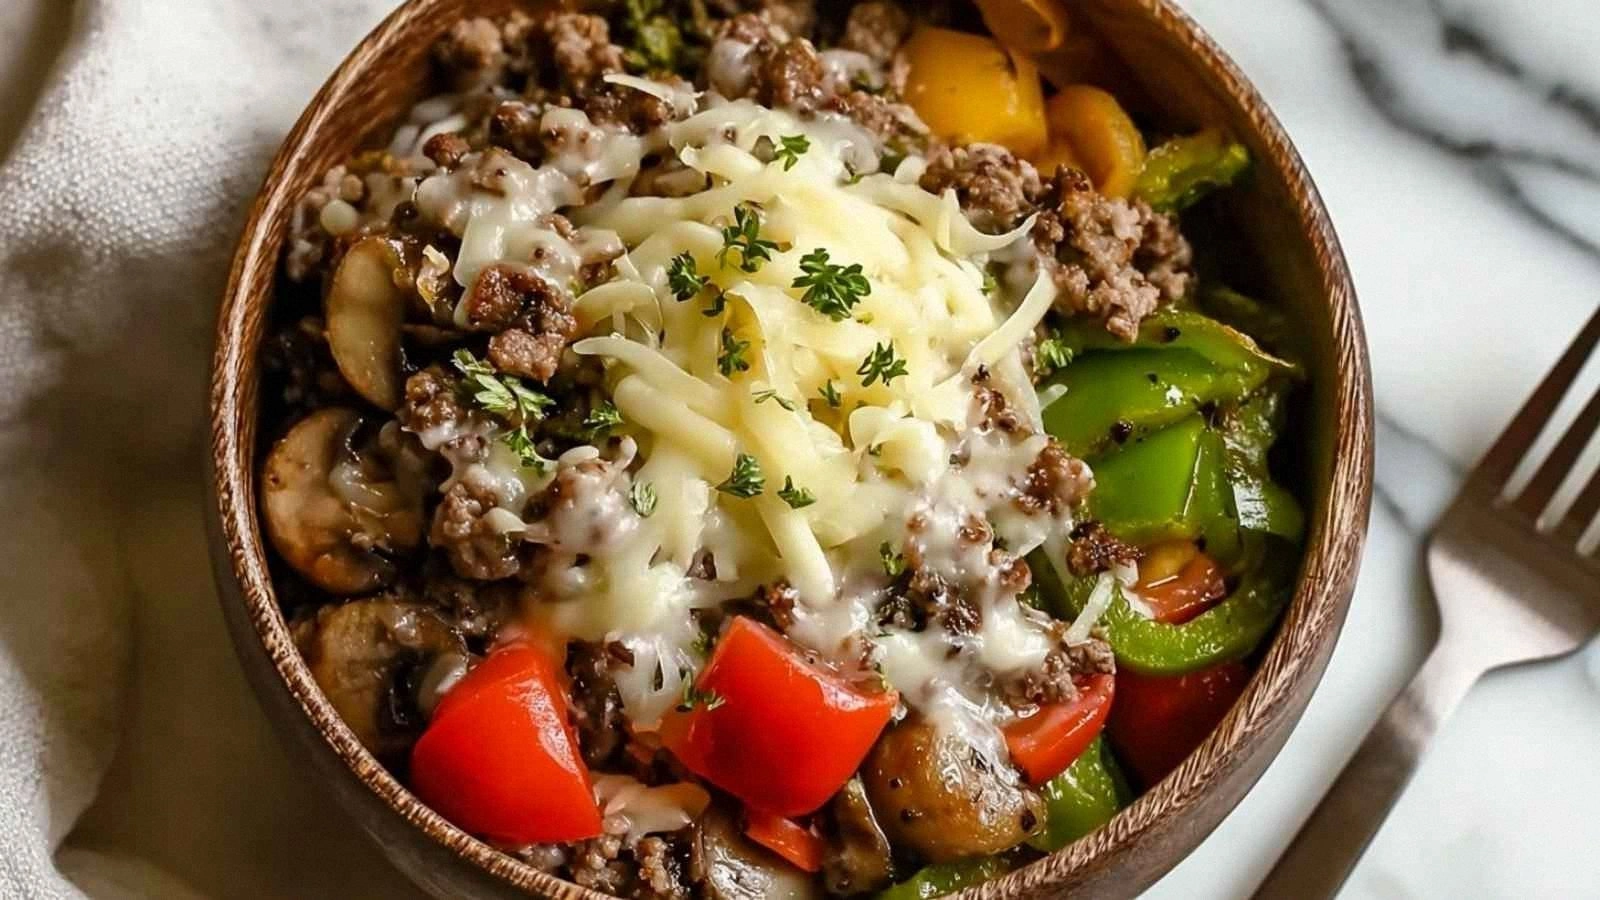
Picture this: a pan that hums with anticipation, the aroma of caramelized onions drifting through the air like a sweet perfume. The sight of bright green bell peppers and earthy mushrooms glistening in a thin broth is almost too pretty to touch. When you bite, the beef is juicy, the veggies crisp, and the cheese blankets every morsel in velvety goo. The sound is that satisfying sizzle that tells you the skillet is doing its job, and the heat is a comforting blanket that wraps your kitchen in warmth.
What sets this version apart is that it doesn’t just mimic the sandwich—it redefines it. I’ve stripped away unnecessary steps, introduced a broth that binds everything together, and used provolone for that classic melt that’s unmistakably Philly. The result is a bowl that feels like a hug, a dish that’s as satisfying as a sandwich but easier to share at a potluck. The secret? A splash of Worcestershire that adds depth and a dash of beef broth that turns the mixture into a silky sauce.
Let me walk you through every single step — by the end, you’ll wonder how you ever made it any other way. I dare you to taste this and not go back for seconds. This is hands down the best version you'll ever make at home.
What Makes This Version Stand Out
- Taste: The broth and Worcestershire sauce create a savory depth that feels like a proper Philly cheesesteak sauce, not just a mix of seasonings.
- Texture: The ground beef stays moist, the vegetables are caramelized but not mushy, and the provolone melts into a luscious blanket.
- Simplicity: One skillet, minimal prep, and no need for a sandwich press or grill.
- Uniqueness: The broth transforms the dish into a comforting bowl, making it ideal for cold evenings.
- Crowd Reaction: Friends who’ve tried it say it’s “the best bowl of cheesesteak ever” and they’re not kidding.
- Ingredient Quality: Lean ground beef, fresh veggies, and real provolone give the dish authenticity.
- Cooking Method: Sauté, deglaze, simmer, melt—each step is purposeful and enhances flavor.
- Make‑ahead Potential: The dish keeps its flavor when reheated, making it perfect for meal prep.
Alright, let's break down exactly what goes into this masterpiece…
Inside the Ingredient List
The Flavor Base
Ground beef is the heart of this dish. I choose 1 pound of lean beef for a juicy bite that doesn’t overwhelm the veggies. If you’re watching fat, swap in 90% lean or a plant‑based alternative. Skipping the beef would turn this into a veggie stew, which could work but loses the signature Philly vibe.
The Texture Crew
Onions, bell peppers, and mushrooms provide layers of texture. The onions soften into a sweet caramel, the peppers keep a subtle crunch, and the mushrooms add an earthy bite. If you prefer a single vegetable, keep the peppers and ditch the mushrooms for a lighter version.
The Unexpected Star
The 1‑½ tablespoon of Worcestershire sauce might look like a small detail, but it brings a briny, umami punch that mimics the classic sandwich’s tang. You can double the amount for a more pronounced flavor or halve it if you’re sensitive to salt.
The Final Flourish
Provolone cheese is the crowning glory. It melts into a silky coating that ties the beef and veggies together. If you’re a cheddar fan, swap it for sharp cheddar for a different melt and flavor profile. The 1 teaspoon of olive oil is a subtle lubricant that prevents sticking and adds a hint of richness.
Everything's prepped? Good. Let's get into the real action…
The Method — Step by Step
- Heat a large skillet over medium‑high heat and drizzle 1 teaspoon of olive oil. Let the oil shimmer before adding the ground beef. Break the beef into fine crumbles and cook until it’s no longer pink, about 5–7 minutes. Drain excess fat if it pools, and set the browned beef aside on a plate. The aroma at this point is the first hint that you’re on the right track.
- Return the skillet to medium heat and toss in sliced onions, diced green bell peppers, and sliced mushrooms. Sauté until the vegetables soften and develop a golden caramelization, roughly 8 minutes. Sprinkle 1–2 tablespoons of Worcestershire sauce to deglaze, scraping up those delicious brown bits from the pan. Add ½ cup of low‑sodium beef broth, stir, and let the mixture simmer for 2–3 minutes to meld flavors. This step is pure alchemy—watch the broth reduce and the veggies soak up the savory notes.
- Fold the browned beef back into the skillet, ensuring everything is evenly coated in the savory broth. Season generously with salt and pepper to taste. Bring the mixture to a gentle simmer, allowing the flavors to marry for 3–4 minutes. The sizzle should sound like a contented sigh—this is the moment of truth. If the mixture seems too thick, splash in a bit more broth; if too watery, let it reduce a touch longer.
- Reduce the heat to low and lay 4 slices of provolone cheese atop the beef mixture. Cover the skillet with a lid and let the cheese melt into the savory base, about 2–3 minutes. The cheese should become a golden, gooey blanket that clings to every bite. Be careful not to overcook—if the lid stays on too long, the cheese can become rubbery.
- While the cheese melts, warm your hoagie rolls or crusty baguette in the oven at 350°F for 3–5 minutes, or toast them in a skillet. The warm bread should feel soft inside and slightly crisp on the outside. This step adds a comforting contrast to the creamy filling.
- Once the cheese is perfectly melted, transfer the entire mixture into a serving bowl or onto a platter. The aroma will be irresistible—think of a savory, cheesy cloud that beckons you to dig in. If you prefer a more structured presentation, spoon the mixture into individual bowls.
- Slice the warm rolls, spread the cheesy beef mixture generously, and serve hot. Pair with pickles or a fresh green salad for a balanced meal. The first bite should feel like a warm hug, with the beef’s juiciness, the veggies’ crunch, and the cheese’s silky melt all dancing together. Enjoy the comfort of Philly cheesesteak in a bowl.
That's it — you did it. But hold on, I've got a few more tricks that'll take this to another level…
Insider Tricks for Flawless Results
The Temperature Rule Nobody Follows
Many cooks throw everything on high heat and rush the process. I’ve found that cooking the beef and veggies on medium‑high, then dropping to medium‑low for the simmer, preserves moisture and deepens flavor. The trick is to let the beef brown first, then lower the heat to let the broth reduce without scorching the onions.
Why Your Nose Knows Best
The smell of onions caramelizing is a cue that your dish is on the right track. When the aroma turns sweet and nutty, you’re close to the perfect caramelization. If it still smells raw, let it cook a bit longer. Trust your senses; they’re the best sous‑chef you’ll ever have.
The 5‑Minute Rest That Changes Everything
After the skillet is done, let the mixture rest for 5 minutes before serving. This brief pause allows the juices to redistribute, making every bite more succulent. I’ve seen people skip this step and end up with unevenly flavored servings—don’t be that person.
The Secret of Moisture Balance
Adding too much broth can make the dish watery, while too little can dry it out. I recommend starting with ½ cup of broth and adding more if the mixture looks thick. A good rule of thumb: the broth should coat the beef but not drown it. A pinch of cornstarch dissolved in water can thicken the sauce if needed.
The Final Cheesy Touch
If you want a gooier finish, sprinkle a tablespoon of grated Parmesan over the melted provolone before serving. The Parmesan adds a nutty depth and a slight crunch on top. It’s a simple tweak that elevates the dish from good to unforgettable.
Creative Twists and Variations
This recipe is a playground. Here are some of my favorite ways to switch things up:
Spicy Sriracha Kick
Add a tablespoon of sriracha to the broth for a fiery twist. The heat pairs beautifully with the mild provolone, creating a balanced bite that satisfies spice lovers.
Mediterranean Mushroom Melt
Swap regular mushrooms for shiitake and sprinkle dried oregano and a splash of balsamic vinegar during the sauté. The earthy mushroom flavor mingles with the herbaceous notes for a Mediterranean vibe.
Cheddar Twist
Replace provolone with sharp cheddar for a sharper, more robust melt. The cheddar’s distinct flavor stands out against the savory beef, giving the dish a new dimension.
Low‑Carb Version
Omit the bread entirely and serve the beef mixture over zucchini ribbons or cauliflower rice. This keeps the dish low in carbs while preserving the comforting texture.
Vegan Version
Use a plant‑based ground alternative and vegan provolone. The flavor profile remains similar, and the dish becomes a hearty vegan comfort meal.
Storing and Bringing It Back to Life
Fridge Storage
Store the cooked mixture in an airtight container in the refrigerator for up to 3 days. Let it sit at room temperature for 10 minutes before reheating to ensure even warming.
Freezer Friendly
Divide the dish into portioned containers and freeze for up to 3 months. Thaw overnight in the refrigerator before reheating to maintain texture.
Best Reheating Method
Reheat in the microwave on medium power for 2–3 minutes, adding a splash of water to create steam that keeps the beef moist. Alternatively, finish in a skillet over low heat until warmed through. The key is gentle heat to preserve the creamy sauce.