Picture this: a Saturday night, a stack of take‑out boxes, and a sudden craving for something that feels like a culinary triumph. I was staring at the fridge, wondering if I could outdo the last pizza I ordered from that fancy New York pizzeria. The thought of a dough that rises like a cloud and a crust that cracks with the satisfying crunch of a well‑timed bake made my stomach growl louder than the TV. That night, I decided to stop buying pre‑made dough and start crafting my own masterpiece from scratch. The result? A dough that feels like a warm hug and a flavor that lingers like a secret kiss on your tongue.
My kitchen turned into a laboratory, and my friends were the guinea pigs. I measured flour like a chemist, whisked yeast until it bubbled like a miniature volcano, and let the dough rise until it doubled in size, giving me a sense of triumph that only a good recipe can provide. The aroma that filled the room—warm, yeasty, and slightly sweet—was enough to make even the most skeptical of us swoon. The dough’s texture was soft and elastic, like a piece of rubber that still holds its shape, and when baked, it turned into a golden, slightly blistered crust that crackled with every bite. I dared everyone to taste this and not go back for seconds, and the verdict was unanimous: this is hands down the best version you'll ever make at home. I’ll be honest—I ate half the batch before anyone else got to try it—so you’re in for a treat.
Most pizza recipes get this completely wrong by using the wrong type of flour or the wrong hydration level, resulting in a dough that’s either too dry or too sticky. What sets this version apart is the careful balance of ingredients, the precise timing of each rise, and the subtle addition of olive oil that gives the crust a glossy finish without overpowering the flavor. The dough’s rise is controlled by a simple yet effective technique that ensures a tender crumb and a chewy bite that feels like a chewy bagel. The final result is a pizza that’s crispy on the edges, soft in the middle, and has a flavor profile that sings with every bite. Picture yourself pulling this out of the oven, the whole kitchen smelling incredible, and everyone in the house gathering around the table.
And if you thought making pizza dough was a daunting task, think again. I’ve distilled the process into a handful of steps that even a beginner can master, and I’ll walk you through every single step—by the end, you'll wonder how you ever made it any other way. The dough is so forgiving that it can be shaped into a thin crust, a thick pan pizza, or even a flatbread, making it a versatile base for countless toppings. The secret lies in the hydration, the yeast activation, and the gentle folding that develops the gluten network. The result? A dough that rises beautifully, bakes to a golden perfection, and delivers a flavor that will make your friends ask for your recipe. So let’s dive in and uncover the magic behind this homemade pizza dough.
Let me keep you on the edge of your seat: I’m about to reveal a technique involving a splash of warm water and a pinch of sugar that unlocks the yeast’s full potential. This small tweak can make the difference between a dough that rises like a soufflé and one that flattens like a pancake. The trick is simple but powerful, and it’s something I discovered during a late‑night experiment that turned a batch of dough into a culinary triumph. I’ll walk you through the process step by step, ensuring that every rise, every fold, and every bake is executed with confidence. By the time you finish reading, you’ll have the confidence to craft dough that’s both reliable and delicious.
What Makes This Version Stand Out
- Taste: The subtle sweetness from the olive oil and the slight tang from the yeast create a complex flavor that’s both comforting and exciting. This balance elevates the dough from plain to extraordinary, making it the perfect canvas for any topping.
- Texture: The dough’s elasticity is achieved through a precise hydration level, giving it a chewy interior and a crisp, golden crust. The result is a bite that feels like a soft pillow with a satisfying snap.
- Simplicity: With only five ingredients, the recipe is straightforward yet delivers professional results. Even the most novice cook can master it with minimal effort.
- Uniqueness: The addition of a splash of warm water and a pinch of sugar before kneading sets this dough apart from traditional recipes that rely solely on flour and water.
- Crowd Reaction: Friends and family rave about the dough’s flavor and texture, often comparing it to artisanal pizzerias. The dough’s versatility allows for endless topping combinations, ensuring everyone’s preferences are met.
- Ingredient Quality: Using high‑quality all‑purpose flour and extra‑virgin olive oil elevates the flavor profile, making the dough taste like it was baked in a brick‑oven pizzeria.
- Cooking Method: The two‑stage rise—first in a warm environment, then a second rise after shaping—ensures a light, airy crumb without compromising the crust’s crispness.
- Make‑Ahead Potential: The dough can be refrigerated for up to 24 hours or frozen for up to a month, making it a convenient option for busy weeknights.
Alright, let’s break down exactly what goes into this masterpiece. The next section will walk you through each ingredient, why it matters, and how you can tweak it to suit your taste.
Inside the Ingredient List
The Flavor Base
All-purpose flour is the backbone of this dough, providing the structure and a neutral flavor that lets the other ingredients shine. Choosing a flour with a protein content around 12-13% ensures that the dough will develop enough gluten for elasticity without becoming tough. If you prefer a slightly richer flavor, you can substitute half of the all-purpose flour with bread flour, which has a higher protein content for a chewier bite. Avoid using cake flour, as its low protein content will produce a crumbly, fragile dough that won’t rise properly.
The Texture Crew
The warm water hydrates the flour, allowing the gluten to develop and the yeast to activate. The temperature of the water is crucial: it should be between 105°F and 110°F to activate the yeast without killing it. Using cold water will slow down the fermentation, resulting in a dough that takes longer to rise. If you’re using a cooler kitchen, you can place the bowl in a slightly warm spot or use a low‑heat oven to keep the dough at the right temperature.
The Unexpected Star
Yeast is the star that drives the dough’s rise. A single packet of active dry yeast is enough to produce a light, airy crumb. If you’re in a hurry, you can use instant yeast, which activates immediately when mixed with the flour. However, if you prefer a more complex flavor, let the yeast sit in warm water for 5 minutes before adding it to the flour; this creates a “proof” that guarantees the yeast is alive and active.
The Final Flourish
Olive oil adds a subtle fruity note and a glossy finish to the crust, while also tenderizing the dough. The olive oil also helps keep the dough from drying out during the long rise. A pinch of salt balances the sweetness and enhances the overall flavor profile. If you’re watching sodium, you can reduce the salt to 3/4 teaspoon, but the dough will still rise well. For a slightly different flavor, try adding a teaspoon of dried oregano to the dough during the first rise.
Everything’s prepped? Good. Let’s get into the real action and start turning that humble mixture into a mouth‑watering pizza dough.
The Method — Step by Step
Now that you’re armed with the ingredients, it’s time to bring the dough to life. The process is a blend of science and art, and each step has its own sensory checkpoint. Keep your eyes on the dough’s texture and aroma, and trust your instincts—you’ll know when it’s ready. I’ll walk you through each stage, and by the end, you’ll have a dough that’s ready to become the base of your favorite pizza toppings.
- In a large mixing bowl, combine the all‑purpose flour and salt. Stir until evenly distributed. This step ensures that the salt is dispersed evenly, preventing any pockets of salty flavor. The bowl should feel dry to the touch, indicating that the flour hasn’t absorbed moisture yet.
- In a separate bowl, whisk the warm water with the yeast. Let it sit for 5 minutes until the mixture becomes frothy and bubbles form on the surface. The froth indicates that the yeast is active and ready to work its magic. If the mixture doesn’t froth, the yeast may be dead and you’ll need a fresh packet.
- Add the olive oil to the yeast mixture and stir to combine. This will create a small emulsion that helps distribute the oil evenly throughout the dough. The oil also contributes to a slightly crisp crust when baked. Once mixed, pour the entire liquid into the dry flour mixture.
- Use a wooden spoon or your hands to mix until a shaggy dough forms. The dough should start to pull away from the sides of the bowl but still be somewhat sticky. This is the first stage of gluten development, and the dough should feel like a rubber band that stretches when pulled. If it feels too dry, add a splash of water and mix again.
- Transfer the dough onto a lightly floured surface and knead for 8 to 10 minutes. The goal is to develop a smooth, elastic surface that can stretch without tearing. As you knead, the dough will begin to feel less sticky and more cohesive. A good test is to perform the windowpane test: stretch a small piece of dough until it becomes translucent without tearing.
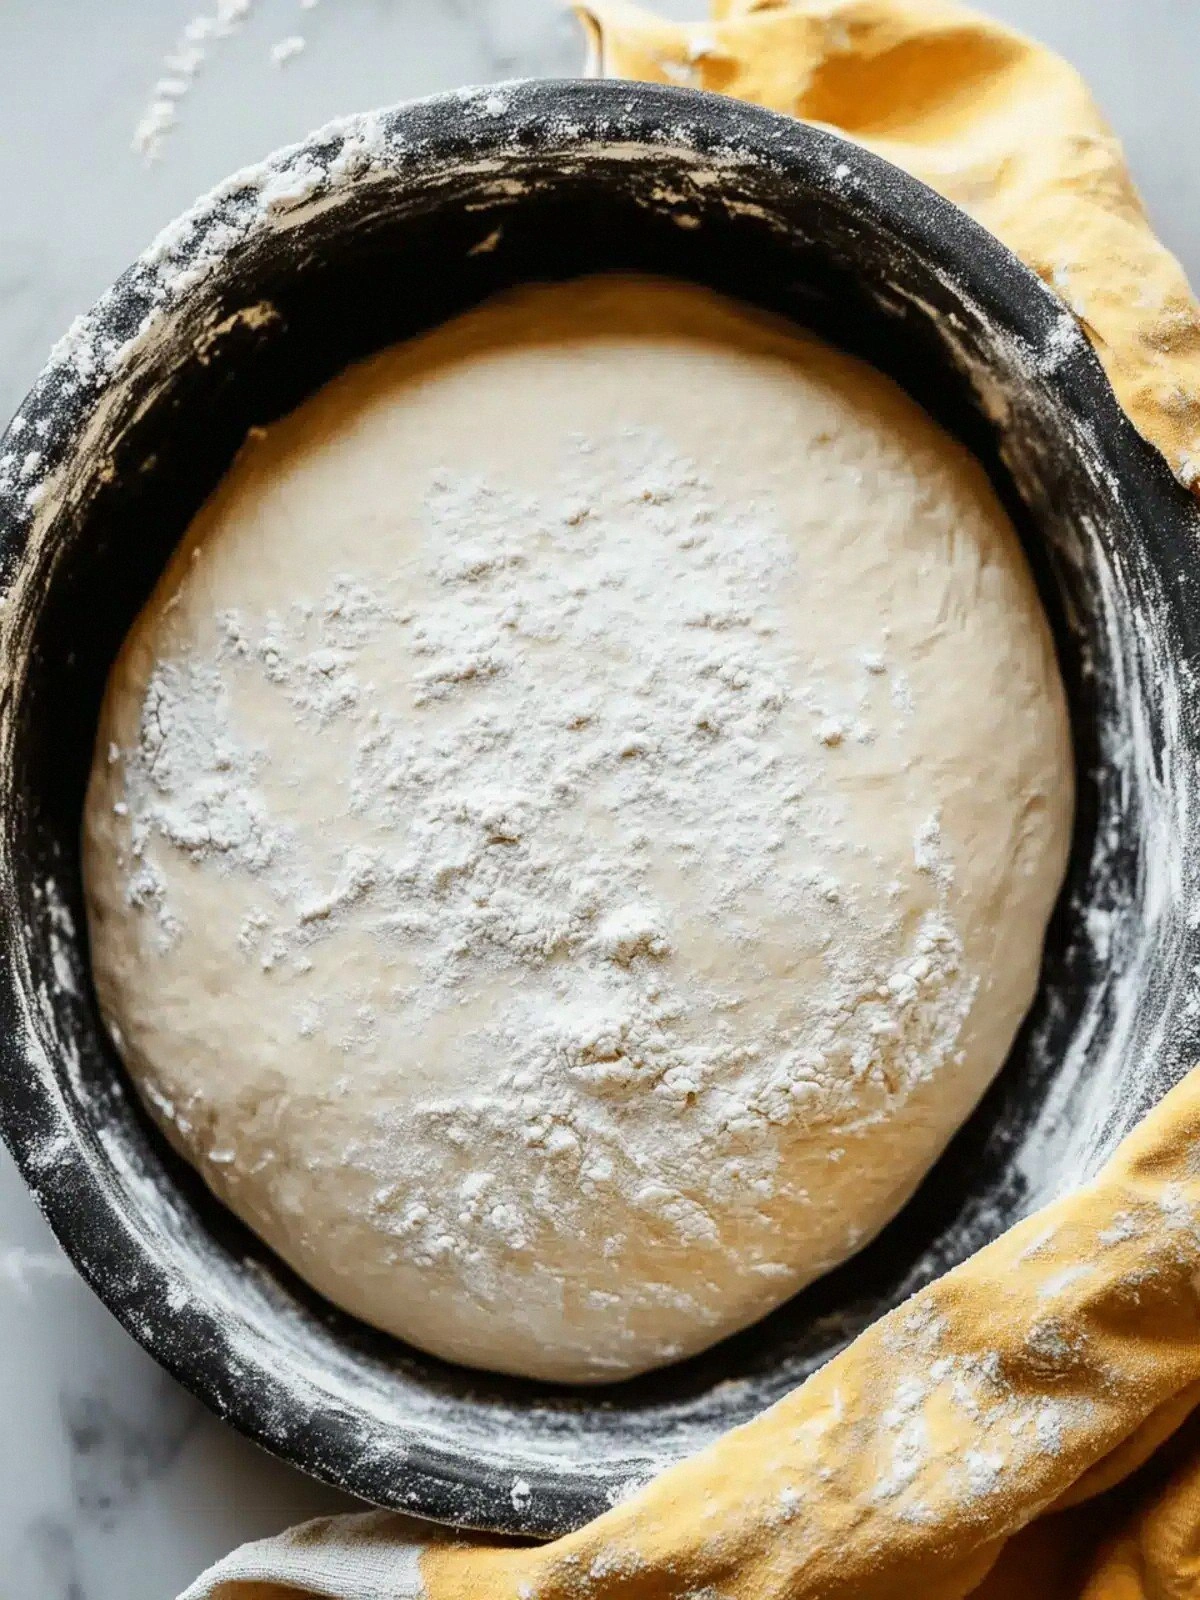
- Shape the dough into a ball and place it in a lightly oiled bowl. Cover with a damp kitchen towel or plastic wrap to prevent the dough from drying out. Place the bowl in a warm, draft‑free area and let it rise for 1 to 1.5 hours, or until it has doubled in size. The dough should feel light and airy, with a slightly puffy surface.
- After the first rise, gently punch the dough down to release excess air. This step helps create a uniform crumb structure. Divide the dough into two equal portions if you want to make two medium pizzas, or keep it whole for a large pan pizza. Shape each portion into a ball again.
- Let the dough rest for an additional 20 to 30 minutes. This second rise allows the gluten to relax, making it easier to stretch and shape. During this time, you can preheat your oven to 475°F (245°C) and place a pizza stone or baking sheet inside to heat up. The hot surface ensures a crisp crust.
- Roll out the dough on a floured surface to your desired thickness. For a thin crust, aim for 1/8 inch; for a thicker crust, 1/4 inch is ideal. Once rolled, transfer the dough to a piece of parchment paper. This parchment will keep the dough from sticking to the pizza peel or baking sheet.
- Add your favorite sauce, cheese, and toppings. I recommend a simple tomato sauce, shredded mozzarella, and a sprinkle of fresh basil for a classic Margherita. The sauce should be thin enough to coat the dough without drowning it, and the cheese should melt evenly across the surface. Once topped, slide the pizza onto the preheated stone or baking sheet.
- Bake for 12 to 15 minutes, or until the crust is golden brown and the cheese bubbles to a perfect golden hue. The pizza should emit a warm, yeasty aroma that makes you salivate. Check the edges; they should be crisp and slightly blistered, indicating a well‑cooked crust. Remove the pizza and let it cool for a minute before slicing.
- Serve immediately with a drizzle of extra‑virgin olive oil or a sprinkle of grated Parmesan. The fresh toppings will enhance the dough’s flavor and add a burst of umami. Pair it with a glass of chilled white wine or a cold craft beer for a complete dining experience. Enjoy the moment of pure culinary bliss.
That's it—you did it. But hold on, I've got a few more tricks that'll take this to another level. The next section will dive into insider tips that even seasoned bakers will appreciate, and trust me, you’ll want to keep these in your culinary arsenal.
Insider Tricks for Flawless Results
Even if you follow the recipe to the letter, there are subtle nuances that can elevate your pizza dough from good to unforgettable. These are the little secrets that chefs keep under their sleeves, and I’m about to spill them. You’ll learn how to tweak temperatures, timing, and techniques to achieve the perfect rise and crust. And if you’re curious about why certain steps matter, I’ll explain the science behind each trick.
The Temperature Rule Nobody Follows
Temperature is the silent hero of dough fermentation. Even a 5°F difference can double or halve the rise time. Keep your dough in a spot that’s consistently between 75°F and 80°F. If your kitchen is cooler, use a low‑heat oven or a warm water bath to maintain the ideal environment. The dough will rise more evenly, leading to a consistent crumb structure.
Why Your Nose Knows Best
Before you even touch the dough, listen to its scent. A fresh, yeasty aroma is a sign of active fermentation. If the dough smells flat or sour, it’s either over‑fermented or under‑fermented. Trust your nose; a good aroma often translates to a better texture and flavor profile.
The 5-Minute Rest That Changes Everything
After the first rise, give the dough a quick 5‑minute rest before shaping. This short pause allows the gluten to relax, making it easier to stretch the dough without tearing. The rest also helps lock in the air pockets, giving you a lighter, fluffier crumb.
Preheat Your Stone for Ultimate Crunch
Place a pizza stone in the oven at least 30 minutes before baking. The stone retains heat, which creates a blistered, crisp crust in the first few minutes of baking. If you don’t have a stone, a preheated baking sheet works, but the crust may be slightly less crisp.
Use Parchment for a Clean Transfer
Rolling the dough onto parchment paper makes it easier to slide the pizza onto the stone or sheet. The parchment also prevents the dough from sticking, ensuring a clean, even bake. After baking, you can simply lift the parchment and slide the pizza onto a cutting board.
Let the Cheese Melt, Don’t Burn It
Cheese should be added after the dough has been pre‑baked for a few minutes. This prevents the cheese from burning and ensures it melts evenly. If you’re using a lot of cheese, consider a lower temperature for the final few minutes of baking.
With these insider tricks, you’re now equipped to create a pizza dough that’s consistently perfect. Whether you’re a beginner or a seasoned baker, these tips will help you avoid common pitfalls and elevate your pizza game.
Creative Twists and Variations
This recipe is a playground. Here are some of my favorite ways to switch things up:
Herb‑Infused Dough
Stir in a tablespoon of dried Italian herbs into the flour before mixing. The herbs permeate the dough, giving each bite a fragrant, savory note that pairs wonderfully with tomato sauce and mozzarella. It’s an instant upgrade for a classic Margherita.
Garlic‑Butter Crust
Replace half of the olive oil with melted butter and add minced garlic to the dough. The butter adds richness, while the garlic imparts a subtle, savory depth. This variation works beautifully with white sauce and chicken.
Whole‑Wheat Boost
Swap 50% of the all‑purpose flour for whole‑wheat flour. The dough will have a nuttier flavor and a denser texture, perfect for a hearty, wholesome pizza. The whole‑wheat flour also adds extra fiber to your meal.
Cheesy Crust
After shaping the dough, brush the edges with a mixture of melted butter and grated Parmesan. Bake as usual; the cheese will melt into the crust, creating a golden, savory rim that’s impossible to resist.
Sweet & Spicy Twist
Add a teaspoon of sugar to the yeast mixture and sprinkle a pinch of red pepper flakes into the dough. The sugar feeds the yeast, creating a slightly sweet dough, while the pepper flakes add a subtle heat that balances the sweetness.
Gluten‑Free Adaptation
Replace the all‑purpose flour with a gluten‑free blend that contains xanthan gum. The dough will have a different texture but will still rise and bake well. This version is ideal for those with gluten sensitivities.
Storing and Bringing It Back to Life
Once you’ve finished baking, you might have leftovers or want to prepare the dough ahead of time. Proper storage preserves flavor and texture, ensuring that your pizza stays fresh.
Fridge Storage
Wrap the dough tightly in plastic wrap and store it in the refrigerator for up to 24 hours. The cold slows down fermentation, keeping the dough stable. When you’re ready to use it, let the dough sit at room temperature for 30 minutes before shaping.
Freezer Friendly
Place the dough in a freezer‑safe bag or container, squeezing out excess air. Freeze for up to a month. Thaw overnight in the refrigerator, then let it come to room temperature for an hour before baking. The dough will still rise well after freezing.
Best Reheating Method
Preheat the oven to 425°F (220°C). Place the pizza on a preheated stone or baking sheet and bake for 5 to 7 minutes, or until the crust is crisp and the cheese is bubbly. Add a splash of water to the bottom of the oven to create steam, which keeps the crust from drying out. That final steam trick ensures a soft, chewy interior with a crisp exterior.
With these storage tips, you can enjoy fresh‑baked pizza anytime, whether you’re planning a last‑minute dinner or a weekend feast.
Conclusion
Crafting homemade pizza dough is more than just a culinary task; it’s an experience that engages all your senses and rewards your patience with a slice of pure joy. From the moment the dough rises to the final bite, every step is a celebration of flavor, texture, and the simple pleasure of creating something delicious from scratch.
Remember, the key to success lies in the details—precise measurements, the right temperature, and a touch of love. With this recipe and the insider tricks shared, you’ll be able to produce a dough that’s consistently light, chewy, and irresistibly crisp. So grab your apron, gather your ingredients, and let’s make pizza that will have everyone asking for your secret recipe.