It was a rainy Sunday afternoon when I attempted to rescue a batch of brownies that had just fallen flat on the counter. The chocolate had lost its bite, the edges were soggy, and the whole kitchen smelled like disappointment. I stared at the ruined batch, feeling the weight of the kitchen's silence, and decided that this was the perfect moment to reinvent the classic dessert. I grabbed a handful of ingredients, a dash of ambition, and a promise to myself that I would turn this flop into a triumph.
Picture the first bite: a dense, fudgy brownie core that melts like velvet against your tongue, followed by a silky cheesecake layer that swirls with warm chocolate sauce. The aroma is a heady blend of roasted cocoa and creamy dairy, while the sound of the hot fudge drizzle is a satisfying hiss that signals decadence. The texture is a glorious contrast—crunchy edges, a soft, almost gooey center, and a glossy finish that invites a second forkful. The flavor is rich, layered, and unapologetically indulgent, with a hint of vanilla that balances the sweetness.
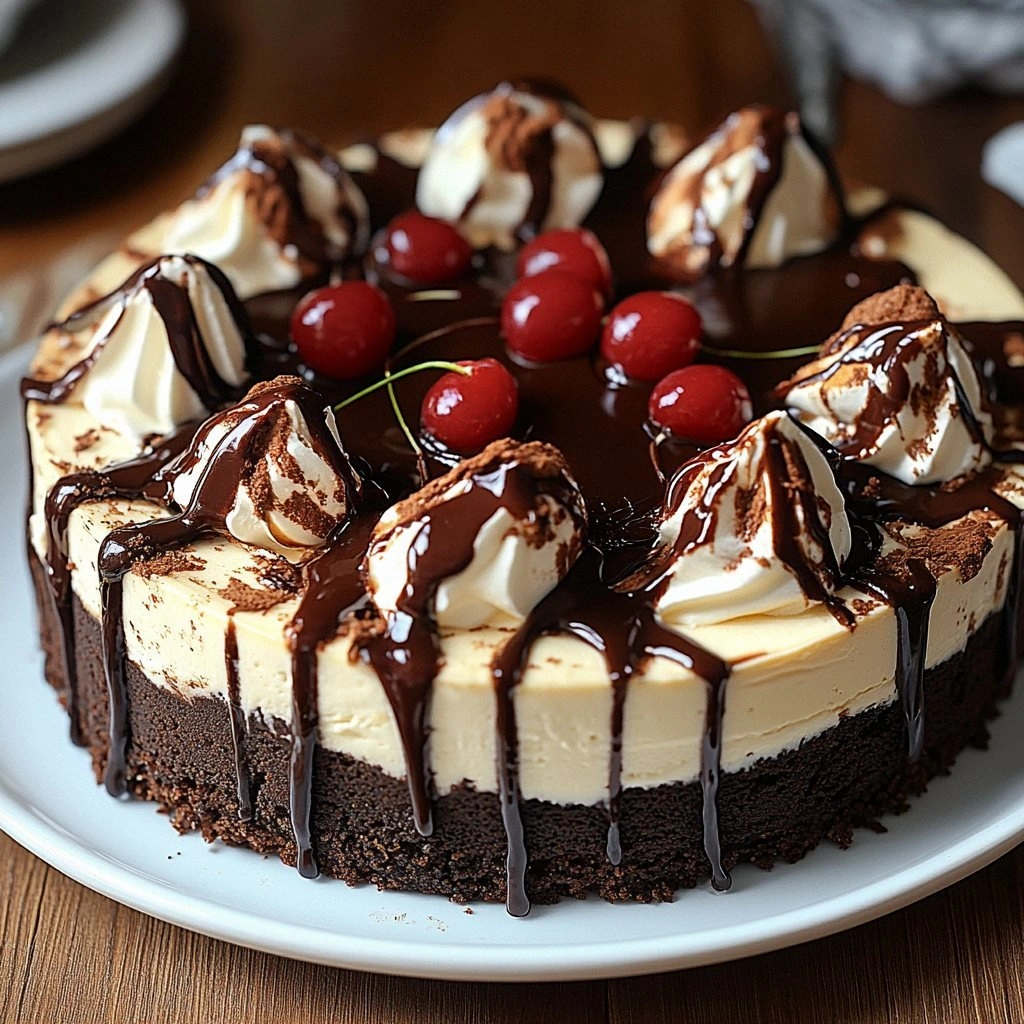
What makes this version the gold standard is the meticulous layering of flavors and textures. I used a double-bake technique to give the brownie base a caramelized crust while keeping the interior moist. The cheesecake filling is made with a combination of cream cheese and sour cream, giving it a tang that cuts through the sweetness. I then topped it with a homemade hot fudge sauce that’s thick enough to coat the surface without dripping off. The final flourish is a swirl of whipped cream and chocolate shavings that add a light, airy contrast to the dense core.
I dare you to taste this and not go back for seconds. The secret? A splash of espresso powder in the brownie batter to deepen the chocolate flavor, and a pinch of sea salt on top to bring out the richness. Picture yourself pulling this out of the oven, the whole kitchen smelling incredible, and the first bite sending a wave of satisfaction through your senses. Let me walk you through every single step—by the end, you'll wonder how you ever made it any other way.
What Makes This Version Stand Out
- Layered Texture: The brownie base delivers a caramelized crust that crackles when you bite, while the interior remains luxuriously moist. The cheesecake layer adds a silky, almost custard-like feel that melts in the mouth. Together, they create a symphony of crunch and cream that keeps you coming back.
- Double-Bake Technique: Baking the brownie twice locks in moisture and develops a deeper flavor profile. The first bake creates a firm foundation, and the second bake, after adding the cheesecake filling, ensures the layers meld without becoming soggy.
- Cream Cheese Fusion: Mixing cream cheese with sour cream reduces fat content while adding a subtle tang that brightens the rich chocolate. This blend also gives the cheesecake a lighter, fluffier texture that contrasts beautifully with the dense brownie.
- Espresso Infusion: A teaspoon of espresso powder in the batter amplifies the chocolate depth without adding a coffee taste. The subtle bitterness balances the sweetness and enhances the overall flavor complexity.
- Rich Hot Fudge: The homemade hot fudge sauce is thick and glossy, coating the surface like a velvet blanket. It’s sweet enough to satisfy but has a slight caramel undertone that elevates the dessert.
- Crowd Favorite: Friends who taste this rave about the “wow” factor. The dramatic presentation—glazed, topped with whipped cream, and sprinkled with chocolate shavings—makes it a showstopper for any gathering.
Alright, let's break down exactly what goes into this masterpiece...
Inside the Ingredient List
The Flavor Base
The foundation of this dessert is a rich chocolate brownie batter. Unsweetened cocoa powder brings depth, while espresso powder sharpens the chocolate profile. The butter and sugars create a caramelized crust that caramelizes during the double-bake. Skipping any of these will result in a flatter, less complex flavor.
Swap the unsweetened cocoa for Dutch‑process cocoa to achieve a milder bitterness if you prefer a smoother taste. When purchasing cocoa, look for a dark roast to intensify the chocolate aroma. For a dairy‑free version, use coconut oil instead of butter; the resulting texture will be slightly firmer but still decadent.
The Texture Crew
The cheesecake layer is where the magic truly happens. Cream cheese provides body and tang, while sour cream adds moisture and a slight acidity that cuts through the sweetness. Eggs bind the mixture, ensuring a firm yet creamy finish. Each ingredient is essential; omitting any will compromise the structural integrity of the dessert.
If you’re looking for a lower‑fat option, replace half of the cream cheese with Greek yogurt. This substitution maintains the creamy texture while reducing calories. When sourcing cream cheese, choose a brand with a lower sodium content to keep the overall flavor balanced.
The Unexpected Star
Hot fudge sauce is the crowning glory that ties the dessert together. Homemade fudge is thicker and richer than store‑bought, with a glossy sheen that glistens under the kitchen lights. The sauce’s viscosity prevents it from running off, allowing it to coat the brownie and cheesecake layers evenly.
To elevate the sauce, add a pinch of sea salt or a dash of vanilla extract. These subtle tweaks enhance the overall flavor profile and add a finishing touch of sophistication. If you prefer a spicier kick, a hint of cayenne pepper will create a surprising contrast.
The Final Flourish
Whipped cream and chocolate shavings provide the final pop of texture and visual appeal. The airy whipped cream lightens the dense base, while the chocolate shavings add a crunchy, bittersweet contrast. Together, they create a balanced bite that satisfies both sweet and savory cravings.
For a vegan alternative, use coconut whipped cream and dairy‑free chocolate chips. This version maintains the same visual appeal while catering to plant‑based preferences. When topping, sprinkle a small pinch of edible gold dust for an extra wow factor at dinner parties.
Everything's prepped? Good. Let's get into the real action...
The Method — Step by Step
- Preheat your oven to 350 °F (175 °C). Line a 9‑inch springform pan with parchment paper, ensuring the paper extends up the sides for easy release. Grease the parchment with a thin layer of butter to prevent sticking. This first step sets the stage for a flawless bake.
- In a large bowl, whisk together 1 cup all‑purpose flour, ½ cup unsweetened cocoa powder, 1 tsp baking powder, ½ tsp baking soda, and ½ tsp salt. In a separate bowl, combine ½ cup melted butter, 1 cup granulated sugar, ½ cup brown sugar, and 2 tsp vanilla extract until smooth. Gradually fold the dry mixture into the wet mixture, stirring until just combined. This careful integration keeps the batter from becoming too airy.
- Pour the batter into the prepared pan and smooth the top with a spatula. Bake for 25 minutes, or until a toothpick inserted near the center comes out with a few moist crumbs. Let the brownie cool for 10 minutes before removing from the pan; the crust should be firm yet slightly chewy.
- While the brownie rests, prepare the cheesecake filling. In a medium bowl, beat 8 oz softened cream cheese, 1 cup sour cream, 1 cup heavy cream, and 2 large eggs until silky smooth. Add 1 cup chocolate chips and fold gently, allowing the chocolate to melt into the mixture. This step creates a silky, custard‑like filling that will layer atop the brownie.
- Spread the cheesecake filling evenly over the cooled brownie layer, smoothing the surface with a spatula. Return the pan to the oven for a second bake of 20 minutes, or until the edges set but the center remains slightly wobbly. This second bake fuses the layers without overcooking the delicate cheesecake.
- Remove the pan from the oven and let the dessert cool completely at room temperature. Once cooled, refrigerate for at least 4 hours, preferably overnight, to allow the flavors to meld and the texture to firm up. Patience here is key to achieving the perfect bite.
- While the dessert chills, prepare the hot fudge sauce. In a saucepan, combine 1 cup chocolate chips, ½ cup heavy cream, 2 tsp espresso powder, and a pinch of sea salt. Heat over medium heat, stirring constantly until the mixture is smooth and glossy. This sauce should be thick enough to coat the surface without dripping.
- Once chilled, carefully slice the dessert into squares or wedges. Drizzle hot fudge sauce generously over each piece, allowing it to pool on the sides for a dramatic effect. Top with a dollop of whipped cream and a sprinkle of chocolate shavings for a finishing flourish.
- Serve immediately or store in an airtight container in the refrigerator for up to 3 days. If you prefer a warm version, reheat individual slices in the microwave for 20–30 seconds until the fudge is silky again. Enjoy the decadent combination of textures and flavors.
- Present the dessert on a platter, allowing guests to see the glossy glaze and the swirls of whipped cream. The visual appeal is as important as the taste, and this look guarantees a memorable dessert experience. Take a moment to admire the creation before digging in.
Insider Tricks for Flawless Results
The Temperature Rule Nobody Follows
Many bakers set the oven temperature to the maximum for a quick bake, but this recipe thrives at a moderate 350 °F (175 °C). The lower heat allows the brownie and cheesecake layers to cook evenly, preventing a burnt crust while ensuring a tender center. If your oven runs hot, set the thermostat a few degrees lower or use an oven thermometer to confirm accuracy.
Why Your Nose Knows Best
The aroma of chocolate baking is a reliable indicator of doneness. When the smell intensifies and the air feels warm, the brownie is close to done. Trust your senses; the visual cues can sometimes be deceptive, especially when baking at higher altitudes.
The 5-Minute Rest That Changes Everything
After removing the dessert from the oven, allow it to rest for exactly five minutes before slicing. This short pause lets the heat distribute evenly, reducing the likelihood of the cheesecake layer cracking. The rest also makes it easier to handle the springform pan without damaging the delicate structure.
The Espresso Boost
Adding espresso powder to the brownie batter deepens the chocolate flavor without imparting a coffee taste. A teaspoon is sufficient; too much can make the batter bitter. This trick is especially effective for those who love a sophisticated chocolate profile.
The Whipped Cream Layer
Whipping the cream to stiff peaks ensures it holds its shape when dolloped onto the dessert. For a lighter texture, fold in a tablespoon of powdered sugar while whipping. This addition also balances the richness of the fudge and cheesecake layers.
The Final Glaze
Drizzling the hot fudge sauce at the last moment keeps it glossy and prevents it from thickening on the surface. If you prefer a thicker glaze, let the sauce cool slightly before drizzling. A thin sheen adds an elegant sheen that makes the dessert look professionally plated.
Creative Twists and Variations
Nutty Crunch Edition
Swap the chocolate chips for chopped walnuts or pecans. The nuts add a pleasant crunch and a nutty undertone that complements the chocolate. Toast the nuts beforehand for a deeper flavor profile.
Caramel Swirl Surprise
Fold a generous swirl of homemade caramel sauce into the cheesecake filling before baking. The caramel’s buttery sweetness contrasts beautifully with the chocolate base. Use a low‑sugar caramel to keep the dessert balanced.
Minty Fresh Variation
Add a teaspoon of peppermint extract to the brownie batter and a few drops to the hot fudge sauce. The mint provides a refreshing counterpoint to the richness. This version is perfect for holiday parties or summer gatherings.
Vegan Delight
Replace the butter with coconut oil, the cream cheese with tofu‑based cheese, and the heavy cream with coconut milk. The texture remains indulgent, and the dessert becomes plant‑friendly. Use a vegan chocolate chip for the fudge sauce.
Spiced Chocolate Explosion
Incorporate a pinch of cinnamon and a dash of cayenne pepper into the brownie batter. The spices add warmth and a subtle heat that lingers on the palate. This variation is ideal for those who love a spicy kick.
Coffee‑Infused Delight
Use cold brew coffee in place of half the heavy cream in the hot fudge sauce. The coffee intensifies the chocolate flavor and adds a subtle bitterness that balances the sweetness. Serve with a side of espresso‑flavored whipped cream for an extra caffeine boost.
Storing and Bringing It Back to Life
Fridge Storage
Store the dessert in an airtight container in the refrigerator for up to 3 days. The layers will firm up, making slicing easier. When ready to serve, let the dessert sit at room temperature for 10–15 minutes to soften slightly.
Freezer Friendly
For longer storage, wrap the dessert tightly in plastic wrap and place it in a freezer bag. It can be frozen for up to 2 months. Thaw overnight in the refrigerator before serving to preserve the texture.
Best Reheating Method
To reheat, place a slice in the microwave on high for 20–30 seconds. For a more even heat, wrap the slice in a damp paper towel before microwaving. Add a tiny splash of water before reheating; this steams the surface back to its original silky sheen.