I’m going to start with a confession that will probably make you smile: I ate half the batch of maple quinoa granola before anyone else even got a spoonful. It was a quiet Sunday morning, the kind where the house smells like a cozy cabin and the only soundtrack is the soft hum of the refrigerator. I had a sudden craving for something that was simultaneously crunchy, sweet, and a little nutty—like a breakfast that could double as a snack and a guilt‑free treat. That craving turned into a dare from a friend who said, “If you can make granola that isn’t soggy, I’ll bring you fresh berries tomorrow.” I accepted, and what happened next was a kitchen adventure that turned a simple pantry staple into a masterpiece.
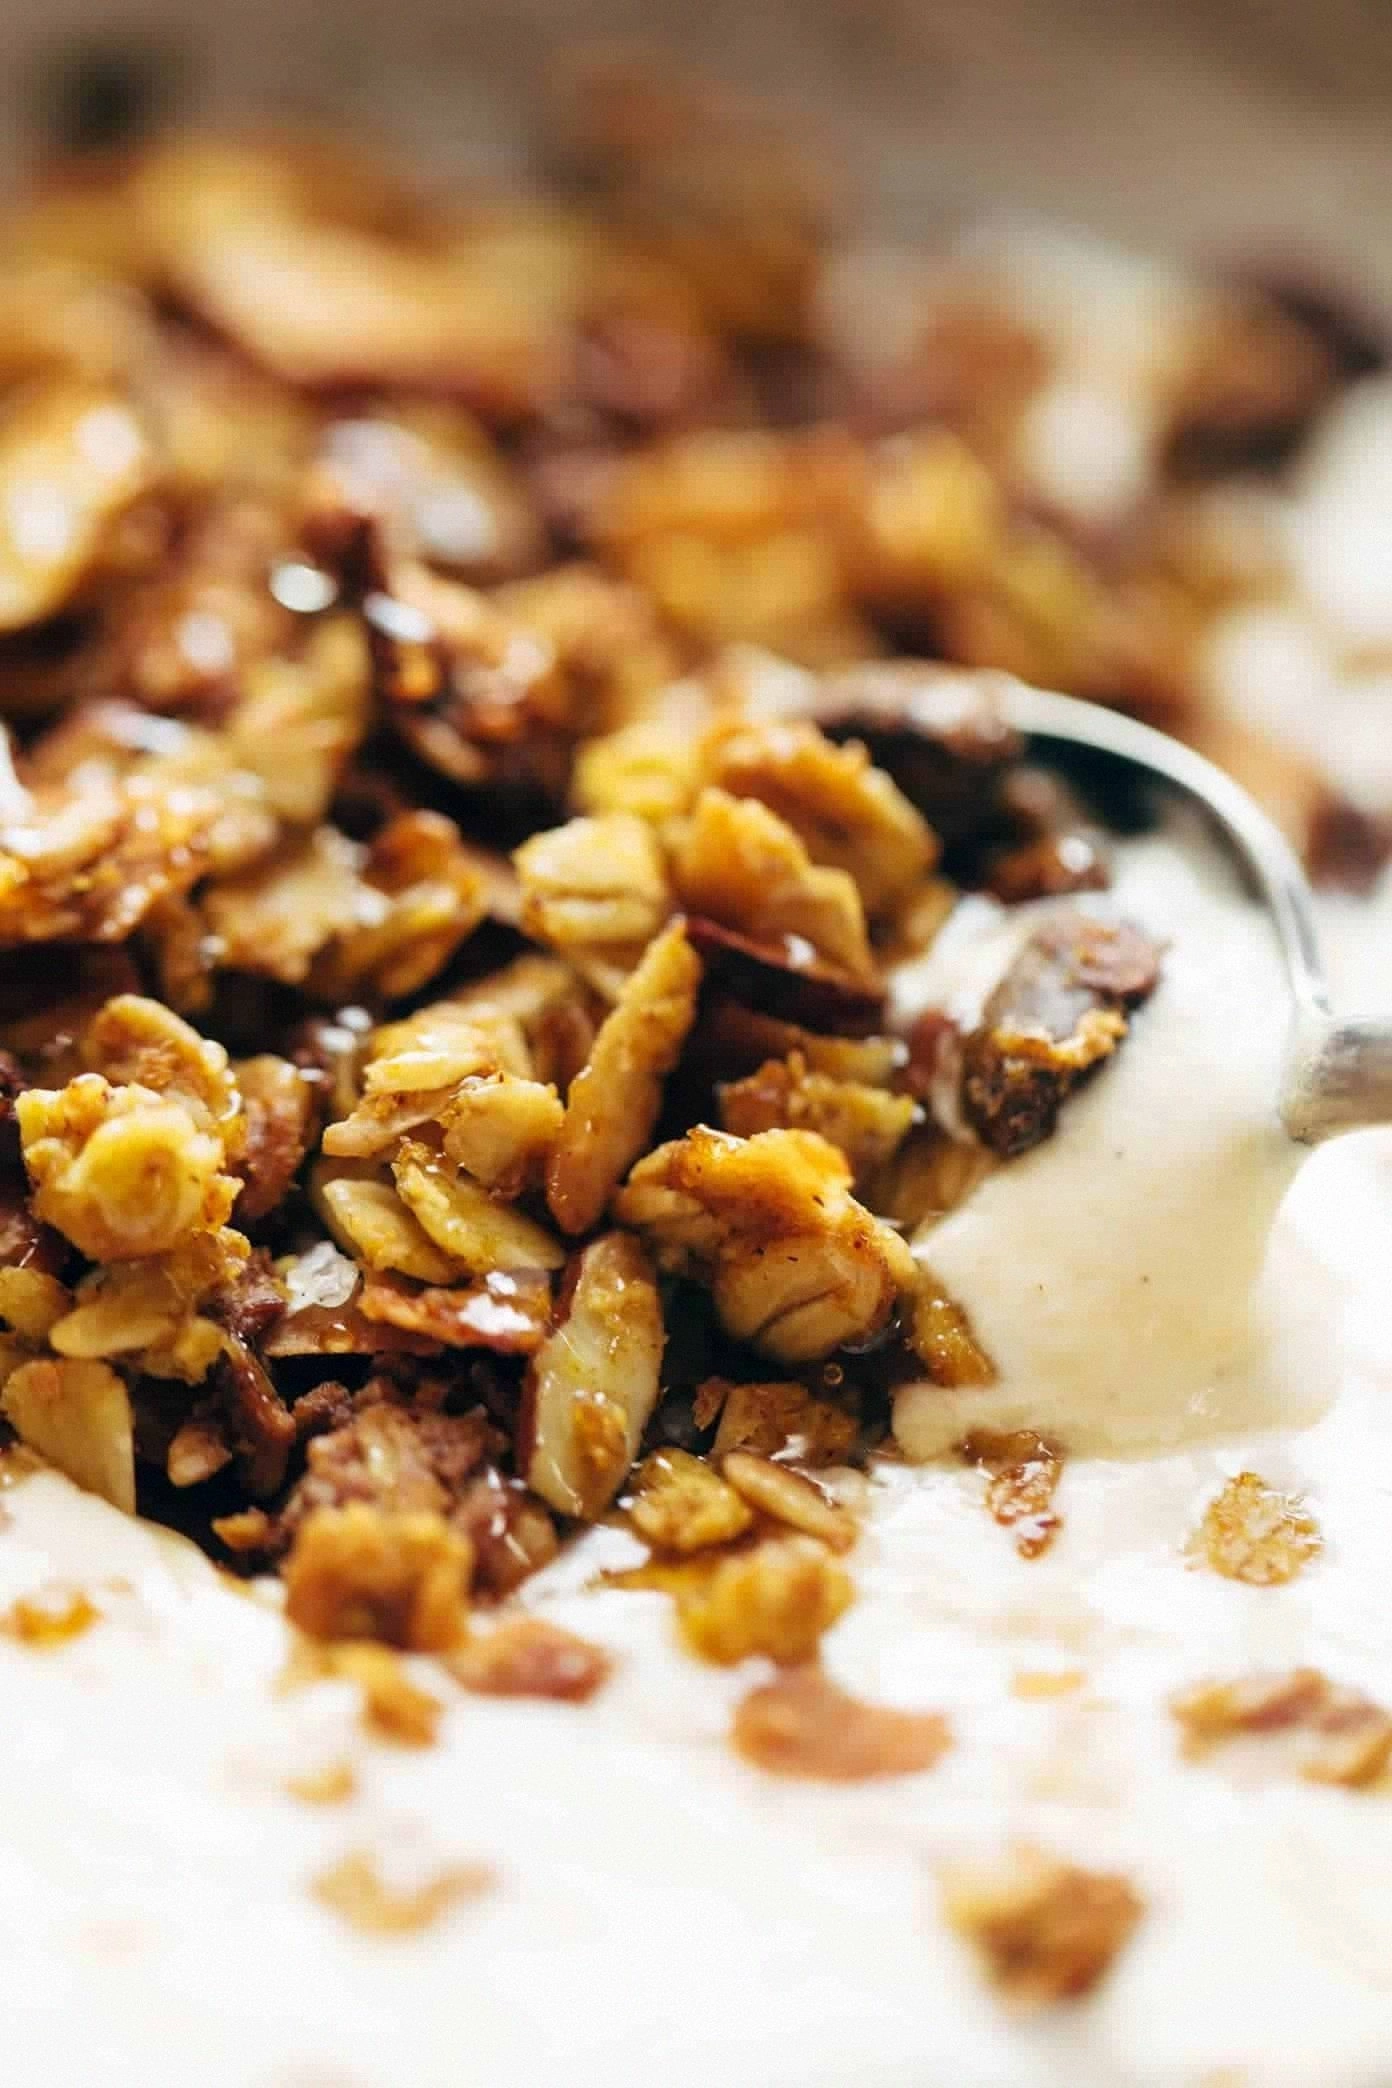
Picture this: the oven preheats, the air filling the kitchen with the warm, caramelized scent of maple syrup mingling with toasted quinoa. The sound of the granola mixture hitting the hot baking sheet is a gentle sizzle that feels like applause for the ingredients about to transform. My hands were covered in a sticky, golden glaze that clung to the quinoa like a sweet armor, and the oats were already whispering promises of crisp edges that would shatter like thin ice under a spoon. The texture was already dancing in my mind—crunchy, light, and just a touch chewy from the quinoa’s natural puff.
Most granola recipes get the balance wrong: they either end up too sweet, too soggy, or they hide the star of the show—quinoa—behind a cloud of sugar. This version, however, flips the script by using quinoa as the backbone, giving you a protein boost that feels like a secret weapon in every bite. The maple syrup isn’t just a sweetener; it’s a flavor catalyst that caramelizes perfectly, creating glossy clusters that cling together without turning into a hard brick. And the best part? You won’t need a ton of fancy equipment—just a mixing bowl, a baking sheet, and the willingness to trust the process.
There’s a technique in this recipe that I swear will change the way you think about granola forever: I toast the quinoa separately before mixing it with the oats and nuts. This step adds a depth of flavor that most recipes skip, and it also ensures every piece gets an even crunch. I’ll walk you through every single step—by the end, you’ll wonder how you ever made granola any other way. Okay, ready for the game‑changer?
What Makes This Version Stand Out
- Protein‑Packed: Quinoa adds a plant‑based protein boost that ordinary oat‑only granola can’t match, keeping you fuller longer.
- Maple Magic: Real maple syrup creates a caramelized glaze that’s sweet without being cloying, and it brings a subtle woodsy note.
- Crisp Layers: By spreading the mixture thinly and turning it halfway, you get airy, crunchy shards instead of dense clusters.
- Simple Swaps: The recipe is flexible—swap almonds for pecans or coconut oil for butter without compromising texture.
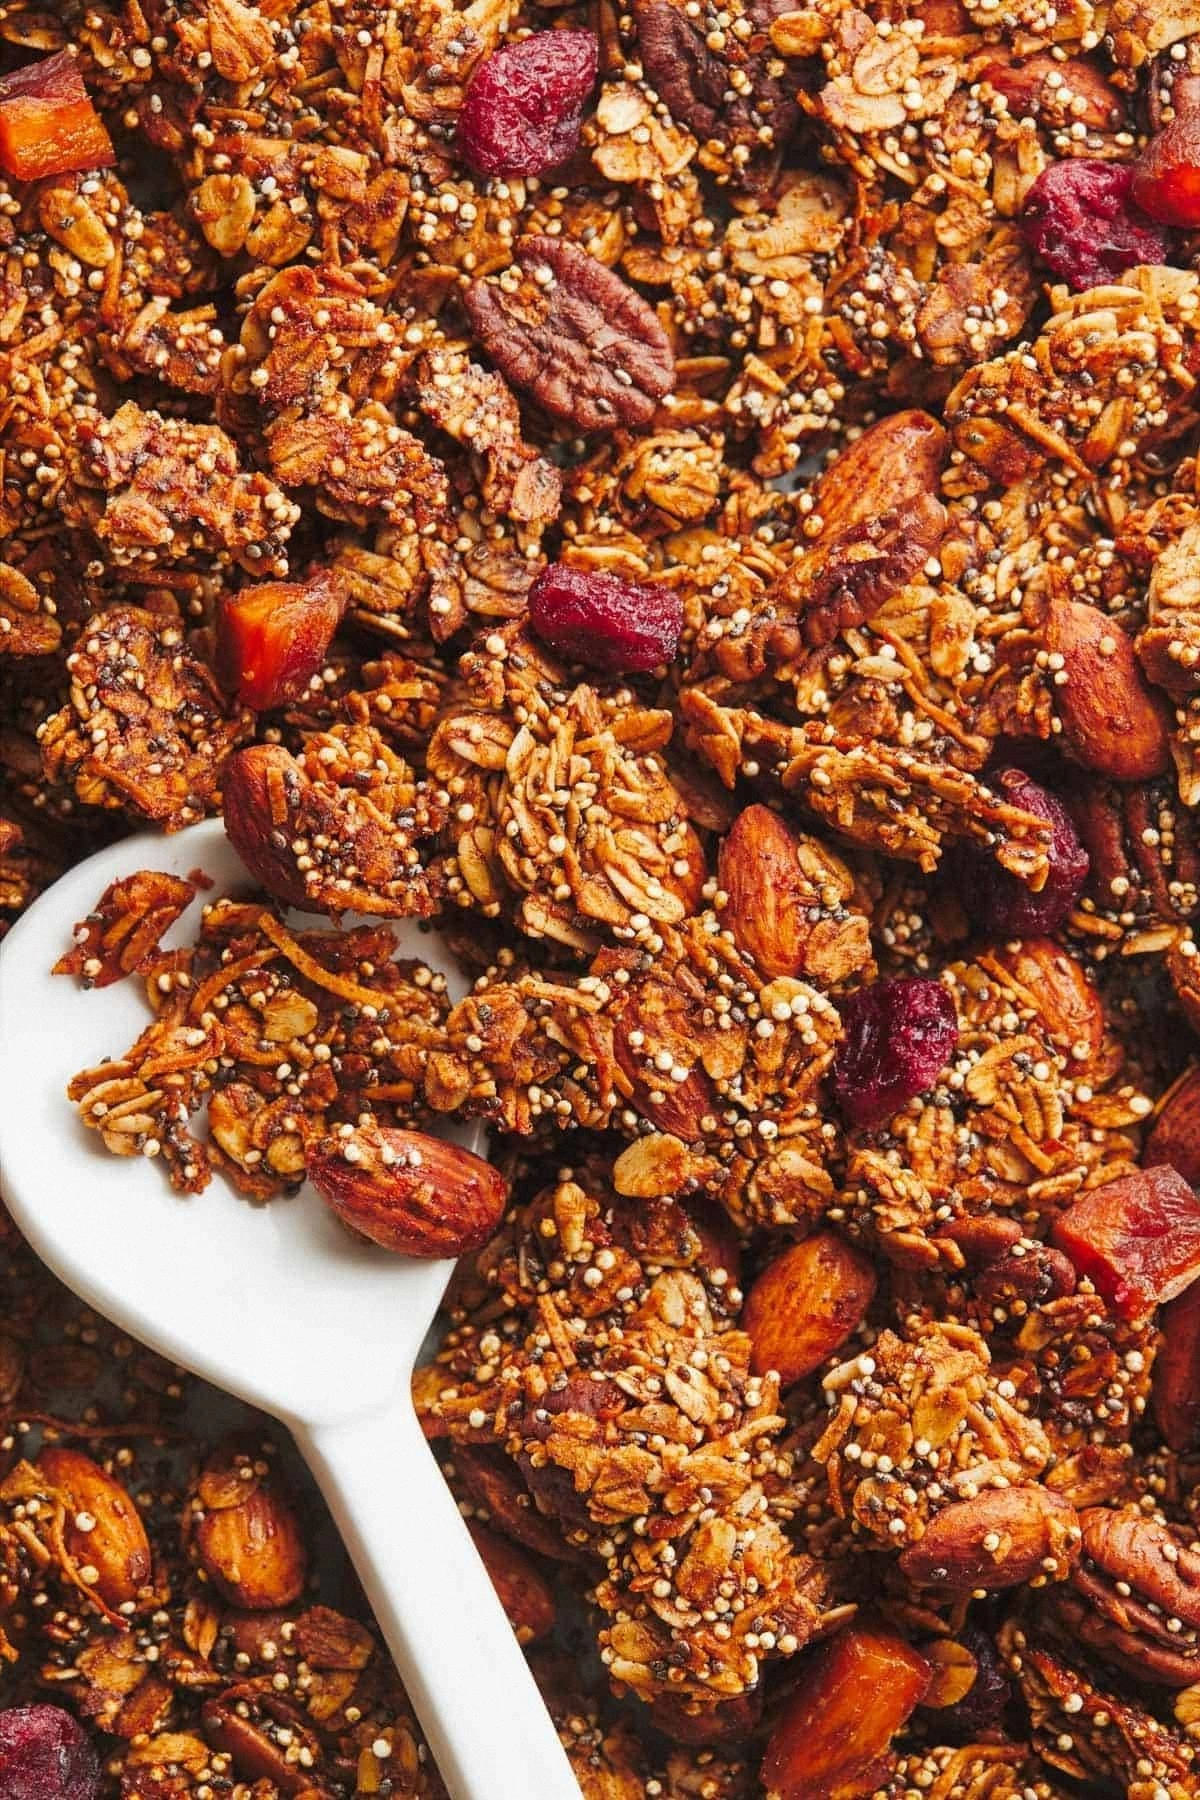
- Visual Appeal: Golden‑brown edges contrasted with specks of toasted quinoa make it look as good as it tastes.
- Make‑Ahead Power: This granola stays crunchy for weeks if stored right, making it a perfect grab‑and‑go breakfast.
- All‑Day Energy: The balanced carbs, protein, and healthy fats give you sustained energy from sunrise to sunset.
- Family‑Friendly: Even picky eaters love the sweet maple flavor, and the nut‑free version still shines.
Inside the Ingredient List
The Flavor Base
Maple syrup is the sweet heart of this granola. It seeps into every nook, creating a glossy coat that caramelizes during baking. If you swap it for honey, expect a slightly floral note and a lighter color, but you’ll lose that deep amber hue. For the best flavor, use a pure, grade‑A maple syrup; the darker the grade, the richer the taste.
The Texture Crew
Rolled oats provide the classic crunch, while quinoa adds a surprising puffiness that makes each bite feel airy. Toasted almonds contribute a buttery snap, and pumpkin seeds add a buttery, slightly salty pop. If you’re allergic to nuts, try toasted sunflower seeds or roasted chickpeas for a similar crunch without the nut profile.
The Unexpected Star
Shredded coconut isn’t just a garnish; it absorbs a bit of the maple glaze, turning golden and slightly crisp on the edges. This gives the granola a tropical whisper that balances the earthy quinoa. When choosing coconut, go for unsweetened to keep the sweetness in check.
The Final Flourish
A pinch of sea salt and a dash of cinnamon are the secret weapons that cut through the sweetness and add warmth. The vanilla extract rounds out the flavor, making the aroma linger long after the baking is done. If you love spice, a pinch of nutmeg or ginger will add an extra layer of complexity.
Everything’s prepped? Good. Let’s get into the real action and turn these humble ingredients into a bowl‑full of breakfast brilliance.
The Method — Step by Step
The first move is to preheat your oven to 325°F (163°C). While the oven warms, spread a parchment‑lined baking sheet with a thin layer of coconut oil—just enough to keep the granola from sticking. The heat will be gentle enough to toast without burning, giving you that golden‑brown perfection. That sizzle when the oil hits the pan? Absolute perfection.
While the oven does its thing, toast the quinoa. Heat a dry skillet over medium heat, add the cooked quinoa, and stir constantly for 3‑4 minutes until you smell a nutty fragrance. This step is pure magic—don’t skip it, or you’ll miss out on the extra crunch.
Kitchen Hack: Use a large spoon to toss the quinoa in the skillet; it prevents clumping and ensures even toasting.In a massive mixing bowl, combine rolled oats, toasted quinoa, chopped almonds, pumpkin seeds, and shredded coconut. Toss them together until they’re uniformly distributed. This is the moment where you can feel the future texture in your hands—dry, fluffy, and waiting for that sweet coating.
In a separate small saucepan, melt coconut oil over low heat, then whisk in maple syrup, vanilla extract, cinnamon, and sea salt. Let the mixture simmer for just 30 seconds—enough to blend but not so long that the syrup darkens.
Watch Out: If the mixture starts to boil vigorously, lower the heat immediately; burnt maple will turn bitter.Pour the glossy maple‑oil mixture over the dry ingredients. Using a sturdy spoon, fold everything together until every oat, quinoa puff, and nut is glossy with the sweet coating. You’ll notice the mixture clumping slightly—that’s a good sign that the syrup is binding the granola into crunchy clusters.
Spread the mixture evenly on the prepared baking sheet, pressing it down lightly with a spatula. The thinner the layer, the crispier the final product, so resist the urge to pile it high. Slide the sheet into the oven and bake for 20 minutes.
After the first 20 minutes, pull the sheet out and give the granola a good stir, breaking up any large clumps. This ensures even browning and prevents the edges from over‑caramelizing. Return the sheet to the oven for another 10‑15 minutes, watching closely for a deep amber hue.
When the edges start pulling away from the pan and the scent of toasted maple fills the kitchen, it’s time to pull the granola out. Let it cool completely on the sheet—this cooling stage is crucial because the granola continues to crisp as it loses heat. Once cooled, stir in dried cranberries if you like a burst of tangy sweetness.
Transfer the finished granola to an airtight container. It will stay crunchy for up to two weeks, but if you notice any soft spots, pop it back in a 150°F oven for 5 minutes to revive the crunch. That’s it—you did it. But hold on, I’ve got a few more tricks that'll take this to another level...
Insider Tricks for Flawless Results
The Temperature Rule Nobody Follows
Most home bakers set the oven to a high heat and hope for the best, but granola thrives at a low, steady temperature. Baking at 325°F allows the sugars to caramelize slowly, preventing burnt edges while still achieving that golden crunch. If you push the heat up to 375°F, you’ll risk a bitter, over‑cooked flavor and uneven texture. Trust the lower temp; it’s the secret to that perfect, even snap.
Why Your Nose Knows Best
Your kitchen nose is your best timer. When the aroma shifts from sweet to nutty and a faint caramel scent rises, you’re about 5 minutes away from perfection. Don’t rely solely on the clock—listen to that fragrant cue. I once left a batch in too long because I ignored the scent, and the result was a hard, bitter brick. Let your nose be the guide, and you’ll always end up with a fragrant, fluffy granola.
The 5‑Minute Rest That Changes Everything
After baking, let the granola rest on the sheet for exactly five minutes before stirring. This short pause lets the syrup set, creating those irresistible clusters that don’t melt together. Skipping this rest makes the granola too loose, and you’ll end up with a soggy mess. I’m serious—those five minutes are a game‑changer.
Stirring Strategy
When you stir the granola halfway through baking, use a gentle folding motion rather than a vigorous scramble. This technique keeps the clusters intact while ensuring every corner gets toasted. A friend once aggressively mixed the granola at the midway point, and the result was uneven browning and broken pieces. Keep it gentle, and you’ll preserve those crunchy shards.
Cool‑Down Crunch
The moment you pull the granola from the oven, it’s still soft. As it cools, it hardens into that satisfying crunch we all crave. If you’re impatient and try to eat it warm, you’ll get a gummy texture. Patience is a virtue here—let it sit for at least 20 minutes before tasting, and the crunch will be worth the wait.
Creative Twists and Variations
This recipe is a playground. Here are some of my favorite ways to switch things up:
Chocolate Drizzle Delight
After the granola cools, melt dark chocolate and drizzle it over the top. The bitter chocolate contrasts the sweet maple, creating a sophisticated flavor duo. It’s perfect for a brunch treat or a gift‑ready snack.
Spicy Autumn Burst
Add a teaspoon of pumpkin pie spice and a pinch of cayenne to the dry mix. The warm spices echo the maple, while the subtle heat gives the granola a surprising kick that’s perfect for cooler months.
Tropical Sunshine
Swap the almonds for toasted macadamia nuts and add dried pineapple chunks after baking. The tropical fruit adds a chewy, sweet contrast to the crunchy base, turning breakfast into a beach‑side escape.
Nut‑Free Power
Replace all nuts with extra pumpkin seeds and roasted chickpeas. The chickpeas become a crunchy, protein‑rich alternative that still holds the granola together, making it safe for nut‑allergic friends.
Cinnamon‑Apple Crunch
Stir in finely diced dried apples and increase the cinnamon to 1½ teaspoons. The apples rehydrate slightly, adding a tender chew that pairs beautifully with the maple sweetness.
Storing and Bringing It Back to Life
Fridge Storage
If you live in a humid climate, store the granola in an airtight container in the refrigerator. It stays crisp for up to three weeks, and the cool environment prevents moisture from softening the clusters. Just let it sit at room temperature for a few minutes before serving to regain full crunch.
Freezer Friendly
Granola freezes like a champ. Portion it into zip‑top bags, squeeze out excess air, and freeze for up to three months. When you need a quick snack, thaw a handful at room temperature, and you’ll have a fresh‑tasting batch in seconds.
Best Reheating Method
To revive any lost crunch, spread the granola on a baking sheet and warm it in a 150°F oven for 5‑7 minutes. Adding a tiny splash of water (about a tablespoon) before reheating creates a gentle steam that restores the texture without making it soggy. This trick is perfect for when you’ve stored the granola for a while and want it to taste brand‑new.