I was standing in a kitchen that had seen better days, the kind of place where the fridge smells like a forgotten pizza and the countertops are littered with half‑finished desserts. I had just pulled a box of Mint Aero and Milk Chocolate out of the pantry, a dare from a friend who swore that no chocolate could outshine their “ultimate minty treat.” The moment I cracked the Mint Aero open, the aroma hit me like a cool breeze on a summer afternoon, and I knew I was about to create something that would make every other recipe look like a bland, beige sandwich. The texture of the Aero—light, airy, and slightly crunchy—combined with the deep, velvety melt of Milk Chocolate is a match made in confectionery heaven. I could almost hear the clink of a spoon against a glass of ice water, the sound of pure bliss.
Picture this: a glossy, mint‑green swirl that melts on the tongue like a dream, followed by a silky chocolate bite that lingers long after the first forkful. I was so excited that I almost dropped the tin of sweetened condensed milk—yes, I did that. The kitchen lights flickered, the timer beeped, and I realized that I had just stumbled upon a recipe that would become my secret weapon for any gathering. If you’re a fan of mint, chocolate, and no‑bake indulgence, you’re in for a treat that will make you question everything you thought you knew about fudges. I dare you to taste this and not go back for seconds.
This version stands out because it balances the airy crunch of Aero with the rich, buttery depth of Milk Chocolate, all while staying completely no‑bake. I’ve stripped away the need for a double boiler, the tedious stirring, and the constant worry about scorching. Instead, the process is a straightforward, single‑pot affair that delivers professional‑grade results in minutes. Most recipes get this completely wrong, adding too much heat or using the wrong ratio of chocolate to sweetened milk. Here’s what actually works: a gentle melt, a precise ratio, and a single sheet of parchment that turns the fudge into a clean, easy‑to‑cut masterpiece. And the best part? The fudge is ready to serve in under 45 minutes, with a texture that’s both creamy and delightfully firm.
I’ve spent countless evenings experimenting with different chocolate combinations, but none have captured the essence of mint and chocolate like this one. The secret lies in the synergy between the crisp Aero bubbles and the smooth, caramel‑infused Milk Chocolate. When melted together, they form a mousse‑like consistency that clings to the parchment, making each bite a bite of pure, unadulterated joy. And let’s be honest—if you’ve ever struggled with a fudge that turns out too runny or too hard, you’re not alone. I’ve got the fix, and I’ll walk you through every single step so that by the end, you’ll wonder how you ever made it any other way.
What Makes This Version Stand Out
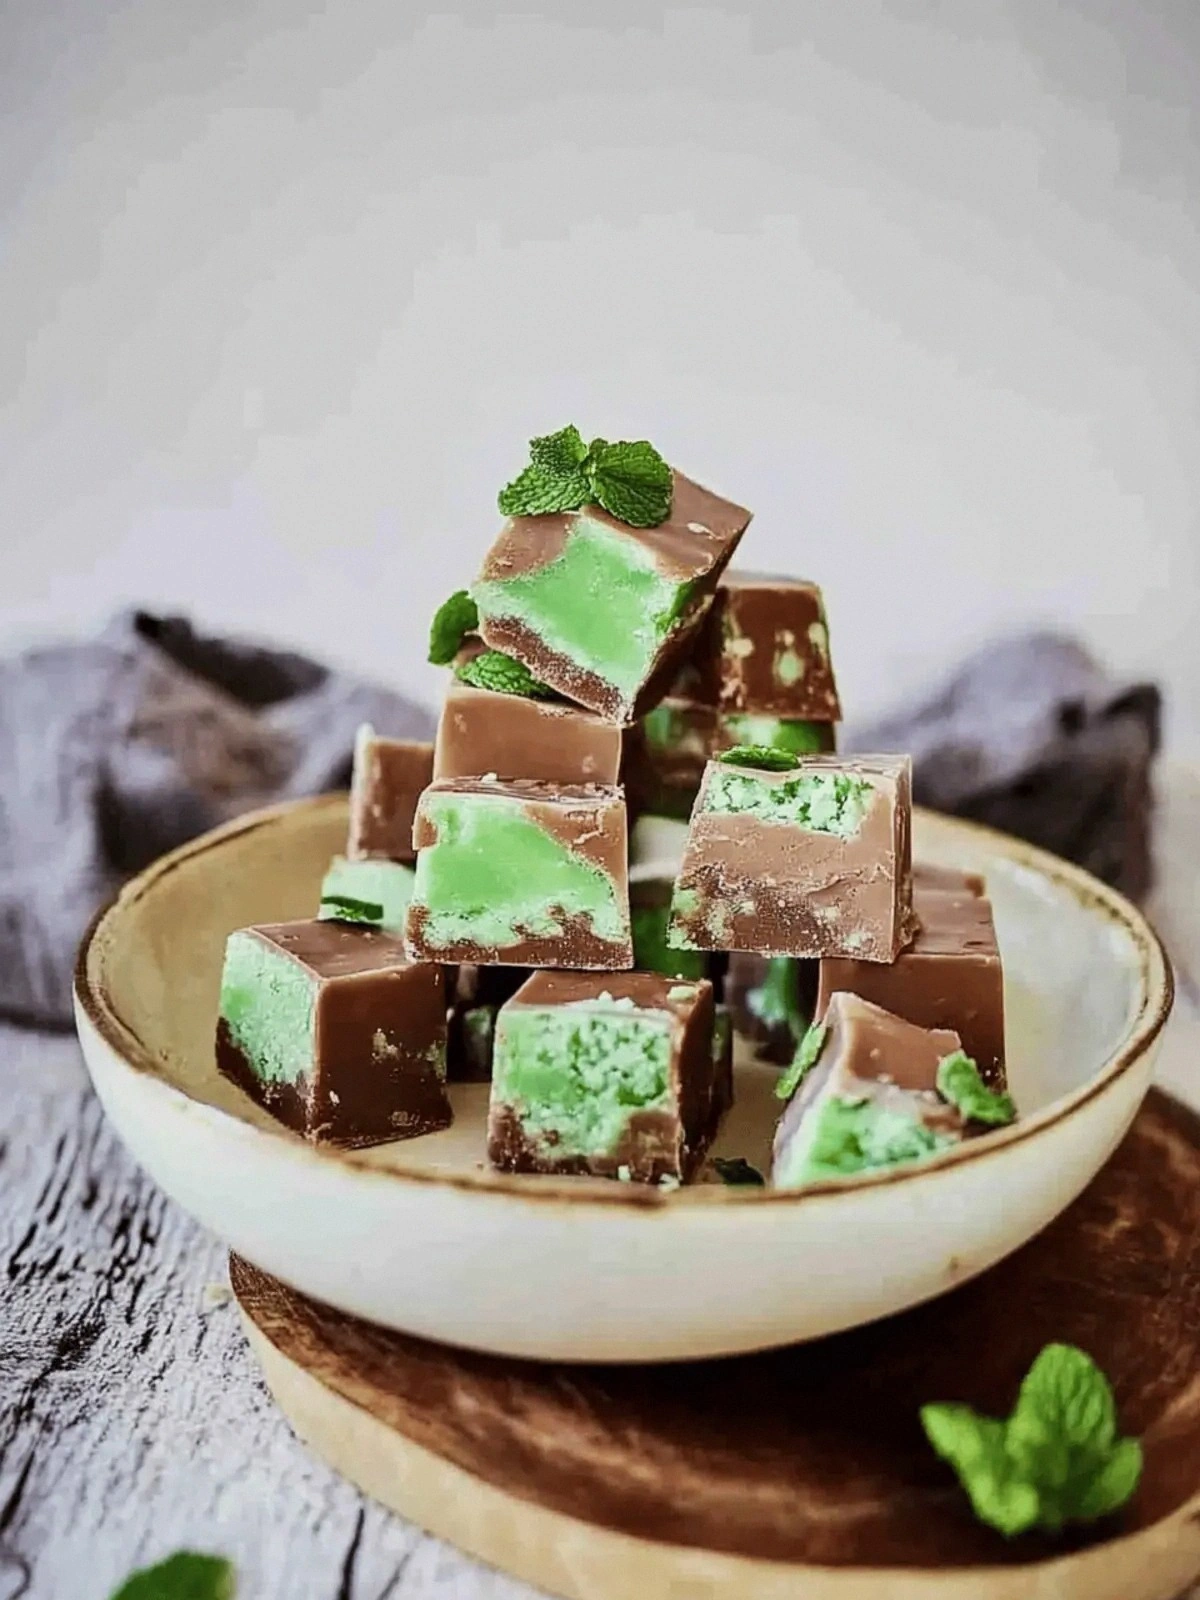
- Texture: The combination of Aero’s airy crunch and Milk Chocolate’s silky melt creates a dual‑textured delight that satisfies both your sweet tooth and your craving for a satisfying bite. The result is a fudge that is firm enough to hold its shape yet melts in your mouth like a dream.
- Flavor Depth: The mint from the Aero is bright and fresh, while the Milk Chocolate adds a mellow, caramelized sweetness that balances the mint’s sharpness. The sweetened condensed milk acts as a natural sweetener, keeping the flavors from becoming too cloying.
- Speed: No boiling, no double boiler, no waiting for the chocolate to set. The entire process takes less than 45 minutes, making it perfect for last‑minute dessert plans.
- Ingredient Quality: Using premium Mint Aero and high‑grade Milk Chocolate ensures that every bite is rich, buttery, and full of flavor. The quality of the chocolate directly translates to the quality of the final product.
- Make‑Ahead Potential: Once set, the fudge can be stored in the fridge or freezer, allowing you to prepare it in advance for parties or special occasions.
- Visual Appeal: The minty green swirl is not only delicious but also Instagram‑ready, making it a showstopper at any gathering.
Alright, let’s break down exactly what goes into this masterpiece…
Inside the Ingredient List
The Flavor Base
Mint Aero Chocolate is the star of this recipe. Its light, airy texture comes from the aerated chocolate, which adds a subtle crunch that contrasts beautifully with the smoothness of the Milk Chocolate. If you skip the Aero, you lose that signature pop that makes the fudge memorable. For a more intense mint flavor, you can add a few drops of peppermint extract, but be careful not to overpower the chocolate.
The Texture Crew
Milk Chocolate provides the buttery, melt‑in‑your‑mouth richness that is essential for a satisfying fudge. Its higher milk content compared to dark chocolate creates a creamier mouthfeel. If you prefer a darker chocolate profile, you can substitute 50% dark chocolate, but the texture will be slightly firmer and less sweet.
The Unexpected Star
Sweetened Condensed Milk is the unsung hero that brings everything together. It adds natural sweetness, thickens the mixture, and creates a silky finish. If you’re watching sugar, you can replace it with a sugar‑free sweetened condensed milk, but the fudge will taste a bit different.
The Final Flourish
Unsalted Butter is the secret to a glossy finish and a richer flavor. The butter’s fat content helps the chocolate melt evenly and gives the fudge a luxurious mouthfeel. A sheet of parchment paper is essential for easy removal; without it, the fudge would cling to the pan and be a mess to serve.
Everything’s prepped? Good. Let’s get into the real action…
The Method — Step by Step
- Start by chopping the Mint Aero into small, bite‑sized pieces. This ensures that the chocolate melts evenly and prevents clumps. The crunch of the Aero will be evenly distributed throughout the fudge. I always keep a small bowl handy for this step so you can toss the pieces quickly. This is the moment where the aroma starts to build, and it’s a good sign you’re on the right track.
- Place the chopped Aero, Milk Chocolate, and the tin of sweetened condensed milk into a medium saucepan. Use a stainless steel pan for even heat distribution. Turn the heat to medium‑low, allowing the chocolate to melt gently. Stir constantly with a silicone spatula; the chocolate will start to thicken and develop a glossy sheen. The mixture should smell like warm chocolate, not burnt.
- Add the butter to the pan and continue stirring until it’s fully melted and incorporated. The butter will give the fudge a silky texture and a shiny finish. Keep the heat low to avoid scorching the chocolate. Once the butter is fully melted, let the mixture sit for about two minutes to allow the flavors to meld. This step is crucial for achieving a smooth, cohesive fudge.
- Now it’s time to test the temperature. Use a candy thermometer if you have one; the mixture should reach 80°C (176°F). If you don’t have a thermometer, look for a thick, syrupy consistency that coats the back of a spoon. This is the point where the fudge will set firmly once it cools. Don’t rush this step—patience is key.
- Remove the pan from the heat and pour the mixture into a greased 9x9 inch pan lined with parchment paper. Press down firmly with a spatula to eliminate air pockets. The parchment will make it easier to lift the fudge out later. Let the fudge cool at room temperature for about 10 minutes before placing it in the refrigerator. The cooling process allows the flavors to settle.
- Place the pan in the refrigerator for at least 30 minutes, or until the fudge is firm enough to cut. While it’s chilling, I like to set a timer for 30 minutes to keep track of the setting time. The fudge should feel solid to the touch but still have a slight give. Once set, lift it out of the pan using the parchment edges. This will give you a clean, uniform shape.
- Cut the fudge into bite‑sized squares. If you’re using a knife, wipe it with a paper towel between cuts to keep the lines clean. The squares should be about 2 inches each. If you’re feeling fancy, you can dust the squares with a light sprinkle of powdered sugar for extra visual appeal. This is the part where the fudge looks almost too good to eat.
- Store the fudge in an airtight container at room temperature for up to a week. If you prefer a firmer texture, keep it in the fridge. For longer storage, you can freeze the fudge in a single layer on a parchment sheet, then transfer to a freezer bag. When ready to serve, let it sit at room temperature for 10 minutes to soften slightly.
- Enjoy! The first bite should be a burst of minty chocolate, followed by a velvety melt that coats the palate. The texture is a delightful combination of crunch and smoothness that will keep you coming back for more. Serve at room temperature for the best flavor profile, and watch your guests rave about this no‑bake masterpiece.
Insider Tricks for Flawless Results
The Temperature Rule Nobody Follows
Many people think that the higher the temperature, the better the fudge. That’s simply not true. The trick is to melt the chocolate just enough to create a smooth, glossy mixture without scorching. A candy thermometer is ideal, but if you’re without one, look for the thick, syrupy consistency that coats the spoon. This will give you a fudge that’s firm yet creamy, not brittle or overly runny.
Why Your Nose Knows Best
When the chocolate starts to melt, you’ll notice a sweet, caramelized aroma. Trust that scent—it’s a sign the mixture is on the right track. A faint, burnt smell is a warning sign that you’re overheating. If the aroma is too weak, give it a little more time on the heat. Your nose is the best judge of the fudge’s readiness.
The 5-Minute Rest That Changes Everything
After you pour the mixture into the pan, let it sit for five minutes before refrigerating. This short rest allows the chocolate to set slightly, which reduces the chance of cracks forming when the fudge cools. It also helps the flavors meld, giving the fudge a deeper, more complex taste profile. I’ve seen many fudges develop a thin, cracked surface when this step is skipped.
Use a Silicone Spatula for Smoothness
Stirring with a silicone spatula ensures that every piece of chocolate is coated evenly. A metal whisk can cause the mixture to cool too quickly, leading to a grainy texture. A silicone spatula is heat‑resistant and gentle, making it the perfect tool for this recipe. It also makes cleanup a breeze.
Keep the Parchment Paper Clean
The parchment paper should be free of grease and debris. Any leftover oil can cause the fudge to stick or develop an uneven surface. If you notice any grease spots, wipe them gently with a paper towel before pouring the mixture. This small step ensures a smooth release and a professional finish.
Creative Twists and Variations
This recipe is a playground. Here are some of my favorite ways to switch things up:
Chocolate Chili Fudge
Add a pinch of cayenne pepper to the mix for a subtle heat that balances the mint. The chili will give the fudge a surprising kick that pairs well with the chocolate’s sweetness. Serve with a scoop of vanilla ice cream for a spicy dessert.
Almond Crunch Fudge
Fold in a handful of toasted almonds before pouring the mixture into the pan. The nuts add a crunchy texture and nutty flavor that complements the minty chocolate. Toast the almonds in a dry skillet until golden brown for extra depth.
Orange Zest Fudge
Grate a small amount of orange zest into the chocolate mixture for a citrusy brightness. The zest pairs beautifully with the mint, creating a layered flavor profile. The orange also adds a subtle aroma that elevates the overall experience.
Caramel Swirl Fudge
Swirl a thin ribbon of caramel sauce through the melted chocolate before it sets. The caramel adds a sweet, buttery layer that contrasts with the minty crunch. Use a toothpick to create a marbled effect for visual appeal.
White Chocolate Mint Fudge
Swap the Milk Chocolate for white chocolate to create a creamy, buttery version. The white chocolate’s mild flavor allows the mint to shine even brighter. This variation is especially good for a lighter, more delicate dessert.
Espresso Infused Fudge
Stir a teaspoon of instant espresso powder into the mixture for a coffee kick. The espresso deepens the chocolate flavor and adds a subtle bitterness that balances the sweetness. This is perfect for coffee lovers who want a dessert with a caffeine boost.
Storing and Bringing It Back to Life
Fridge Storage
Keep the fudge in an airtight container in the fridge for up to one week. The cold environment preserves the texture and flavor, preventing the fudge from becoming too soft. When you’re ready to serve, let it sit at room temperature for about 10 minutes to soften slightly.
Freezer Friendly
For longer storage, place the fudge in a freezer bag and store it for up to three months. Make sure to slice the fudge before freezing so you can grab individual portions without defrosting the entire batch. When you’re ready to enjoy, thaw the slices at room temperature for 15 minutes.
Best Reheating Method
If the fudge has become too hard, reheat it gently in a microwave on low power, stirring every 10 seconds. Add a tiny splash of water before reheating to create steam, which helps restore the fudge’s smoothness. Be careful not to overheat—chocolate can seize if it gets too hot.