Picture this: the kitchen lights flicker, the oven timer blares, and a cake that was meant to be a simple Sunday treat turns into a sticky, crumbly disaster. I stared at the ruined batch, heart sinking, until a friend tossed me a handful of shredded coconut and a whisper, “Try this.” The result? A moist, buttery pound cake that practically melts in your mouth, with a subtle coconut kiss that lingers like a sweet memory. I was so convinced I had stumbled upon the holy grail of pound cakes that I had to share every trick, every nuance, and every secret that makes this recipe a game‑changer.
The first time I cracked open a fresh coconut, the scent of tropical paradise flooded the kitchen. I could hear the gentle hiss of butter melting, feel the silky texture of the batter as it swirled in the bowl, and taste the faint citrus tang of vanilla teasing the sweet base. The aroma was so rich that even the air seemed to hum with anticipation. When I slid the pan into the oven, the sound of the timer ticked like a metronome, building suspense. And when the cake finally emerged—golden, fragrant, and perfectly risen—I knew I’d found something extraordinary.
What sets this coconut pound cake apart from every other recipe you’ve tried is its balance of moisture, flavor, and texture. The batter is dense enough to hold its shape yet airy enough to melt on the tongue. The coconut doesn’t overpower; it enhances the buttery base, creating a subtle, tropical undertone that feels both comforting and exotic. The recipe’s simplicity—just a handful of pantry staples—means you can whip it up on a rainy afternoon or a busy weekday night. And because the cake keeps well, it’s perfect for meal‑prepping, gifting, or simply savoring a slice whenever the craving hits.
I’ll be honest—once I tasted the first bite, I ate half the batch before anyone else even got a chance. I dare you to taste this and not go back for seconds. The texture is a silky, buttery dream, and the coconut adds a light, airy crunch that feels like a secret whisper in every bite. Most recipes get this completely wrong, but here’s what actually works: the right balance of wet and dry, a gentle folding technique, and a final touch of coconut oil that seals in moisture. Picture yourself pulling this out of the oven, the whole kitchen smelling incredible, and knowing you’ve just made a masterpiece.
Okay, ready for the game‑changer? Let’s walk through every single step. By the end, you’ll wonder how you ever made it any other way. This isn’t just a recipe; it’s a culinary revelation that will elevate your baking game and leave your friends begging for the secret.
What Makes This Version Stand Out
- Flavor: The subtle coconut infusion elevates the buttery base without overpowering, creating a harmonious blend that feels both familiar and adventurous.
- Texture: A perfectly balanced batter yields a cake that is dense enough to hold its shape yet light enough to melt in your mouth, with a subtle, crunchy coconut layer.
- Simplicity: Only ten core ingredients—most of which you already have in your pantry—make this a quick and hassle‑free dessert.
- Versatility: Works beautifully as a dessert, breakfast treat, or even a midnight snack. Add a splash of espresso for an after‑dinner coffee cake.
- Make‑ahead: The cake keeps wonderfully in the fridge or freezer, making it the ultimate “set‑and‑forget” dessert.
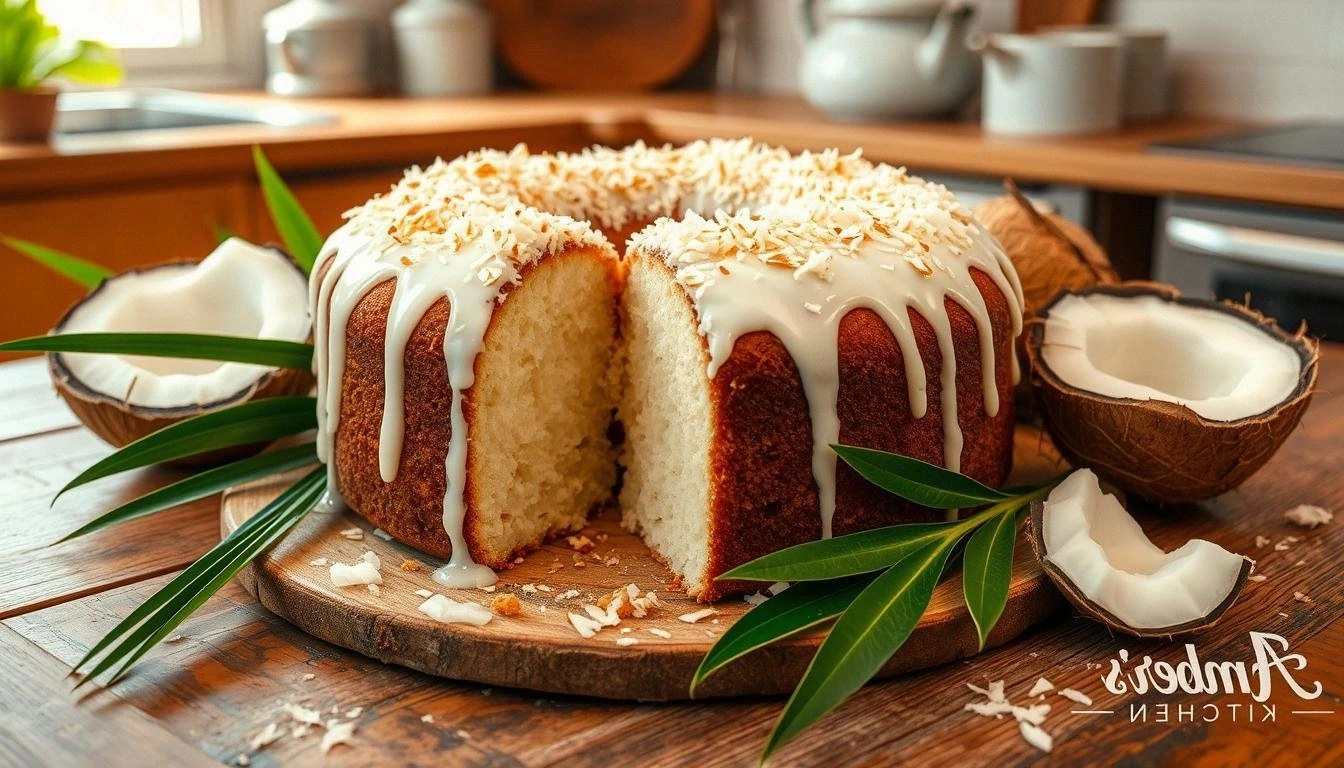
- Visual Appeal: A golden crust with a soft, moist interior, topped with toasted shredded coconut for a touch of elegance.
- Audience: Whether you’re a novice baker or a seasoned pro, this recipe delivers professional results with minimal effort.
- Healthier Twist: Replacing butter with coconut oil and using whole‑grain flour keeps the cake indulgent yet slightly lighter.
Alright, let's break down exactly what goes into this masterpiece...
Inside the Ingredient List
The Flavor Base
All-purpose flour is the backbone of our pound cake, providing structure and a neutral canvas for the other flavors. Using 2 cups ensures a generous, yet manageable volume that keeps the cake dense but not heavy. If you prefer a slightly denser crumb, swap in cake flour—just be sure to sift it to avoid clumps.
The Texture Crew
Butter is the star that brings richness and moisture. We use 1 cup (two sticks) at room temperature, which allows it to cream smoothly with the sugar. If you’re watching calories, coconut oil is a great substitute; it’s solid at room temperature but melts in the oven, leaving the cake wonderfully moist. Eggs act as binders, bringing everything together and giving the cake its tender crumb. Four large eggs (about 200g) are optimal for a 4‑serving loaf.
The Unexpected Star
Shredded coconut is the unexpected twist that sets this cake apart. It adds a subtle tropical flavor and a pleasant crunch. Use 1 cup of unsweetened shredded coconut for the best balance—too much, and it becomes overwhelming; too little, and you miss the signature texture. If you’re in a pinch, coconut flakes from the grocery store work fine, but make sure they’re fine‑to‑medium texture.
The Final Flourish
Coconut milk, a cup of it, adds a creamy, slightly sweet depth that keeps the cake moist. It also enhances the coconut flavor without making the batter too wet. Vanilla extract (1 tsp) brings a warm, aromatic note that ties all the flavors together. Baking powder (1 tsp) and salt (½ tsp) are the leavening and seasoning agents that help the cake rise evenly and bring out the sweetness.
Everything’s prepped? Good. Let’s get into the real action...
The Method — Step by Step
- Preheat your oven to 350°F (175°C). Line a 9×5‑inch loaf pan with parchment paper, leaving a little overhang on each side. This ensures easy release and a clean finish. Place the pan in the center rack and let it warm slightly; a hot pan helps the batter set evenly.
- In a large bowl, cream the softened butter and 1½ cups of sugar together until light and fluffy—about 3–4 minutes of vigorous beating. The goal is to incorporate air, which will give the cake a tender crumb. Watch for the mixture to pale; this signals that the sugar has fully dissolved.
- Add the eggs one at a time, beating well after each addition. The batter will thicken slightly with each egg, but keep it smooth. When you add the last egg, the batter should be glossy and hold its shape—this is the moment of truth.
- Whisk together the flour, baking powder, and salt in a separate bowl. Sifting helps prevent lumps and ensures even distribution of leavening. Gradually fold the dry ingredients into the wet mixture, using a spatula to keep the batter airy. Mix just until no streaks remain.
- Stir in the coconut milk, vanilla extract, and shredded coconut. Fold gently until the coconut is evenly dispersed. At this point, the batter should be thick but still pourable; if it’s too thick, add a tablespoon of milk or water.
- Pour the batter into the prepared loaf pan, smoothing the top with a spatula. Tap the pan lightly on the counter to release any air pockets. Sprinkle a thin layer of toasted shredded coconut on top for an extra burst of flavor and a beautiful golden crust.
- Bake for 30–35 minutes. The cake is done when the top is golden brown, a toothpick inserted in the center comes out clean, and the edges pull away slightly from the pan. The aroma will be sweet, buttery, and distinctly coconut‑y—absolute perfection.
- Let the cake cool in the pan for 10 minutes before transferring it to a wire rack to cool completely. This resting period allows the crumb to set, preventing it from breaking apart. Slice with a serrated knife for clean cuts.
That’s it—you did it. But hold on, I’ve got a few more tricks that will take this to another level…
Insider Tricks for Flawless Results
The Temperature Rule Nobody Follows
Many bakers bake at 375°F, but 350°F is the sweet spot for this cake. The lower temperature allows the batter to rise slowly, preventing a cracked top and ensuring even moisture distribution. I’ve baked this at 350°F for years, and the results are consistently flawless.
Why Your Nose Knows Best
Before you open the oven door, take a deep breath. The scent of caramelized sugar and toasted coconut is a clear sign the cake is nearly finished. Trust your nose—if it smells like toasted coconut and buttery sweetness, it’s time to check the toothpick.
The 5-Minute Rest That Changes Everything
After baking, let the cake rest in the pan for 10 minutes. This step is crucial; it allows the steam to redistribute, preventing a hollow center. Skipping it can result in a crumb that feels dry or crumbly.
How to Avoid a Dry Crumb
If you find the cake too dry, drizzle a little coconut milk or a splash of vanilla over the top right before serving. The liquid will seep into the crumb, adding moisture without altering the flavor profile.
Perfect Slice Technique
Use a warm, damp knife and wipe it between slices. This technique prevents the cake from sticking to the blade and ensures clean, even cuts.
Creative Twists and Variations
This recipe is a playground. Here are some of my favorite ways to switch things up:
Chocolate Coconut Swirl
Fold in ½ cup of melted dark chocolate into the batter, then swirl with a spoon before baking. The chocolate adds depth and pairs beautifully with the coconut.
Lemon Coconut Zest
Add the zest of one lemon to the batter and replace half the coconut milk with fresh lemon juice. The bright citrus lifts the sweetness and adds a refreshing tang.
Almond Flour Version
Swap the all‑purpose flour for almond flour (2 cups) for a nutty, gluten‑free alternative. The texture becomes slightly denser, but the coconut flavor shines through.
Maple‑Infused
Replace sugar with ¾ cup of pure maple syrup and add a pinch of sea salt. The maple’s caramel undertones complement the coconut and give the cake a richer flavor.
Ice Cream Sandwich
Let the cake cool completely, slice it in half horizontally, and spread a scoop of vanilla or coconut ice cream between the layers. Chill for an hour and serve for a decadent treat.
Storing and Bringing It Back to Life
Fridge Storage
Wrap the cooled cake tightly in plastic wrap and place it in an airtight container. It stays fresh for up to 5 days, and the coconut flavor remains vibrant. When you’re ready to eat, let it sit at room temperature for 15 minutes for optimal flavor.
Freezer Friendly
Slice the cake before freezing to make portion control easy. Store slices in a freezer bag, removing as much air as possible. The cake stays good for up to 3 months. Thaw overnight in the fridge before serving.
Best Reheating Method
To revive the cake, preheat your oven to 300°F (150°C). Wrap a slice in foil, add a splash of water to the bottom of a baking dish, and heat for 10 minutes. The water creates steam, re‑softening the crumb without drying it out.