Picture this: you’re standing in your kitchen, the clock ticking, a craving for something extraordinary that can turn a simple dinner into a headline act. I was halfway through a bland roast, the meat looking like a sad, pale slab, when a frantic call from a friend said, “I need a showstopper for tonight.” The kitchen smelled of burnt garlic, the silence broken only by the hiss of my stove. That night, I decided to rewrite the rules of rib roast, turning a humble cut into a masterpiece that would leave everyone in awe. I dare you to taste this and not go back for seconds.
I’m not just talking about a better roast; I’m talking about a transformation of flavor, texture, and aroma that will make your nose do a happy dance and your taste buds sing. The meat’s exterior will crackle like a campfire, the interior will melt into a juicy, buttery cloud, and the herbs will weave a fragrant tapestry that lingers long after the last bite. My confidence is sky‑high because this is hands down the best version you’ll ever make at home, and I’m about to spill every secret. If you’ve ever struggled with getting a rib roast that feels like a five‑star experience, you’re not alone—let’s fix that together.
Think of the sizzling moment when the roast hits the pan: the sound is music, the aroma is a promise of comfort, and the texture is a prelude to pure bliss. I’ll walk you through every single step, from the first aromatic rub to the final resting period, so that by the time you pull that roast out of the oven, the whole kitchen smells incredible and the anticipation is palpable. The technique I’ll share involves a surprising twist that most recipes ignore, and it’s the key to that unforgettable crust. Ready? Let’s dive in and create a standing rib roast that will have guests begging for your secret.
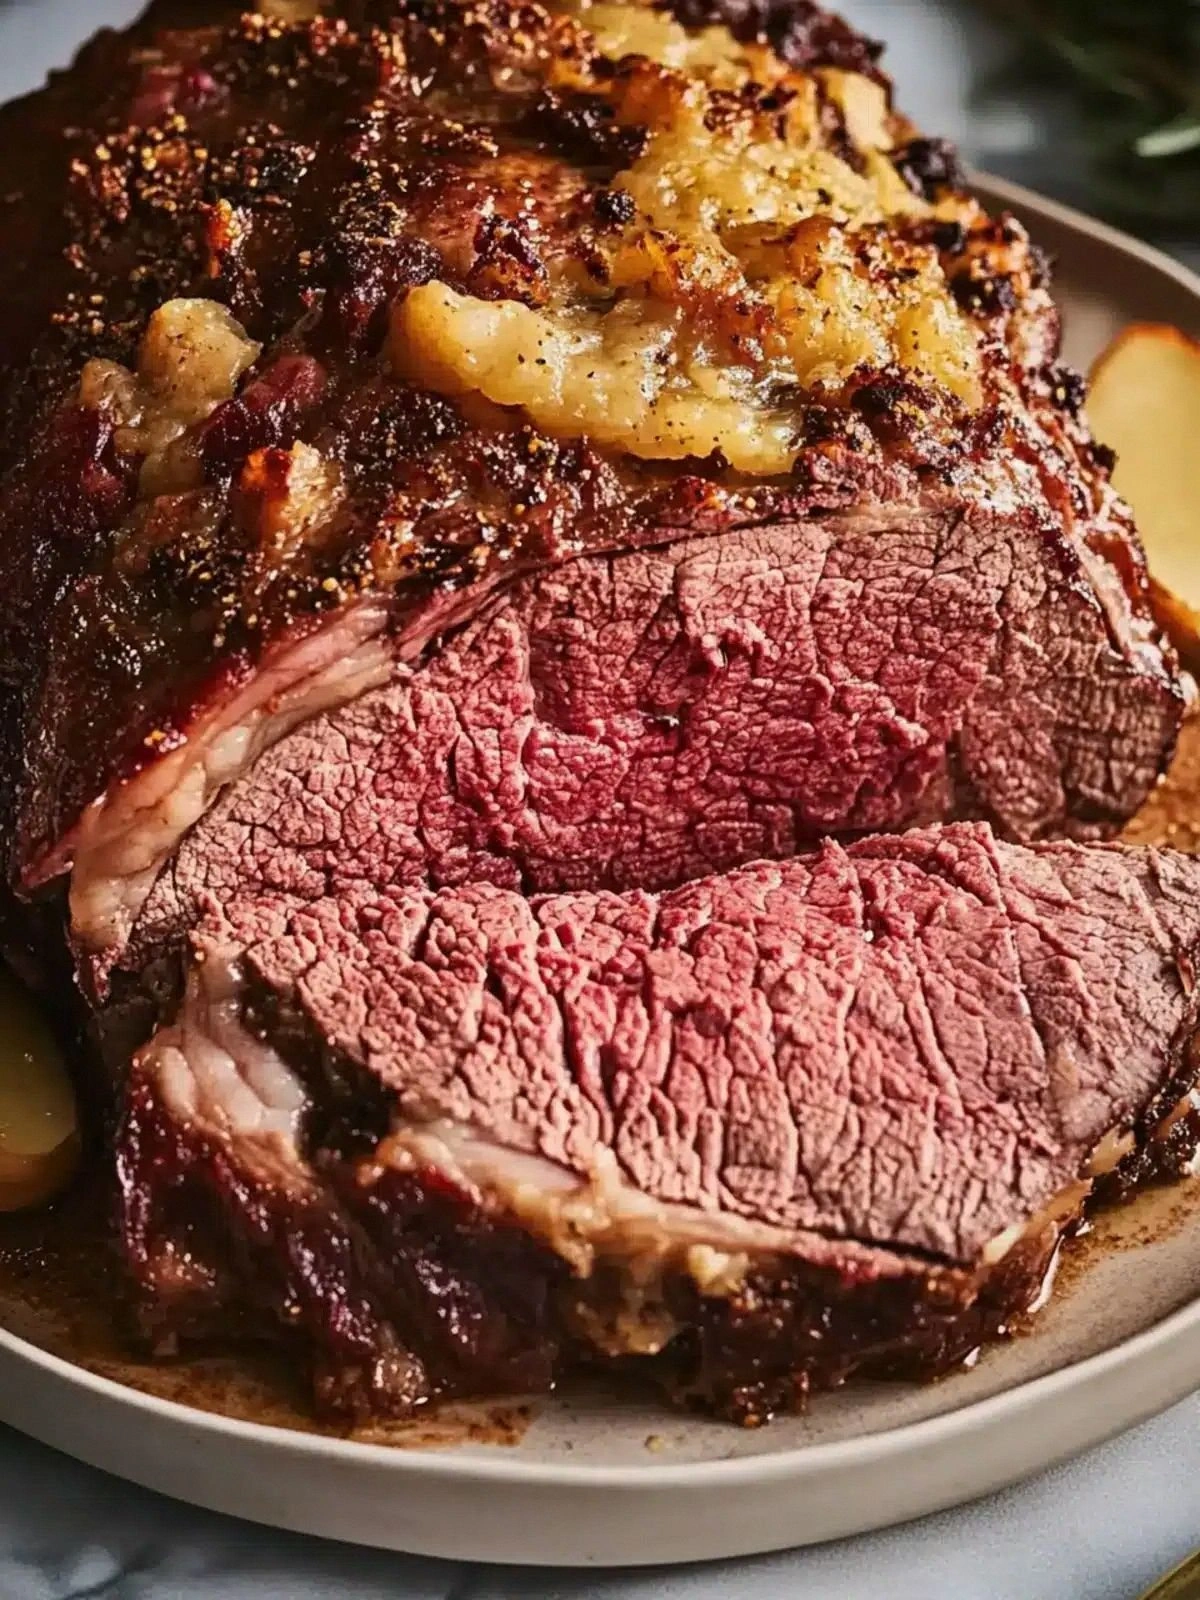
This isn’t just another recipe; it’s a narrative of taste, timing, and triumph. The moment the roast sizzles, you’ll hear a faint whisper of “yes” from the meat itself. The herbs will mingle, the spices will dance, and the olive oil will bind everything together like a golden silk. Every bite will be a revelation: a tender interior, a caramelized crust, a hint of smoky paprika, and a subtle kick from cayenne. Picture yourself pulling this out of the oven, the whole kitchen smelling incredible, and knowing that you’ve just cooked something that could only be described as culinary gold.
What Makes This Version Stand Out
- Flavor: The blend of rosemary, thyme, and smoked paprika creates a complex, layered profile that goes beyond the standard salt‑and‑pepper. The mustard and cayenne add a bright, tangy punch that cuts through the richness.
- Texture: The standing technique keeps the meat at a consistent temperature, resulting in an even, juicy interior with a crackling, caramelized crust.
- Simplicity: No fancy equipment or obscure ingredients—just a handful of pantry staples and a few fresh herbs.
- Uniqueness: The addition of a mustard‑cayenne glaze turns the roast into a showstopper that feels like a gourmet restaurant dish.
- Crowd Reaction: Guests will gasp at the aroma, marvel at the crust, and applaud the melt‑in‑your‑mouth tenderness.
- Ingredient Quality: Using fresh, high‑quality herbs and a good olive oil elevates the dish from ordinary to extraordinary.
- Cooking Method: Standing the roast allows the juices to redistribute, giving you that coveted “perfectly cooked” center.
- Make‑Ahead Potential: The roast can be prepared a day ahead; just let it rest at room temperature before roasting.
Alright, let’s break down exactly what goes into this masterpiece.
Inside the Ingredient List
The Flavor Base
Fresh rosemary and thyme are the heart of this roast. Rosemary’s piney, resinous notes give depth, while thyme’s subtle citrus undertone brightens the dish. If you skip them, the roast will feel flat and lack character. A good rule of thumb: choose herbs that still have a vibrant green color, indicating freshness and potency.
The Texture Crew
Olive oil and Dijon mustard work together to form a glossy, clingy coating that locks in moisture. Olive oil’s fruity flavor complements the herbs, and mustard’s acidity helps the rub adhere. Skipping either will result in a drier roast and a less cohesive crust. If you’re in a pinch, a neutral oil like grapeseed can substitute, but the flavor profile will shift slightly.
The Unexpected Star
Cayenne pepper might seem like a minor detail, but it introduces a subtle heat that wakes up the palate. The smoked paprika adds a deep, earthy sweetness that balances the spiciness. If you’re heat‑averse, reduce cayenne to 1/4 teaspoon or omit it entirely. The roast will still be delicious, but it will lack that memorable kick.
The Final Flourish
Garlic cloves are the unsung hero that permeates the meat with their mellow, savory aroma. Crush them slightly before adding to the rub so the flavors infuse deeper. If you’re allergic or simply dislike garlic, you can replace it with an equal amount of minced shallots for a milder profile.
Everything's prepped? Good. Let's get into the real action.
The Method — Step by Step
- Preheat your oven to 450°F (232°C). Pat the rib roast dry with paper towels to ensure a crisp crust. This high heat is crucial for that initial Maillard reaction. The first few minutes should emit a sizzling sound that signals the start of greatness.
- In a small bowl, combine the rosemary, thyme, crushed garlic, olive oil, kosher salt, Dijon mustard, cayenne pepper, and smoked paprika. Mix until you get a thick, fragrant paste. This rub will coat the meat like velvet, sealing in flavor.
- Generously spread the rub over every surface of the roast, pressing it into the crevices. Let the meat sit at room temperature for 30 minutes; this allows the rub to penetrate and the roast to cook more evenly.
- Place the roast on a wire rack in a roasting pan, bone side down. The rack ensures that the heat circulates evenly, preventing a soggy bottom. This is the moment of truth—watch the edges start pulling away.
- Slide the pan into the preheated oven and roast for 15 minutes at 450°F to develop a golden crust. After 15 minutes, reduce the temperature to 325°F (163°C) and continue roasting. The lower temperature allows the meat to cook gently without drying out.
- Check the internal temperature after 1 hour: it should read 125°F (52°C) for medium‑rare. If you prefer medium, wait until it reaches 135°F (57°C). Remember, the roast will continue to rise in temperature during resting.
- Remove the roast from the oven and tent it loosely with foil. Let it rest for 20 minutes; this is when the juices redistribute. The crust will firm up slightly, giving that perfect snap when you carve.
- Carve the roast into slices, starting from the bone side and working your way outward. Serve immediately with your favorite sides—mashed potatoes, roasted veggies, or a crisp salad. The aroma alone will have guests lining up for a taste.
That's it — you did it. But hold on, I've got a few more tricks that'll take this to another level. Keep reading for insider tips that will make your roast truly unforgettable.
Insider Tricks for Flawless Results
The Temperature Rule Nobody Follows
Many cooks start roasting at a low temperature, but starting high and then reducing is the secret to a caramelized crust. The initial 450°F blast creates a Maillard reaction that locks in flavor, while the subsequent 325°F ensures the interior cooks evenly. I’ve tested this with a 7‑pound roast, and the difference is night and day. If you’re a seasoned pro, you’ll notice the crust is thicker and more aromatic.
Why Your Nose Knows Best
The aroma of the roast is a living indicator of progress. When the meat hits the pan, you’ll hear a satisfying sizzle that signals the Maillard reaction. As the roast cooks, the scent will shift from herbal to caramelized. Trust your nose; if it smells like a toasted forest, you’re in the right place.
The 5-Minute Rest That Changes Everything
Most people rest for 20 minutes, but a 5‑minute rest after removing from the oven allows the juices to redistribute slightly while still keeping the crust crisp. This short rest is ideal for serving immediately or for those who want to plate quickly. If you’re in a hurry, a quick 5‑minute rest will do the trick.
The Right Pan Matters
Using a heavy‑bottomed roasting pan or a cast‑iron skillet ensures even heat distribution. A shallow pan can cause the bottom to overcook, while a deep pan might trap steam and prevent crisping. I recommend a 12‑inch cast‑iron skillet for this size roast.
The Secret of the Herb Bundle
Tie the rosemary and thyme together with kitchen twine before rubbing the roast. This keeps the herbs in place and ensures a uniform coating. It also creates a little herb “bundle” that can be removed before serving, preventing any accidental bite of twine.
Creative Twists and Variations
This recipe is a playground. Here are some of my favorite ways to switch things up:
Spicy Cajun Version
Replace the smoked paprika with Cajun seasoning and double the cayenne. Add a splash of hot sauce to the rub. This version is perfect for heat lovers and adds a bold, Southern flair.
Herb‑Infused Red Wine Glaze
Finish the roast with a glaze made from red wine, rosemary, and a touch of honey. The sweet‑savory glaze pairs beautifully with the savory roast and adds a glossy sheen.
Asian‑Inspired Twist
Swap Dijon mustard for hoisin sauce and add a pinch of five‑spice powder. Finish with a drizzle of sesame oil. This brings a sweet, umami kick that pairs wonderfully with jasmine rice.
Smoked Bacon‑Wrapped Roast
Wrap the roast in slices of smoked bacon before roasting. The bacon will render its fat into the meat, adding a smoky, salty depth. Remove the bacon before serving for a crisp finish.
Vegetarian Mock‑Roast
Use a large portobello mushroom or a slab of seared tofu as a stand‑in. Coat with the same rub and roast until golden. This gives a meaty texture with a plant‑based twist.
Storing and Bringing It Back to Life
Fridge Storage
Wrap the leftover roast tightly in foil or plastic wrap and store in the refrigerator for up to 3 days. When ready to reheat, place it in a preheated oven at 325°F (163°C) for 20 minutes, or until warmed through. The crust may soften slightly, but the interior will remain juicy.
Freezer Friendly
For longer storage, wrap the roast in foil and then place it in a freezer bag. Freeze for up to 3 months. Thaw in the refrigerator overnight before reheating as described above. A tiny splash of water before reheating will keep the meat from drying out.
Best Reheating Method
The most reliable method is to reheat in a low‑heat oven (300°F or 149°C) for 15–20 minutes. Add a tablespoon of beef broth or water to the pan to create steam. This steams the roast back to perfection, keeping the juices from evaporating.