
Shirred Eggs

I still remember my first encounter with shirred eggs - it was a lazy Sunday morning, and my aunt had just pulled out a tray of golden, puffed eggs from the oven. The aroma wafting from the dish was incredible, and the taste was even better. Since then, I've been hooked on shirred eggs, and I love serving them to my family and friends.
Shirred eggs are essentially baked eggs, but the term 'shirred' refers to the way the eggs are cooked in a dish, usually in a water bath, which helps to cook them gently and evenly. This method is perfect for achieving creamy, tender eggs that are just set.
One of the things I love about shirred eggs is how versatile they are. You can add all sorts of ingredients to the eggs, from diced ham and cheese to chopped herbs and spices. And the best part is, they're incredibly easy to make - just whisk together some eggs, milk, and seasonings, pour the mixture into a dish, and bake until they're set.
In this recipe, I'll show you how to make classic shirred eggs, with a few optional variations to get you started. Whether you're a fan of simple, unadorned eggs or like to get creative with your ingredients, this recipe is a great place to start.
So why not give shirred eggs a try this weekend? They're the perfect breakfast or brunch dish, and they're sure to become a new favorite in your household.
Why You’ll Love This Recipe
- Shirred eggs are incredibly easy to make, requiring just a few simple ingredients and some basic cooking skills.
- They're perfect for slow mornings and quick weekday breakfasts, as they can be made ahead of time and reheated as needed.
- Shirred eggs are a great way to use up leftover ingredients, such as diced ham or chopped herbs, which can be added to the eggs for extra flavor.
- They're a versatile dish that can be served with a variety of sides, from toast and hash browns to salads and fresh fruit.
- Shirred eggs are a healthy breakfast option, as they're high in protein and can be made with low-fat milk and other nutritious ingredients.
- They're a great dish to make for a crowd, as they can be easily scaled up to feed a large group of people.
Why This Recipe Works
The key to making great shirred eggs is to cook them gently, so they're just set and still creamy. To achieve this, it's essential to use a water bath, which helps to distribute the heat evenly and prevent the eggs from cooking too quickly.
Another important factor is the ratio of eggs to milk. Using too much milk can result in eggs that are too wet and soggy, while using too little milk can make them dry and overcooked. In this recipe, I've found that a ratio of 1 cup of milk to 4 large eggs works perfectly.
Finally, it's crucial to not overbake the eggs. They should be just set and still slightly jiggly in the center. If you overbake them, they'll be dry and rubbery, which is not what you want.
By following these tips and using a few simple ingredients, you can make delicious shirred eggs that are sure to impress your family and friends.
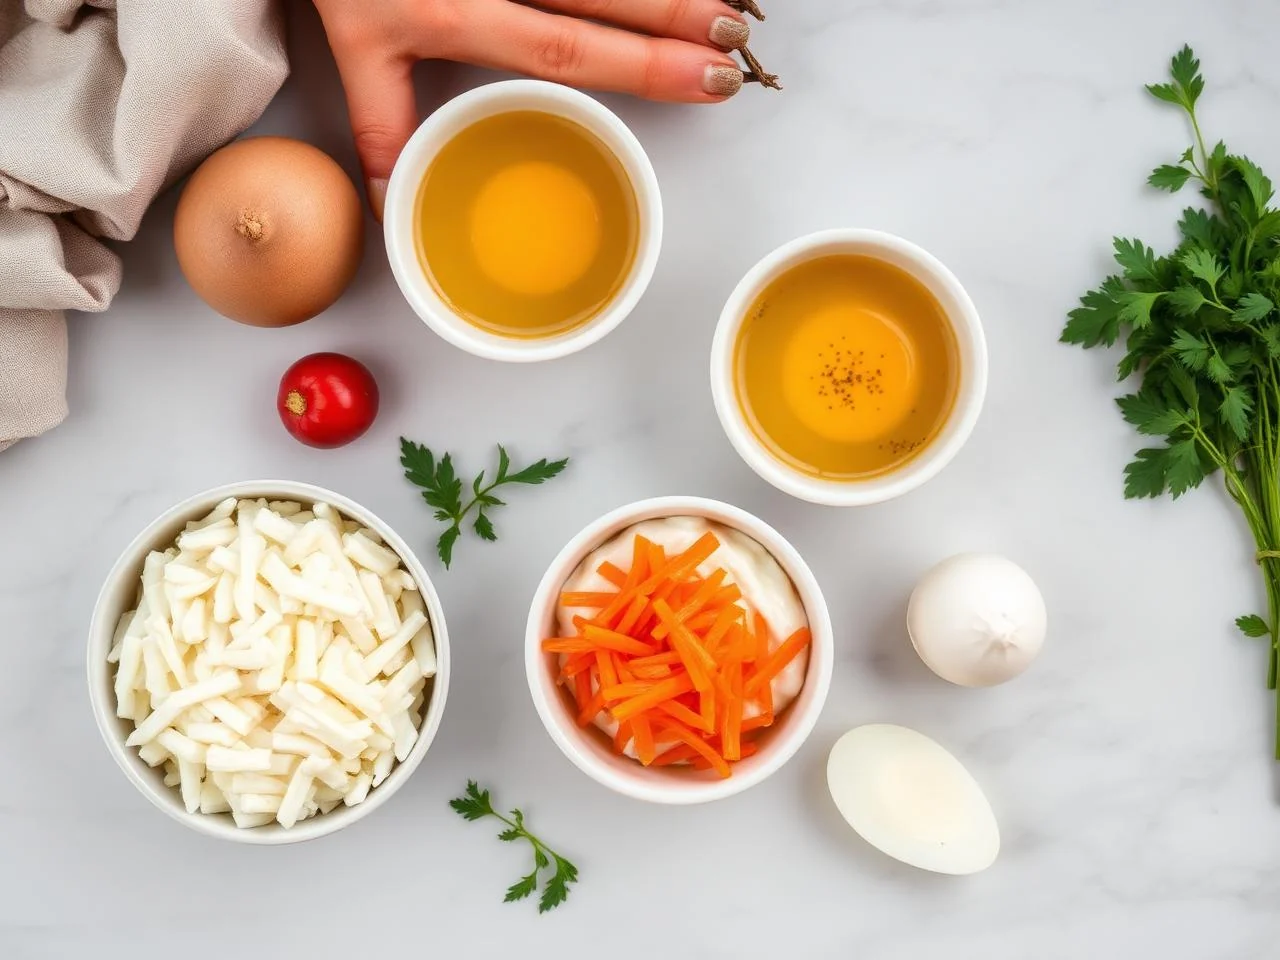
Ingredients You’ll Need
To make shirred eggs, you'll need a few simple ingredients, including eggs, milk, and seasonings. You can also add other ingredients, such as diced ham or chopped herbs, to give the eggs extra flavor.
When shopping for ingredients, look for fresh eggs and high-quality milk. You can also use leftover ingredients, such as diced ham or chopped herbs, to add extra flavor to the eggs.
- 4 large eggsFresh eggs are essential for making great shirred eggs, as they will have a better texture and flavor than older eggs. Look for eggs that are heavy for their size and have a clean, dry shell.
- 1 cup whole milkWhole milk is the best type of milk to use for shirred eggs, as it has a rich, creamy flavor that will add depth and richness to the eggs. You can also use low-fat milk or a non-dairy milk alternative if you prefer.
- 1/2 teaspoon kosher saltKosher salt is a type of salt that is coarser than table salt and has a more delicate flavor. It's a good choice for shirred eggs, as it will add flavor without making the eggs too salty.
- 1/4 teaspoon black pepperBlack pepper is a classic seasoning that pairs well with eggs. Use freshly ground pepper for the best flavor.
- 2 tablespoons unsalted butter, meltedMelted butter is added to the eggs to give them a rich, creamy flavor. You can also use other types of fat, such as cream or oil, if you prefer.
- 1/4 cup diced hamDiced ham is a classic addition to shirred eggs, as it adds a salty, savory flavor. You can use other types of meat, such as bacon or sausage, if you prefer.
- 1/4 cup grated cheddar cheeseGrated cheese is a great addition to shirred eggs, as it adds a rich, creamy flavor. You can use other types of cheese, such as Swiss or Parmesan, if you prefer.
- 1 tablespoon chopped fresh parsleyChopped parsley is a fresh, herbaceous addition to shirred eggs. You can use other types of herbs, such as chives or dill, if you prefer.
- 1 tablespoon chopped fresh chivesChopped chives are a great addition to shirred eggs, as they add a fresh, oniony flavor. You can use other types of herbs, such as parsley or dill, if you prefer.
- Salt and pepper to tasteSeason the eggs with salt and pepper to taste, adding more or less depending on your personal preference.
Equipment You’ll Need
How to Make Shirred Eggs
- 1Preheat your oven to 375 F (190 C).
- 2In a large bowl, whisk together the eggs, milk, salt, and pepper until well combined.
- 3Add the melted butter, diced ham, grated cheese, chopped parsley, and chopped chives to the bowl and stir until they are evenly distributed.
- 4Butter six 1/2-cup ramekins and divide the egg mixture among them.
- 5Place the ramekins in a large baking dish and add hot water to come halfway up the sides of the ramekins.
- 6Bake the eggs for 25-30 minutes, or until they are just set and still slightly jiggly in the center.
- 7Remove the eggs from the water bath and let them cool for a few minutes.
- 8Serve the eggs hot, garnished with additional parsley or chives if desired.
- 9If desired, serve the eggs with toast, hash browns, or other breakfast sides.
- 10To make ahead, prepare the egg mixture and pour it into the ramekins. Cover and refrigerate for up to 24 hours, then bake as directed.
Expert Tips
- Use fresh eggs for the best flavor and texture.
- Don't overbake the eggs - they should be just set and still slightly jiggly in the center.
- Add other ingredients, such as diced vegetables or cooked meats, to the egg mixture for extra flavor.
- Use a water bath to cook the eggs, as this will help them cook evenly and prevent them from becoming too hot or too cold.
- Don't overcrowd the ramekins - leave about 1/2 inch of space between each egg.
- Let the eggs cool for a few minutes before serving, as this will help them set and make them easier to handle.
- Experiment with different seasonings and ingredients to find your favorite flavor combination.
- Consider making a large batch of shirred eggs and freezing them for later use.
Common Mistakes to Avoid
- Overbaking the eggs, which can make them dry and rubbery.
- Not using a water bath, which can cause the eggs to cook unevenly.
- Overcrowding the ramekins, which can cause the eggs to cook too quickly.
- Not letting the eggs cool before serving, which can make them difficult to handle.
- Not using fresh eggs, which can affect the flavor and texture of the eggs.
- Not seasoning the eggs enough, which can make them taste bland.
Variations and Substitutions
- Add diced vegetables, such as bell peppers or mushrooms, to the egg mixture for extra flavor.
- Use different types of cheese, such as feta or goat cheese, for a unique flavor.
- Add cooked meats, such as bacon or sausage, to the egg mixture for added protein.
- Use different types of milk, such as almond or soy milk, for a non-dairy version.
- Add fresh herbs, such as parsley or chives, to the egg mixture for extra flavor.
- Use different types of spices, such as paprika or cumin, to add a smoky or earthy flavor.
- Make individual shirred eggs in muffin tins for a fun and easy breakfast or snack.
What to Serve With Shirred Eggs
Shirred eggs are a versatile dish that can be served with a variety of sides, from toast and hash browns to salads and fresh fruit. Consider serving them with a side of roasted vegetables or a green salad for a healthy and well-rounded meal.
They're also a great dish to serve at brunch, as they can be made ahead of time and reheated as needed. Simply prepare the egg mixture, pour it into the ramekins, and bake until they're just set.
Make-Ahead, Storage, Freezing and Reheating
Shirred eggs can be stored in the refrigerator for up to 3 days or frozen for up to 2 months. To store, let the eggs cool completely, then cover and refrigerate or freeze.
To reheat, simply bake the eggs in a preheated oven at 350 F (180 C) for 10-15 minutes, or until they're warmed through.
Consider making a large batch of shirred eggs and freezing them for later use. Simply thaw the desired number of eggs overnight in the refrigerator, then reheat as directed.
Shirred eggs can also be made ahead of time and refrigerated or frozen, making them a great option for meal prep or brunch gatherings.
Frequently Asked Questions
What is the best type of milk to use for shirred eggs?
Whole milk is the best type of milk to use for shirred eggs, as it has a rich, creamy flavor that will add depth and richness to the eggs. You can also use low-fat milk or a non-dairy milk alternative if you prefer.
How do I know when the eggs are done?
The eggs are done when they are just set and still slightly jiggly in the center. You can check for doneness by gently jiggling the ramekin - if the eggs are still very liquid, they need more time. If they're set and firm, they're overcooked.
Can I make shirred eggs in a large baking dish?
Yes, you can make shirred eggs in a large baking dish. Simply pour the egg mixture into the dish and bake until the eggs are just set and still slightly jiggly in the center.
How do I prevent the eggs from becoming too hot or too cold?
To prevent the eggs from becoming too hot or too cold, use a water bath to cook them. This will help to distribute the heat evenly and prevent the eggs from cooking too quickly.
Can I add other ingredients to the egg mixture?
Yes, you can add other ingredients to the egg mixture, such as diced vegetables or cooked meats, to give the eggs extra flavor. Just be sure to adjust the cooking time and temperature as needed to ensure that the eggs are cooked through.
How do I store shirred eggs?
Shirred eggs can be stored in the refrigerator for up to 3 days or frozen for up to 2 months. To store, let the eggs cool completely, then cover and refrigerate or freeze.
How do I reheat shirred eggs?
To reheat shirred eggs, simply bake them in a preheated oven at 350 F (180 C) for 10-15 minutes, or until they're warmed through.
Can I make shirred eggs ahead of time?
Yes, you can make shirred eggs ahead of time. Simply prepare the egg mixture, pour it into the ramekins, and refrigerate or freeze until you're ready to bake them.

Ingredients
- 4 large eggs
- 1 cup whole milk
- 1/2 teaspoon kosher salt
- 1/4 teaspoon black pepper
- 2 tablespoons unsalted butter, melted
- 1/4 cup diced ham
- 1/4 cup grated cheddar cheese
- 1 tablespoon chopped fresh parsley
- 1 tablespoon chopped fresh chives
- Salt and pepper to taste
Instructions
- Preheat your oven to 375 F (190 C).
- In a large bowl, whisk together the eggs, milk, salt, and pepper until well combined.
- Add the melted butter, diced ham, grated cheese, chopped parsley, and chopped chives to the bowl and stir until they are evenly distributed.
- Butter six 1/2-cup ramekins and divide the egg mixture among them.
- Place the ramekins in a large baking dish and add hot water to come halfway up the sides of the ramekins.
- Bake the eggs for 25-30 minutes, or until they are just set and still slightly jiggly in the center.
- Remove the eggs from the water bath and let them cool for a few minutes.
- Serve the eggs hot, garnished with additional parsley or chives if desired.
- If desired, serve the eggs with toast, hash browns, or other breakfast sides.
- To make ahead, prepare the egg mixture and pour it into the ramekins. Cover and refrigerate for up to 24 hours, then bake as directed.